A Beginners Guide To DaVinci Resolve 21: Edit Like a Pro for Free!
Sep 24, 2026
So, you've chosen DaVinci Resolve. Good choice.
DaVinci Resolve can look pretty intimidating when you first open it. It's an incredibly advanced video editor with thousands of features, but the good news is that you don't need to understand all of them to start making great videos.
In fact, if you're working on a relatively simple video, you can keep your workflow surprisingly straightforward. In this guide, I'll walk you through everything you need to know to get your first project up and running, from setting up your project and importing footage through to editing, audio, titles, colour correction, and exporting your finished video.
1. Starting a Project in DaVinci Resolve
The first thing you'll need to do is download the very latest version of DaVinci Resolve from the Blackmagic website. While there is a paid Studio version, you can get 90% of the functionality from the free version.
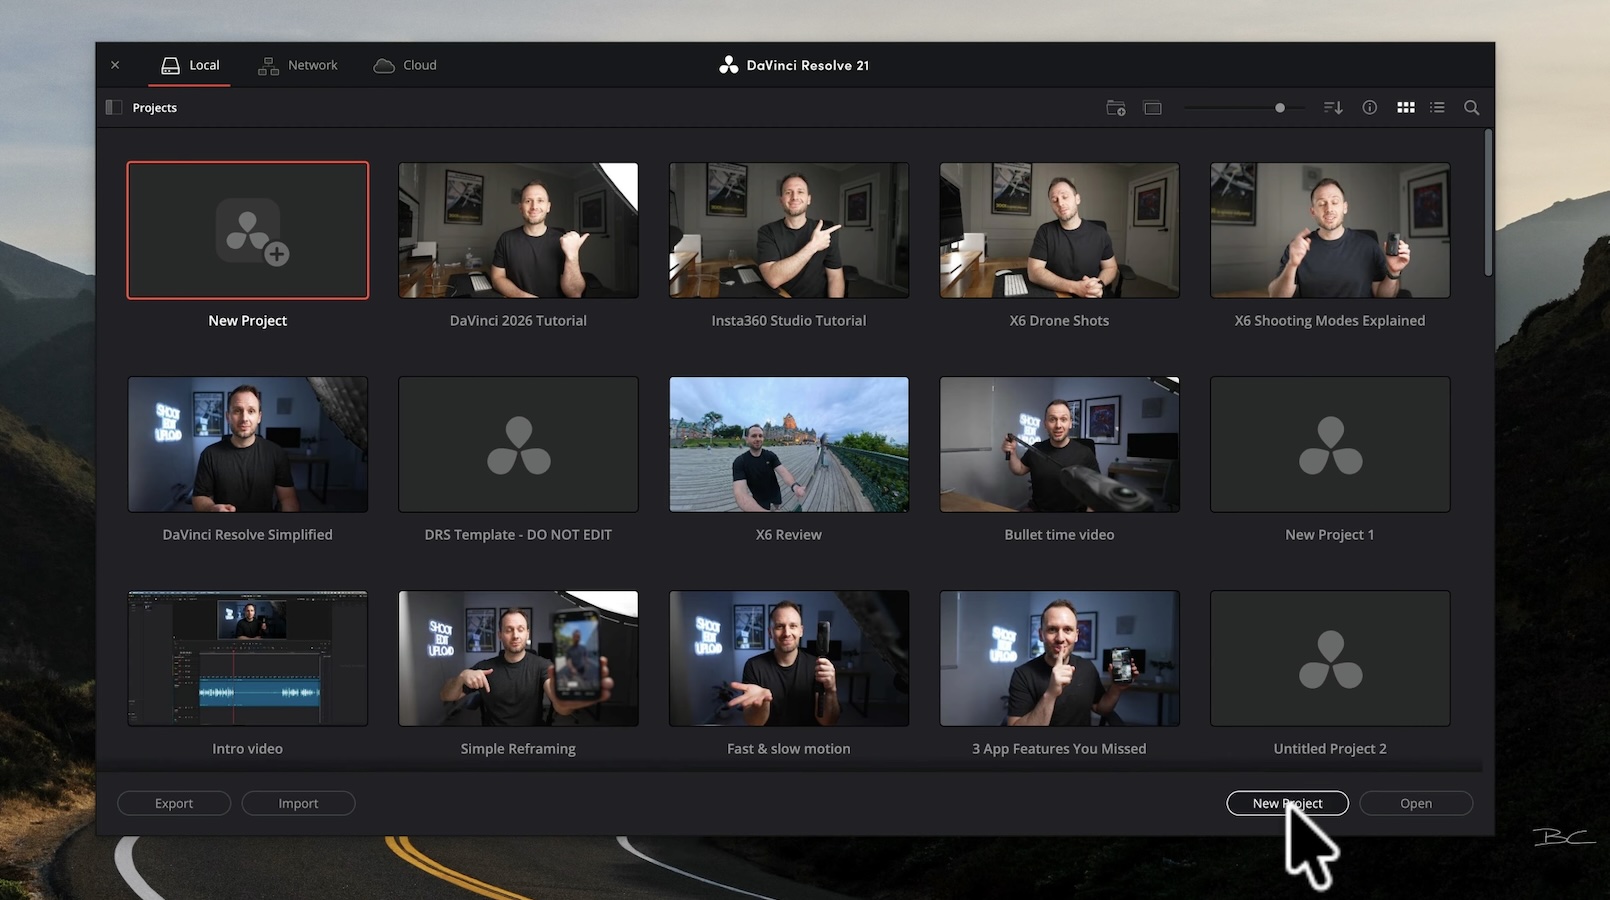
Once you've downloaded and installed it, you'll be presented with a window where you can create a new project. Give your project a name and click Create, and the main software will open up.
At first glance, DaVinci Resolve can seem like a lot to take in. Along the bottom of the interface, you'll see a series of different tabs, each designed for a different part of the editing process:
- Media for importing your files
- Photo for editing photos
- Cut for basic cuts
- Edit for more advanced editing
- Fusion for visual effects
- Colour for colour grading
- Fairlight for audio editing
- Deliver for exporting
If you're working on a simple video and want to keep your workflow on the shorter side, you can head straight to the Edit page.
One thing that's worth knowing from the beginning is that you don't need to save your project manually. DaVinci Resolve automatically saves your project anytime you make even the smallest change.
Set Your Resolution and Frame Rate
Before you start editing, head down to the settings icon and click it. This is where you can change your project's resolution and frame rate.
I filmed at 4K, which is 3840 by 2160. If you shot at a different resolution, you'll want to select it here, along with whichever frame rate your footage was shot at. Make sure you check your clip settings so you can adjust the frame rate to match them. If you're unsure, I'd recommend 30 frames per second.
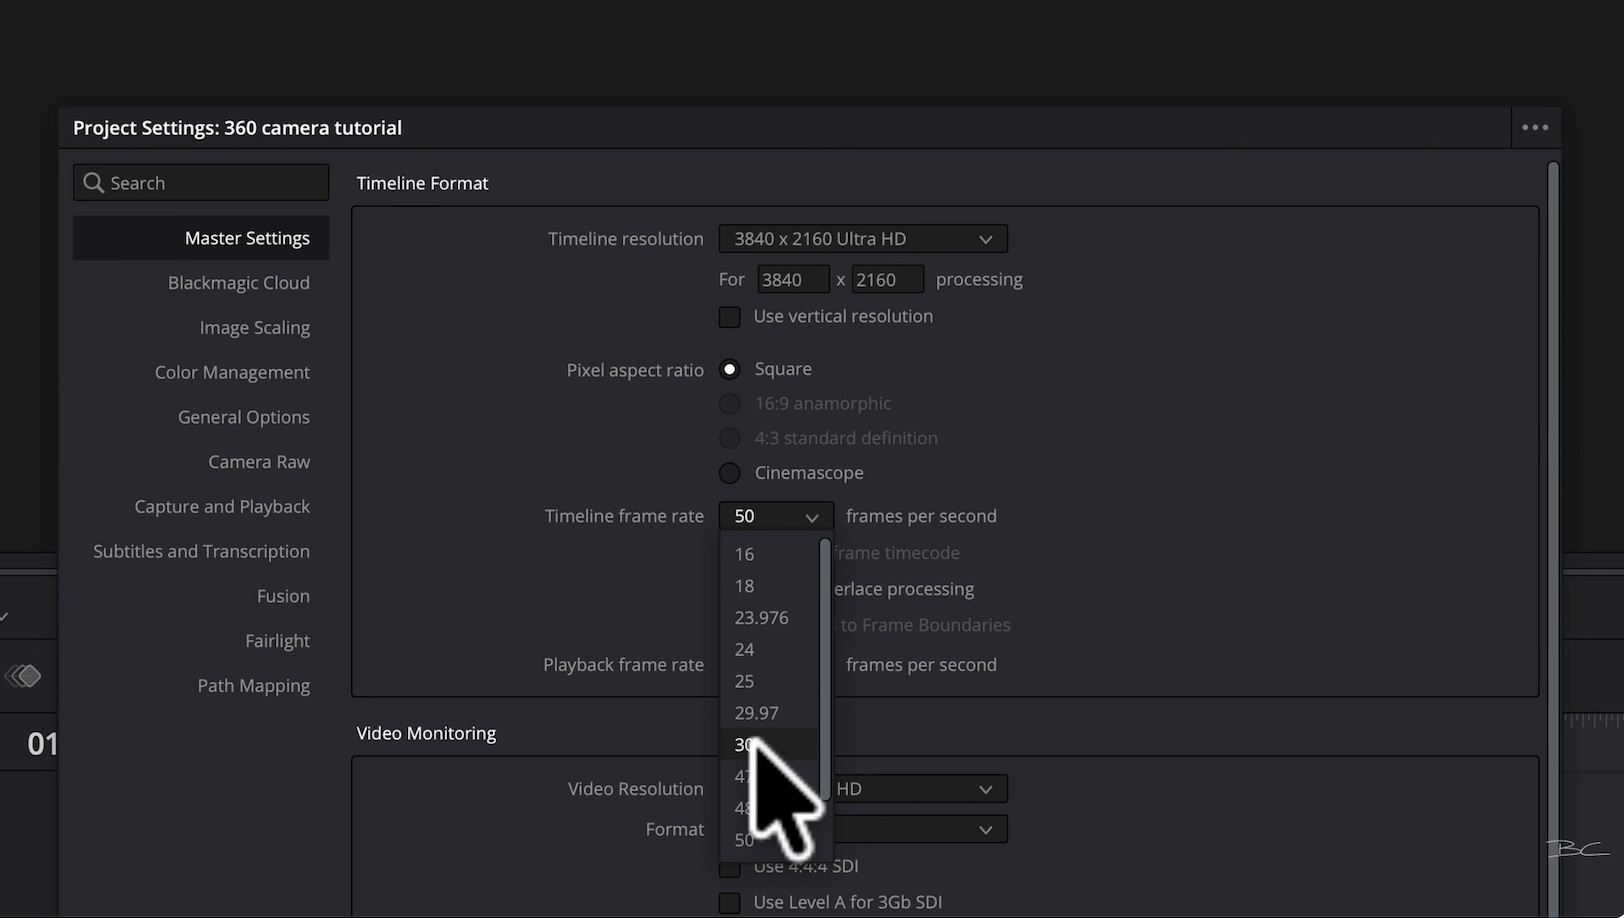
Once you've set those options, click Save.
The software should now be ready for you to start editing.
2. Bringing Your Footage Into Your Project
The next step is importing your video clips.
Head to the Media Pool on the left-hand side. If it isn't showing, just click the Media Pool button. This is where you'll drag and drop your media files directly into the project.
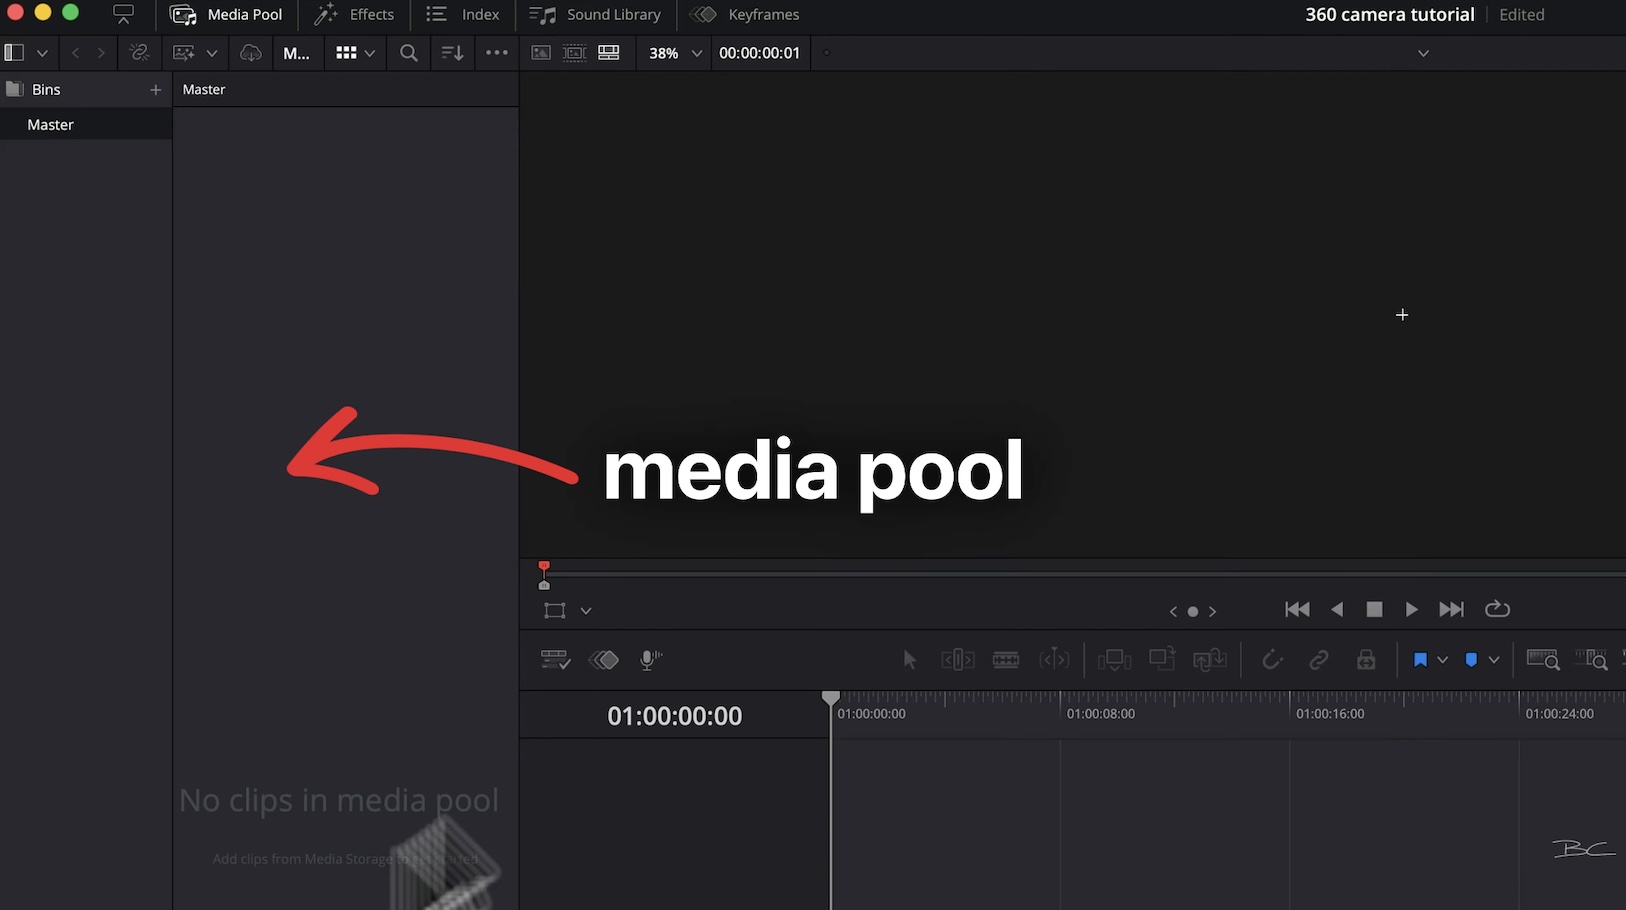
When you import a clip, you may see a box appear telling you that the clip doesn't match the project settings you just set. If that happens, click Change so the frame rates are consistent.
You can continue adding videos, photos, graphics, and music to the Media Pool at any point throughout your edit.
Once you've imported your footage, double-click a clip to have it appear in the viewer. You can scrub through the clip by dragging the red playhead to see what's inside it.
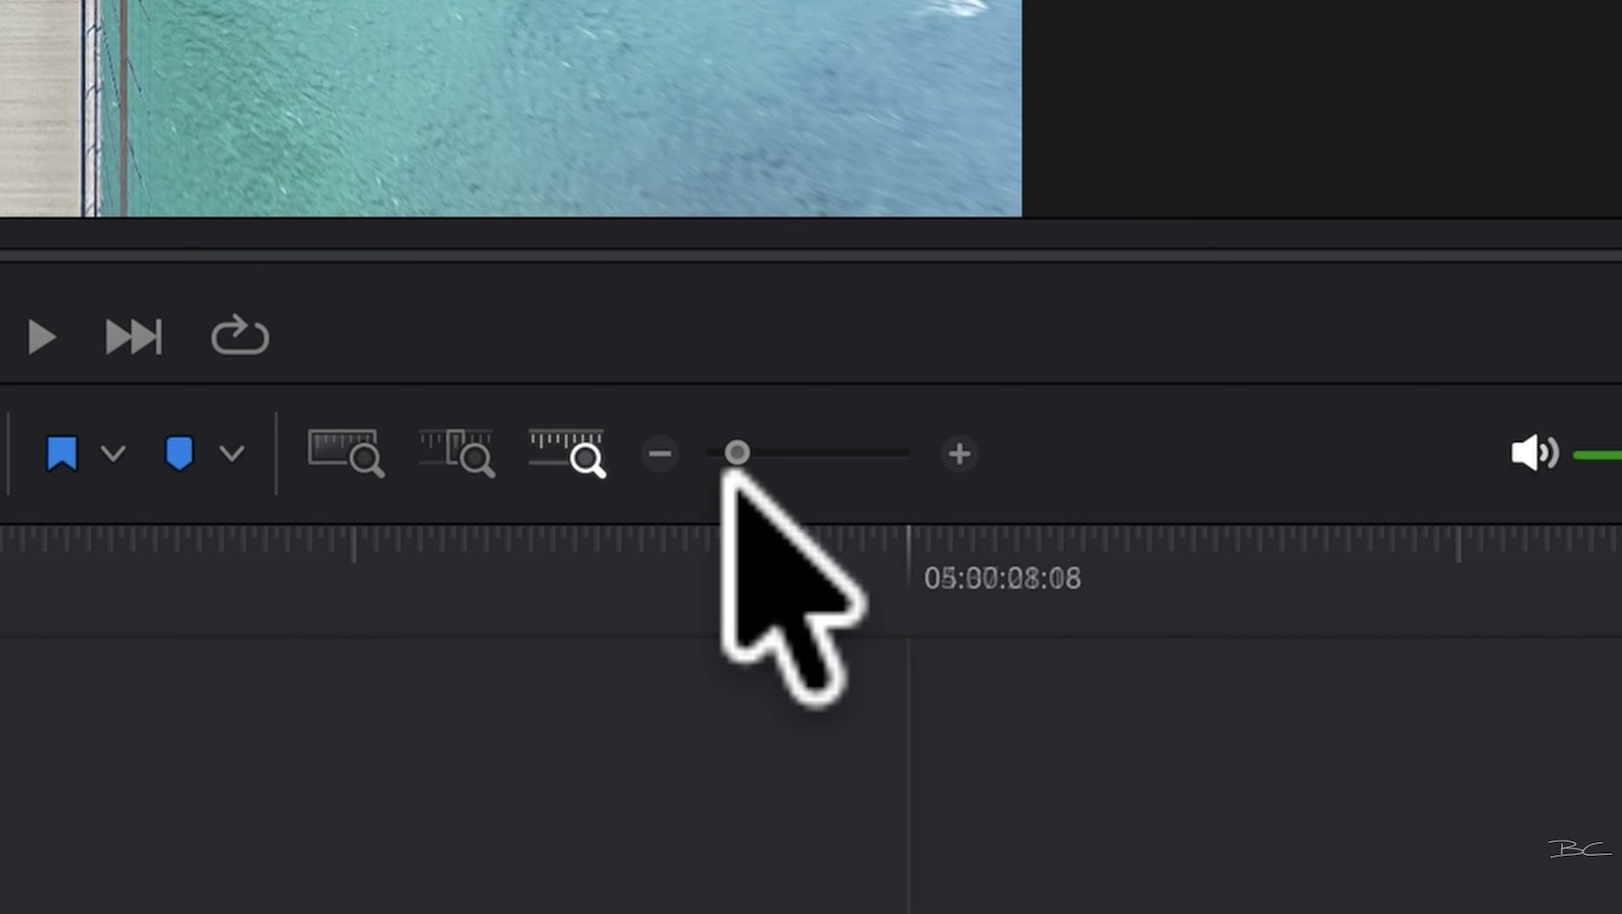
Down the bottom is your project timeline, where you'll actually build your video. You can zoom in and out of the timeline using the plus and minus slider.
3. Understanding the Timeline
Once you're ready to start editing, drag your first clip from the Media Pool down to the timeline.
You can drop it anywhere — it doesn't have to be right at the start. I like to leave a bit of space at the beginning of my project in case I later want to add a clip in front.
The timeline itself is fairly straightforward. The blue track is video, while the green track is audio, which you can see from the waveforms of the clip.
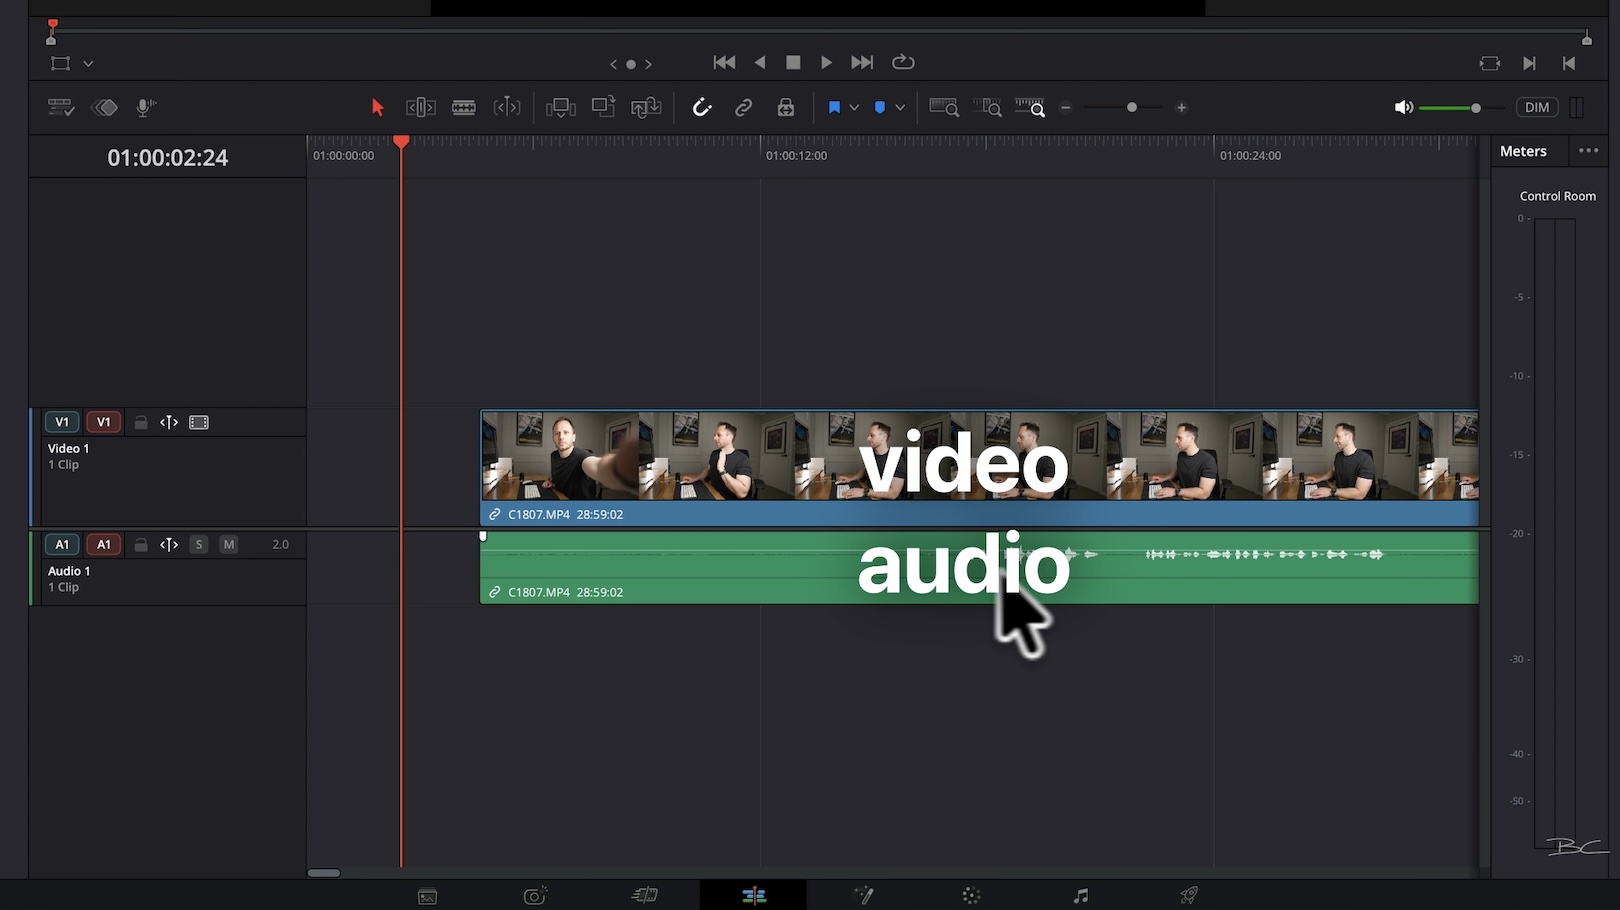
You can play your footage by clicking and dragging the red playhead along the timeline or simply pressing Spacebar to play it in real time.
You can also change the size of your audio and video tracks by clicking and dragging the black bar at the top and bottom. I'd recommend having a big audio track and a small video track, as this makes it easier to identify where you should cut based on the waveforms.
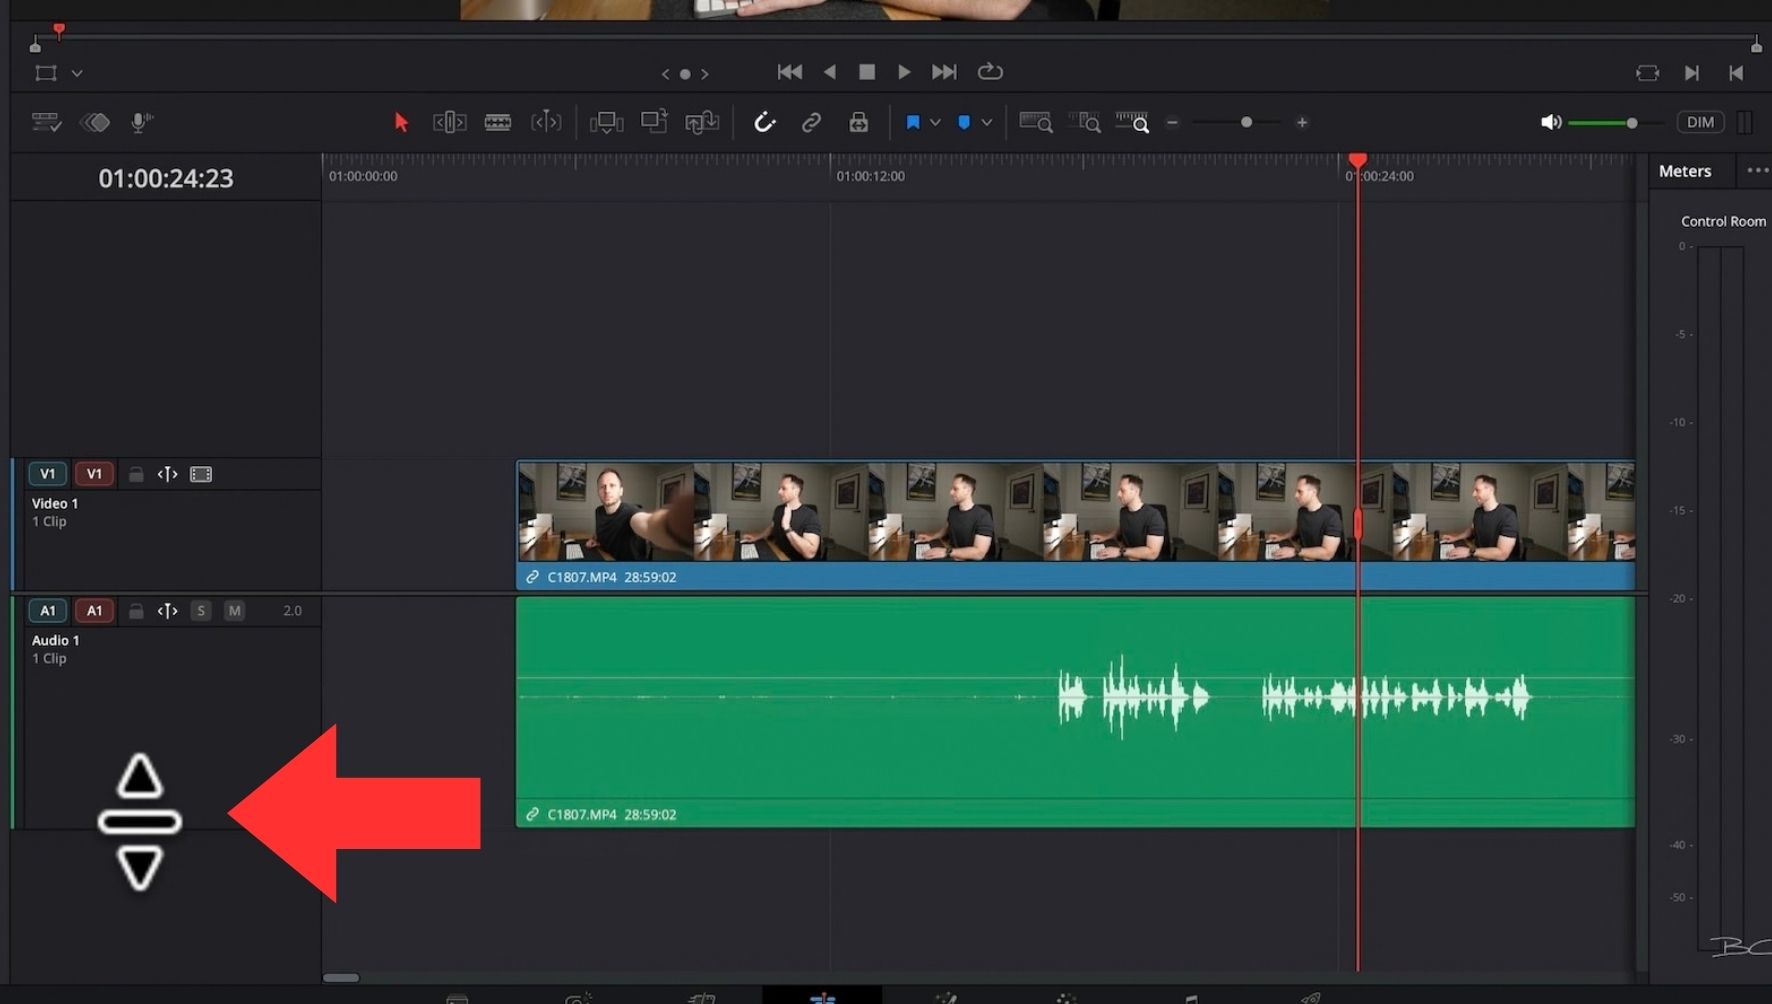
The rest of the workspace is adjustable, too. If you want to increase the size of the viewer, simply click and drag it down. You can do the same with the Media Pool and other menus.
4. Making Simple Cuts
For a dialogue-heavy clip, I'd recommend selecting Linked Selection. This combines the audio and video tracks together as one, meaning any changes you make will automatically be applied to both.
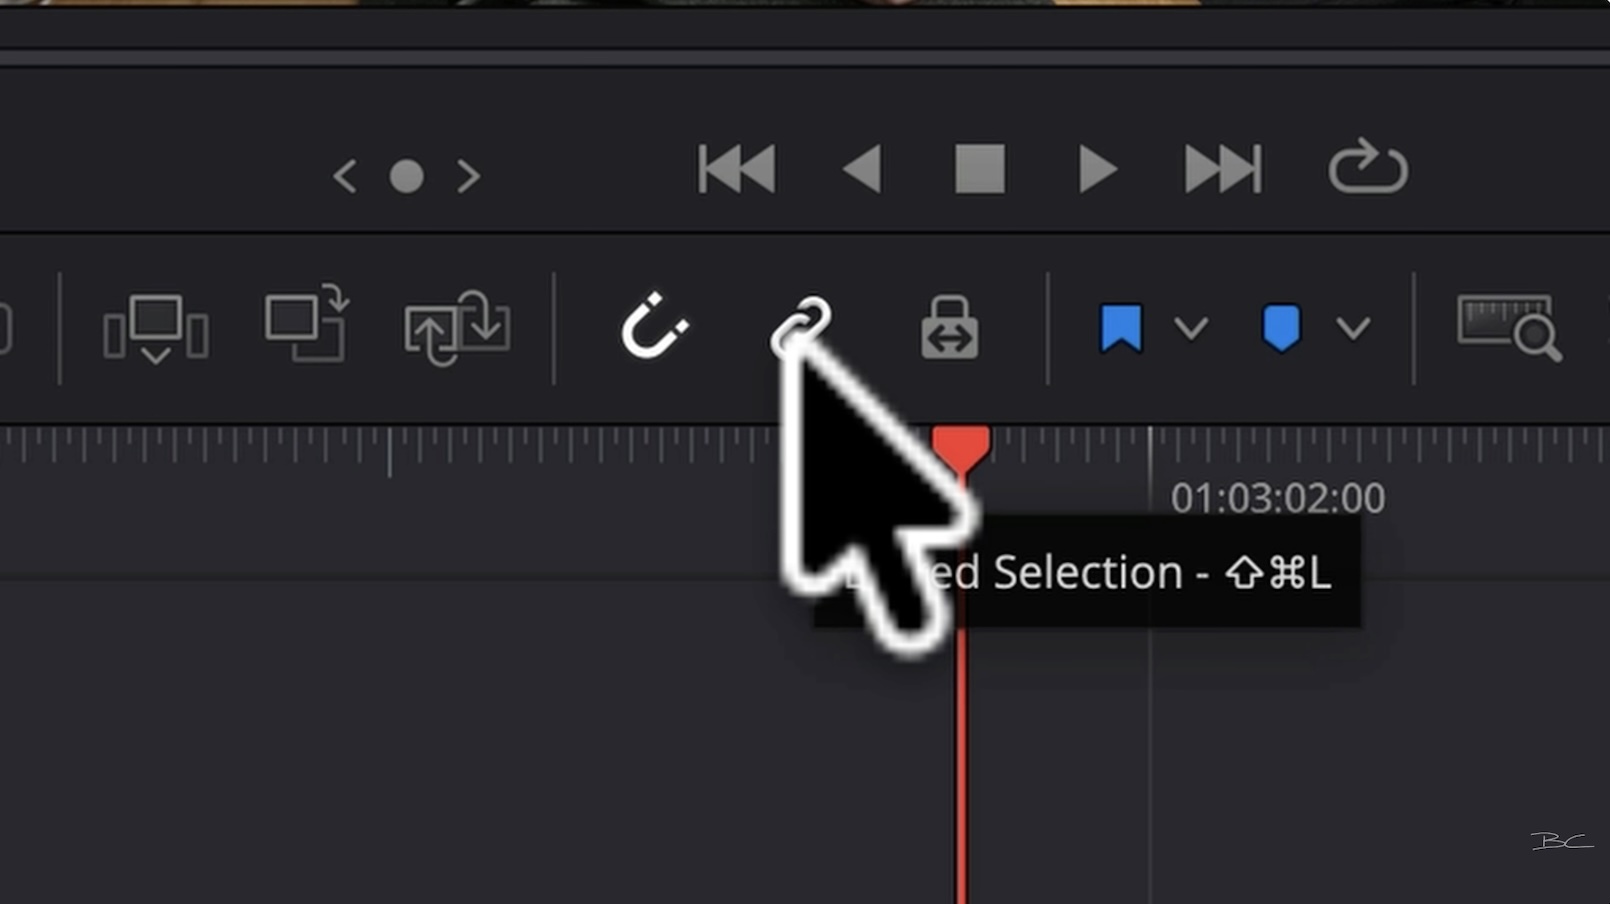
To make a cut, choose the Blade tool or press B on your keyboard, then click at the point in the timeline where you want to make the cut. This will cut the audio and video at the same time.
Press Delete, and both will be deleted.
Without Linked Selection, the Blade tool will only cut one track at a time.
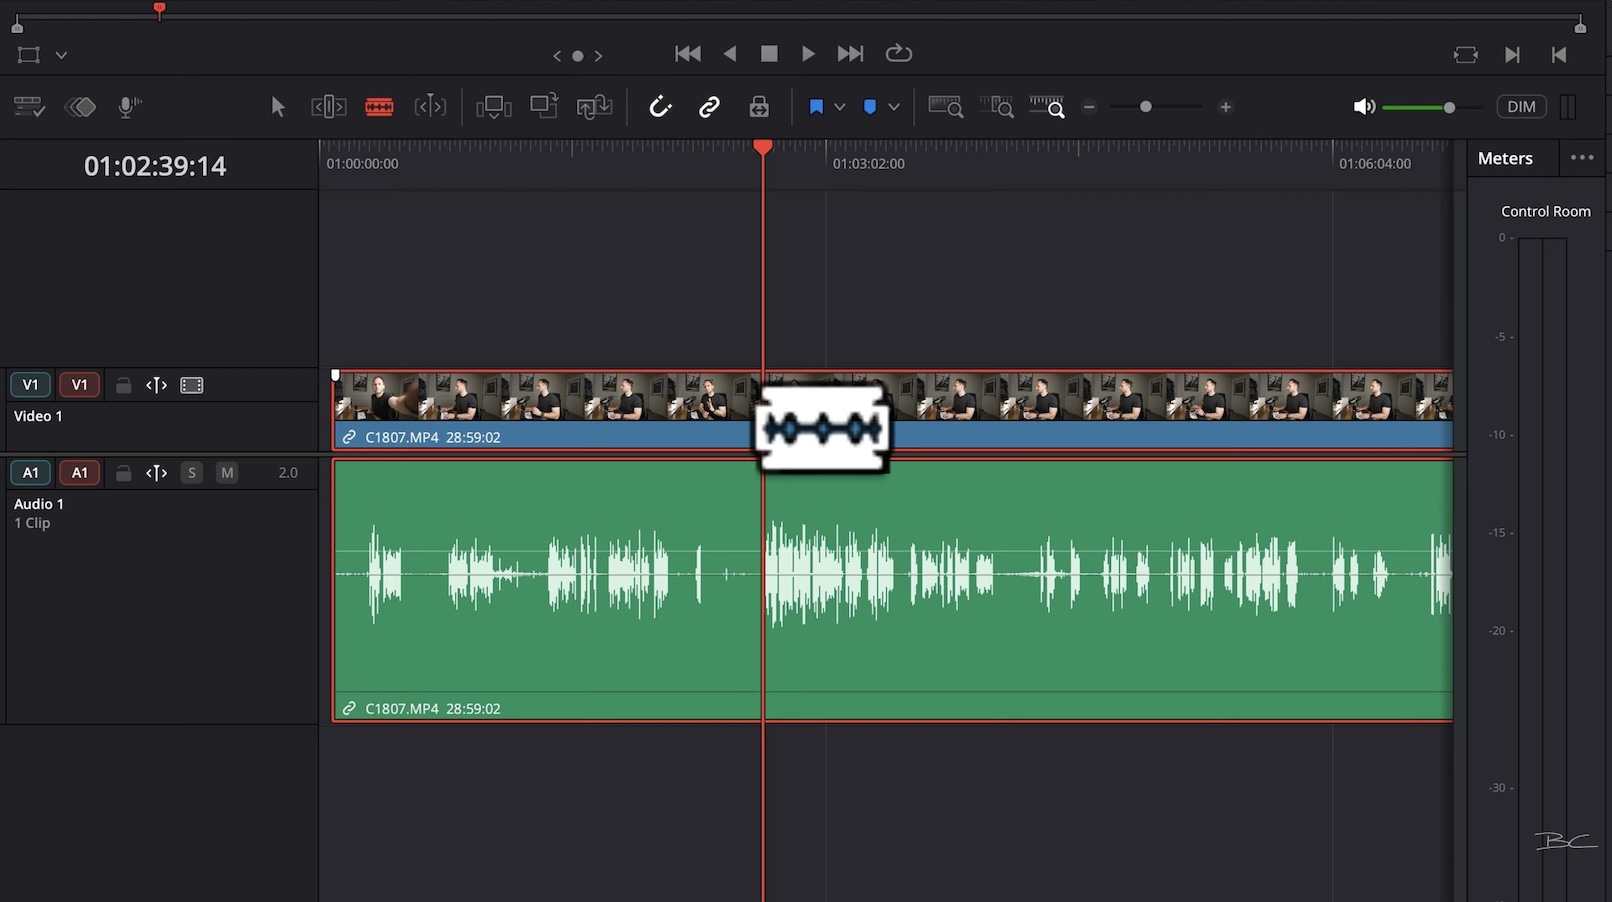
One thing to be careful of is accidentally leaving the Blade tool selected while you're navigating around your timeline. Otherwise, you can quickly end up cutting your footage into a million pieces. Whenever you're not actively cutting, switch back to the Arrow.
And if you make a mistake, Command or Control-Z will undo anything you do in Resolve.
There's also another simple way to trim down your footage. Hover your mouse over the edge of a clip until the relevant icon appears, then click and drag the edge either right or left.
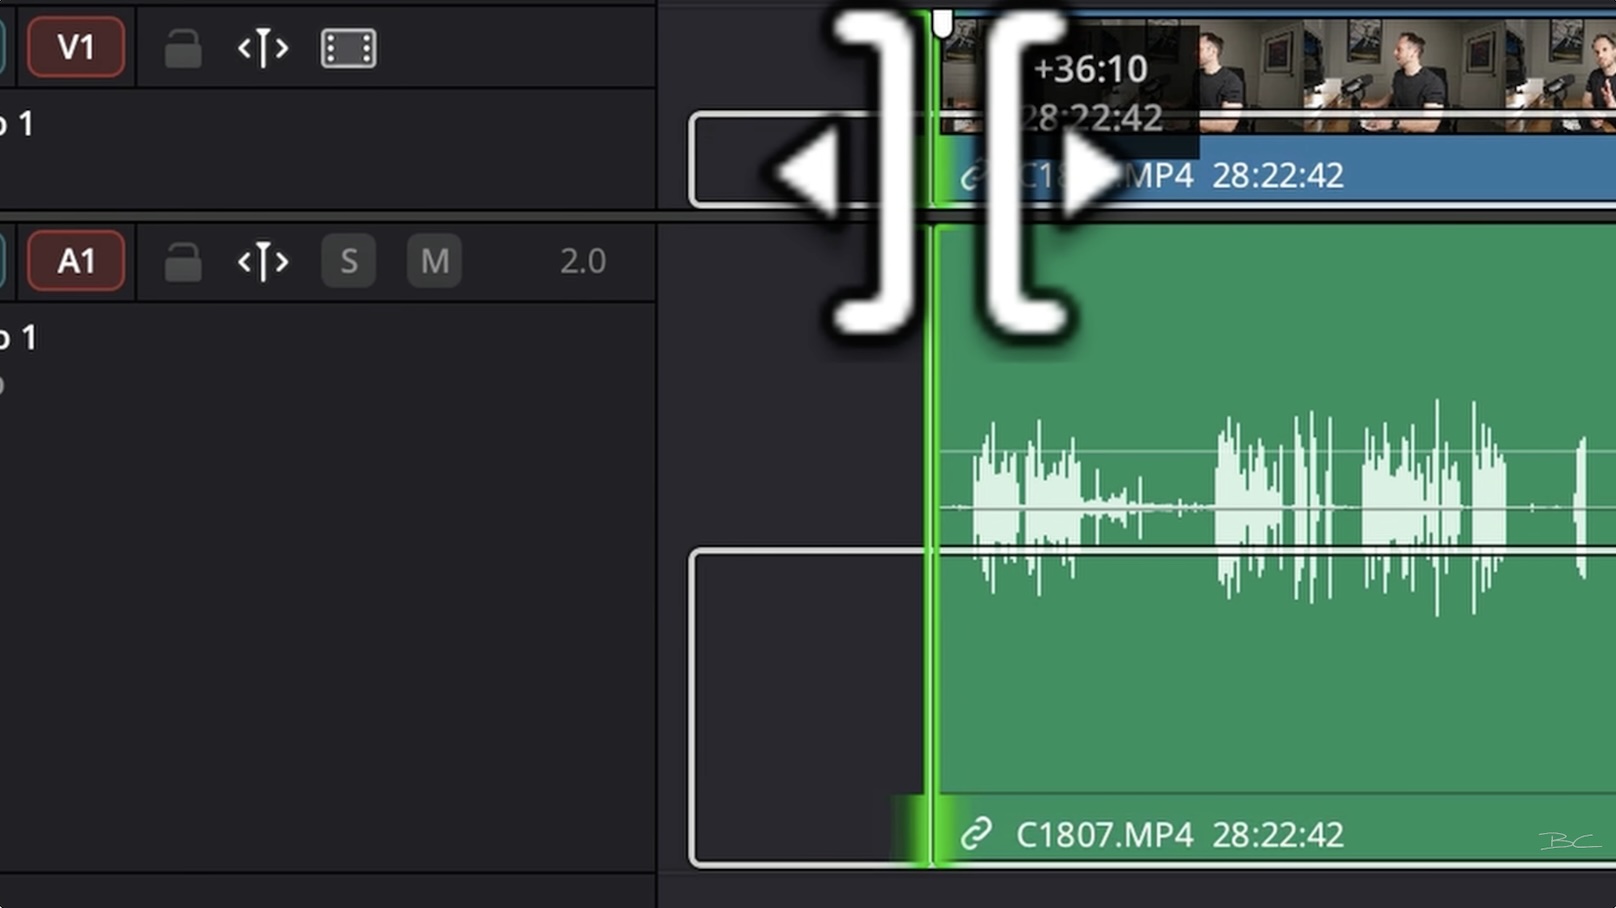
You'll see a white outline, which indicates the overall clip length and therefore how many frames you have to work with.
5. Working with B-Roll
You can move clips around your timeline simply by clicking and dragging them. You can place them anywhere you want, including on top of another track. This is commonly known as B-roll.
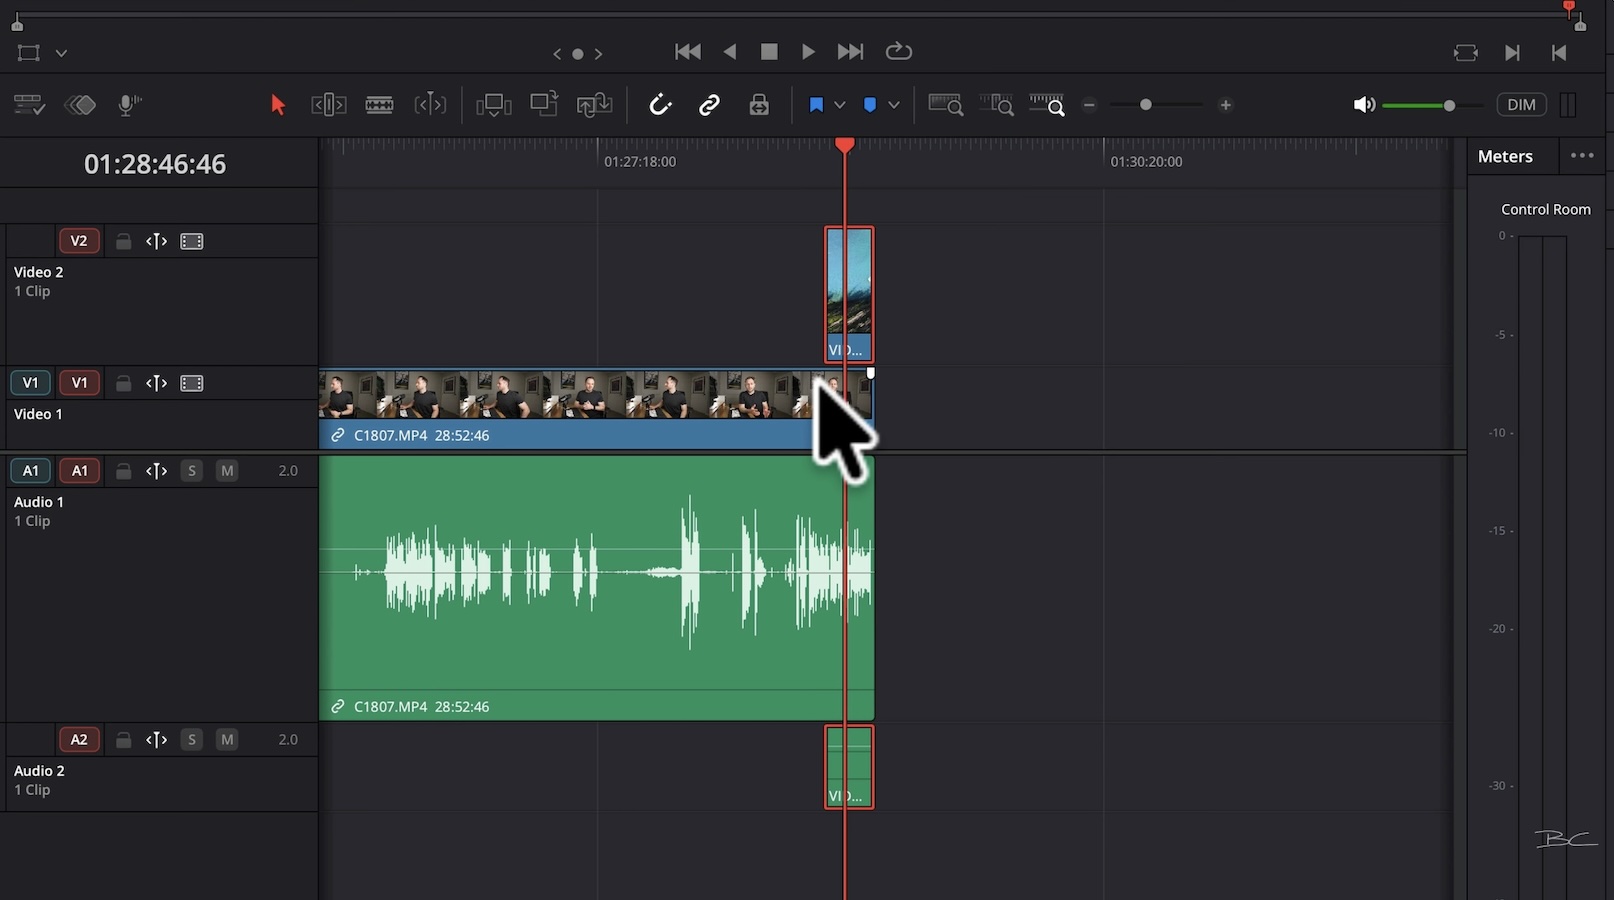
Using B-roll in this way is useful because it leaves the bottom clip untouched in case you later decide you want to use it. Naturally, whichever clip is on the very top layer of the timeline will take precedence in your video.
6. Adding Music
Adding music works in much the same way as adding B-roll. You can either click and drag it into the Media Pool or directly onto the timeline, where it will automatically be added to the Media Pool.
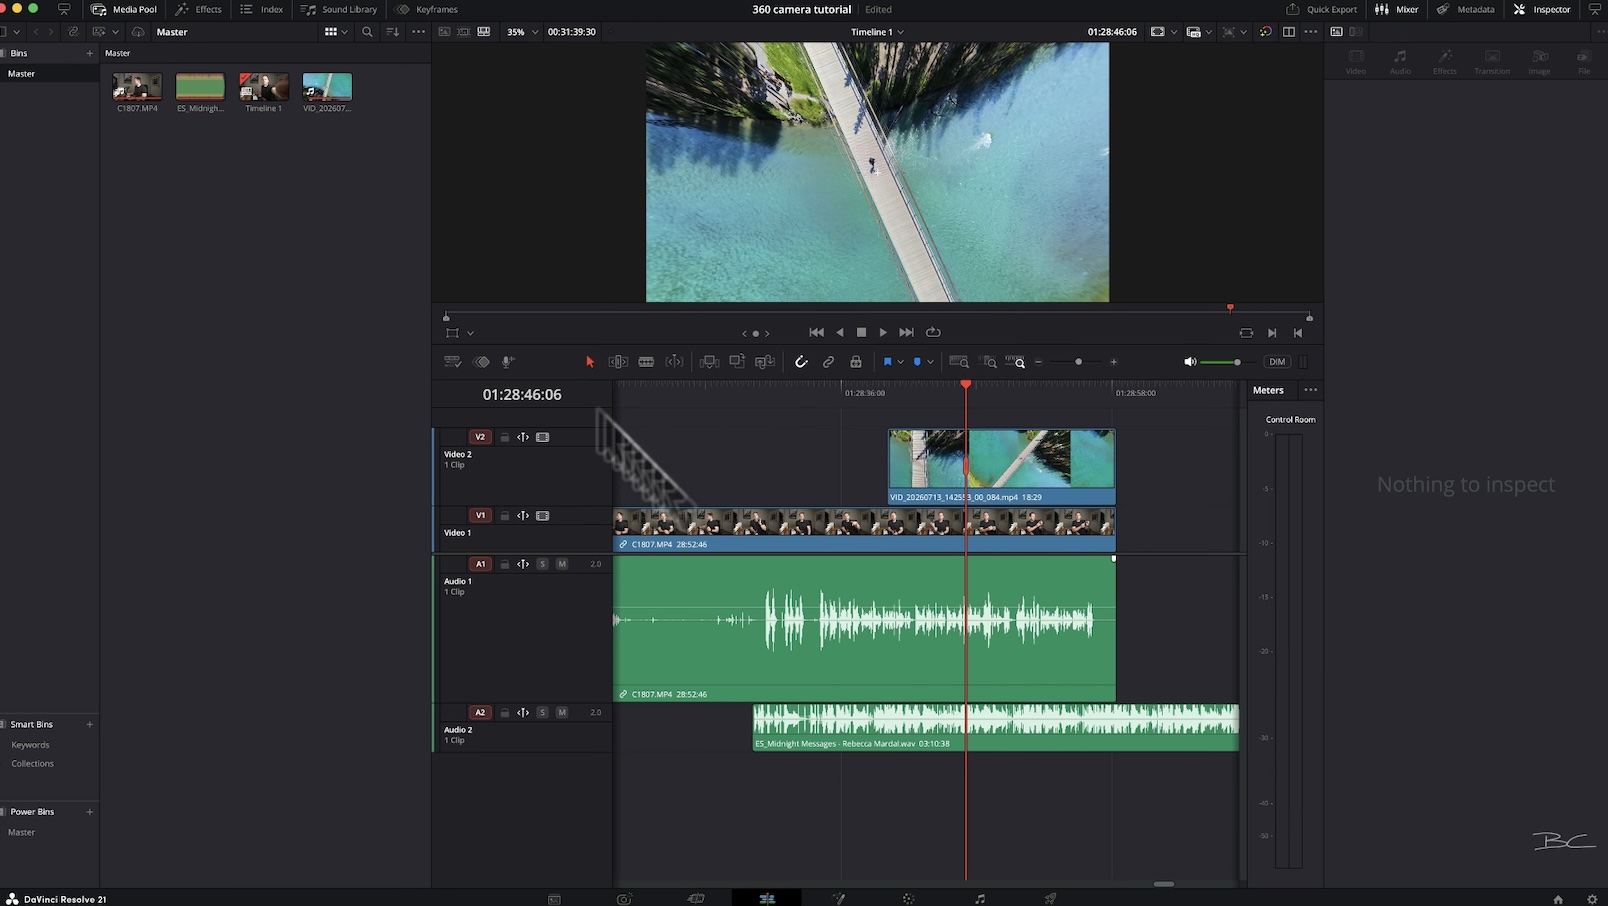
Once you've added it, zoom out and drag the music track to the start of the edit, or wherever you want it to begin.
Just like with the other tracks, you can expand the size of the audio track so you can see the waveforms more clearly.
You'll notice a faint white line running through the track. This represents the decibel level. Drag it up and the music gets louder; drag it down and it gets quieter.
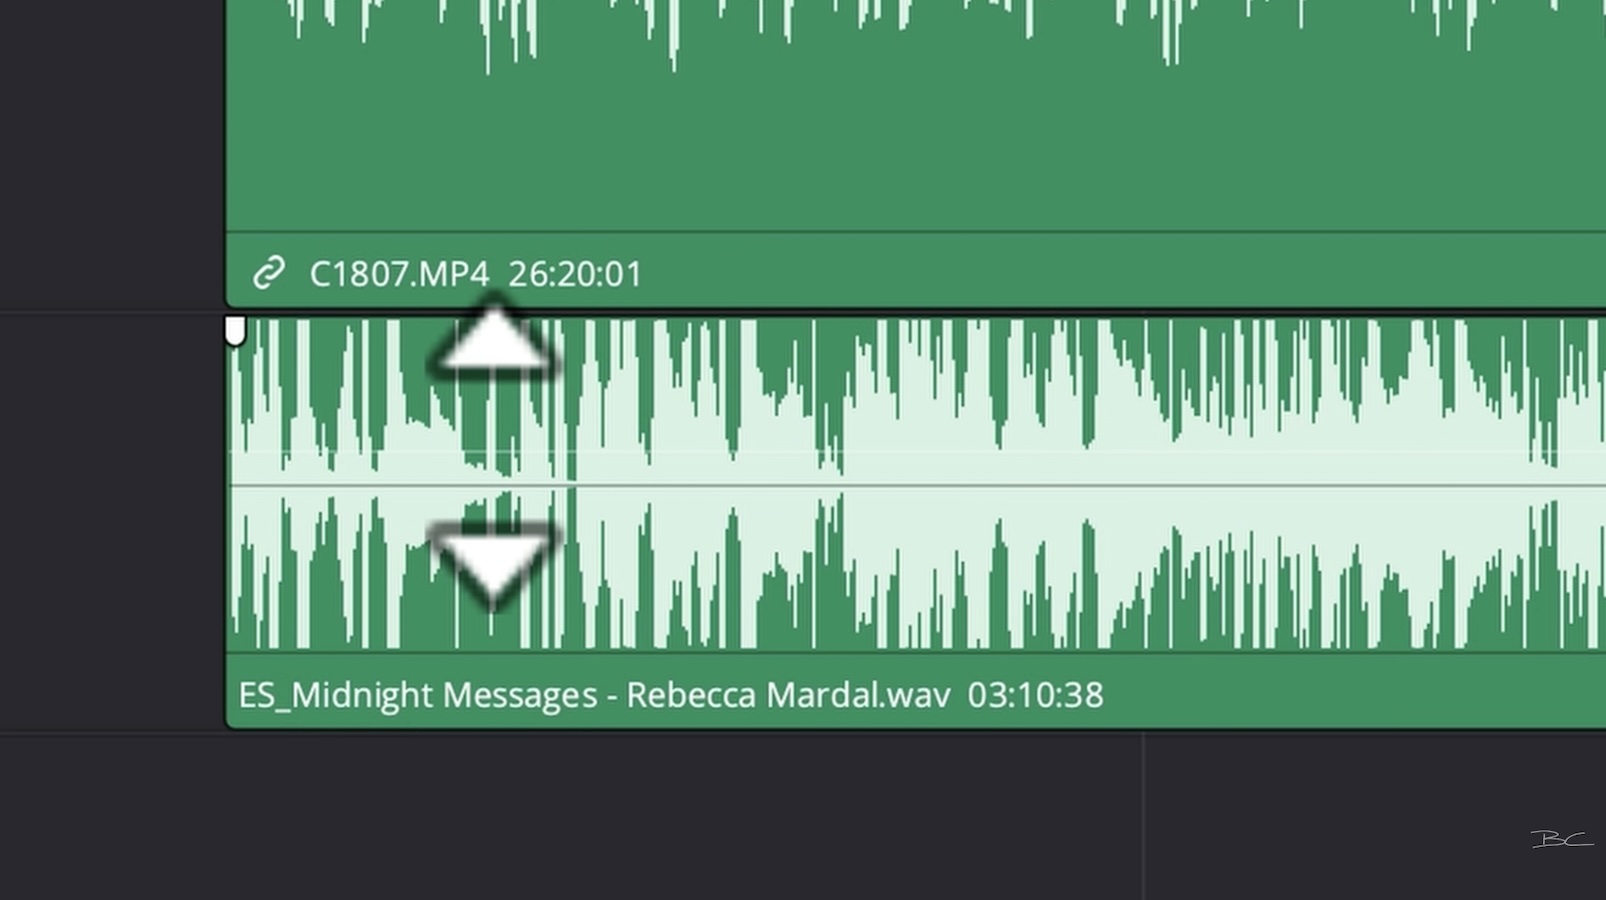
If you're using music as a background track in a talking-head video, I'd recommend keeping the volume at minus 25 decibels at the loudest. Otherwise, it's going to compete too much with the voice.
7. Getting Your Audio Levels Right
Adjusting the overall audio level is straightforward, but sometimes different sections of your video will be louder or quieter than others.
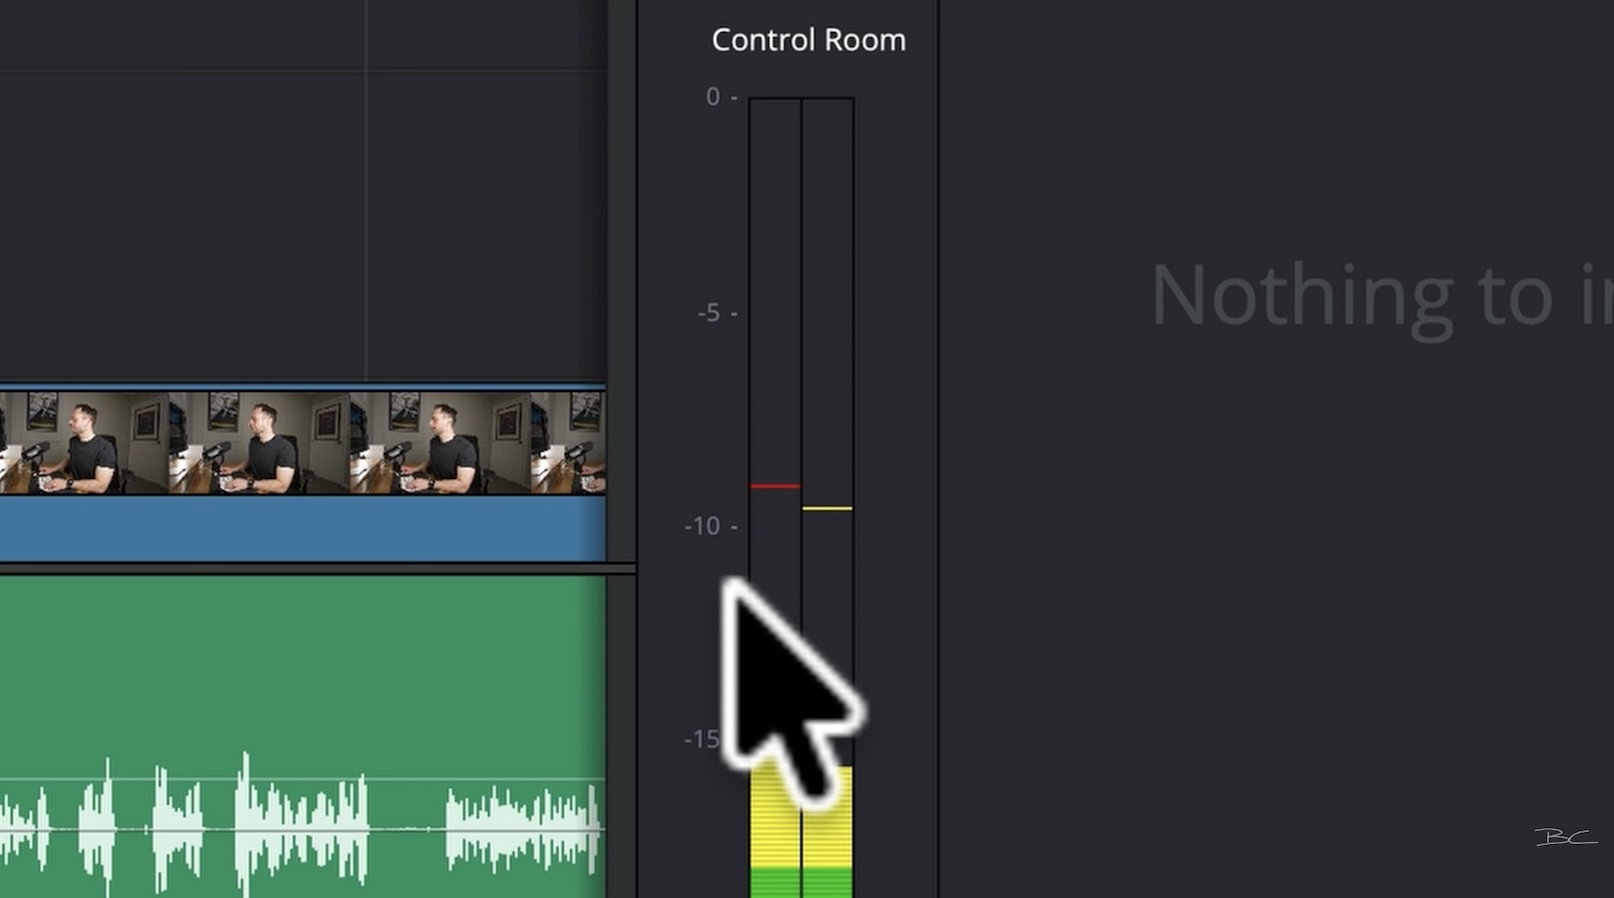
You can use the audio meters to the right of the timeline to judge how loud your audio is. If the meters aren't showing, head to Workspace, then Show Panel in Workspace, and Meters.
When you play the clip, you'll see the audio meters rising and falling. The ideal level you'll want to aim for is somewhere between -10 and -5. If they're above or below that, adjust the volume until it's consistently hitting that sweet spot.
You'll also notice that some sections of your waveform may be louder than others. This is usually because you were talking louder in those sections.
Rather than lowering the entire audio track — which would also lower the sections that are already at the right volume — you can pinpoint the sections that are too quiet and keyframe the audio so the entire dialogue track is even.
To do this, click the audio clip to bring up the settings in the Inspector. Under Volume, place a keyframe using the diamond icon.
The keyframe will appear on the timeline as a white dot. Move the playhead slightly to the right and click the keyframe icon again. Then go to the end of the section and repeat the process, adding one keyframe followed by another.
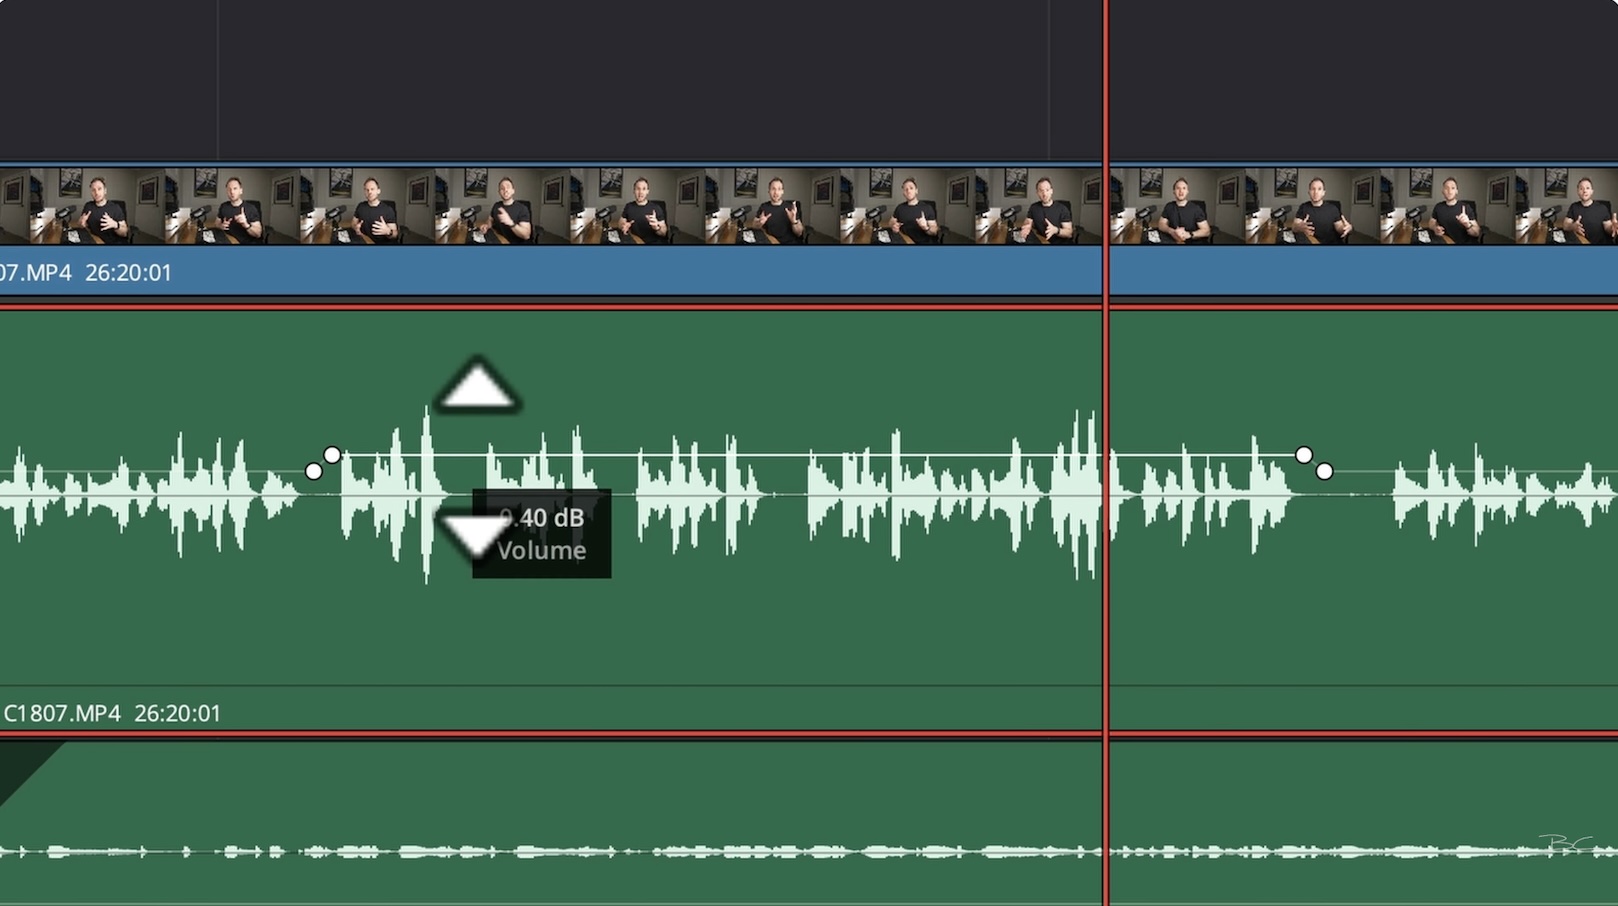
The outer keyframes act as anchors. When you click and drag the faint white line up, you've isolated that section of audio, meaning you're only adjusting the volume for that part and nothing else.
Using AI Dialogue Leveler
DaVinci also has an automatic leveler under the Audio menu called AI Dialogue Leveler. If you turn it on, DaVinci will do its best to lower the loud parts and raise the quiet parts.
However, I found this to be a bit hit and miss and not quite as targeted as doing it manually.
8. Adding Titles and Text
If you want to add titles to your video, you can find them under the Effects tab, then Titles in the bottom left.
There are a few different options available, and you can hover your mouse over them to preview what each effect looks like.
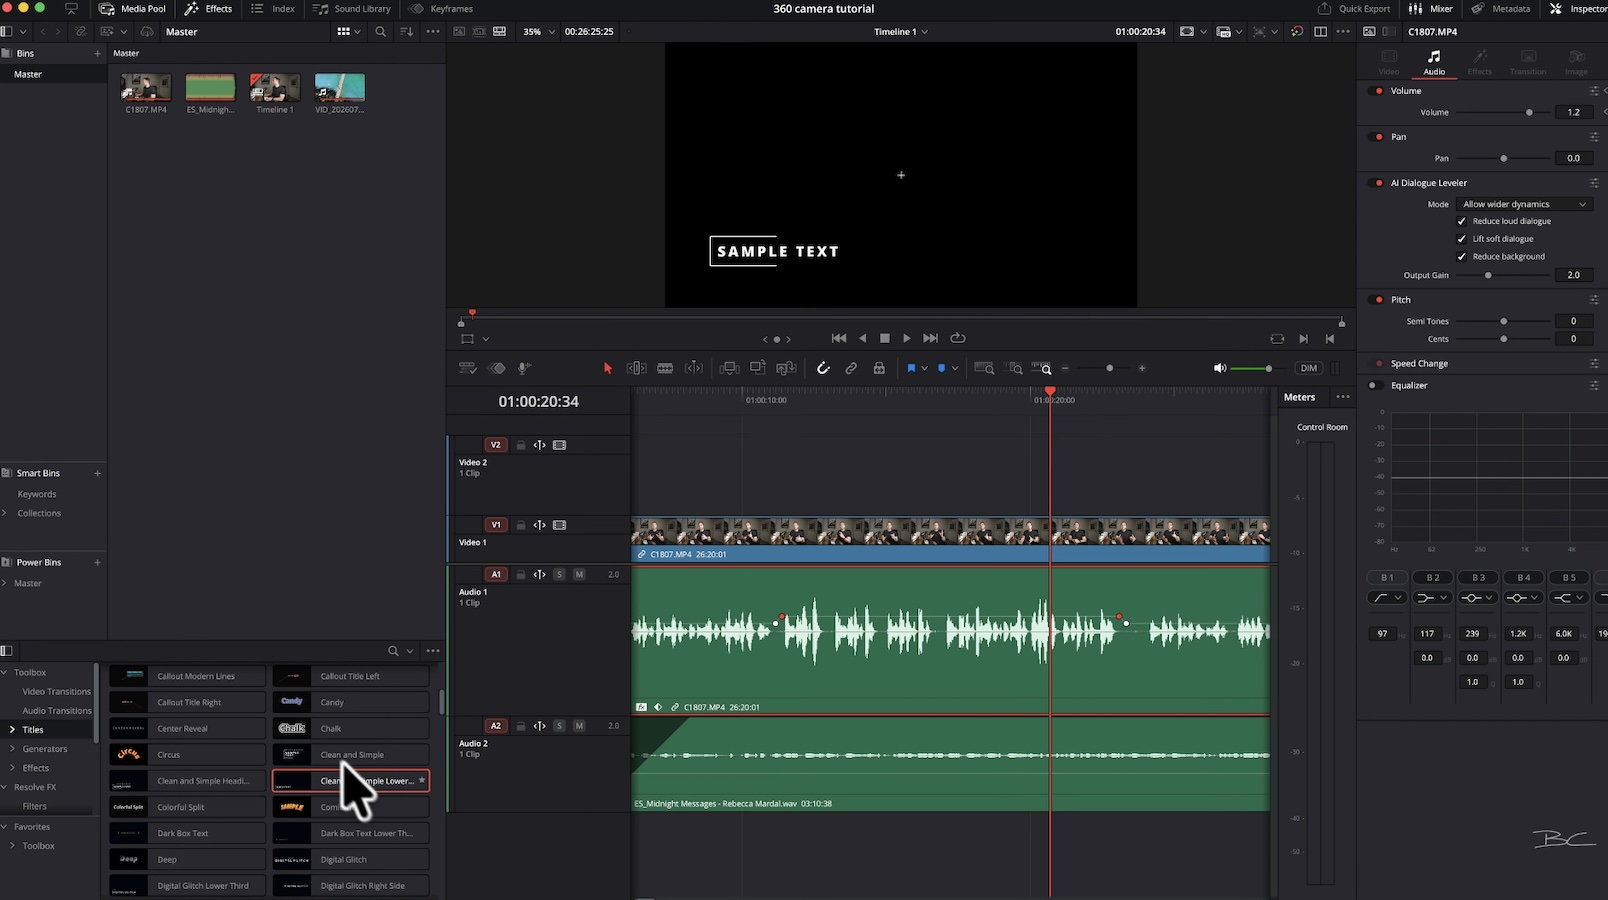
For the most part, though, I found these to be quite gimmicky and not work particularly well with my videos.
If you're keen to keep things simple, I'd recommend choosing the standard Text option and clicking and dragging it onto the timeline.
Remember that whatever is at the top of your timeline layer hierarchy will be visible in your final video.
To customise your text, head over to the right-hand side and enter whatever you want. You can adjust the font, colour, size, spacing, and so on.
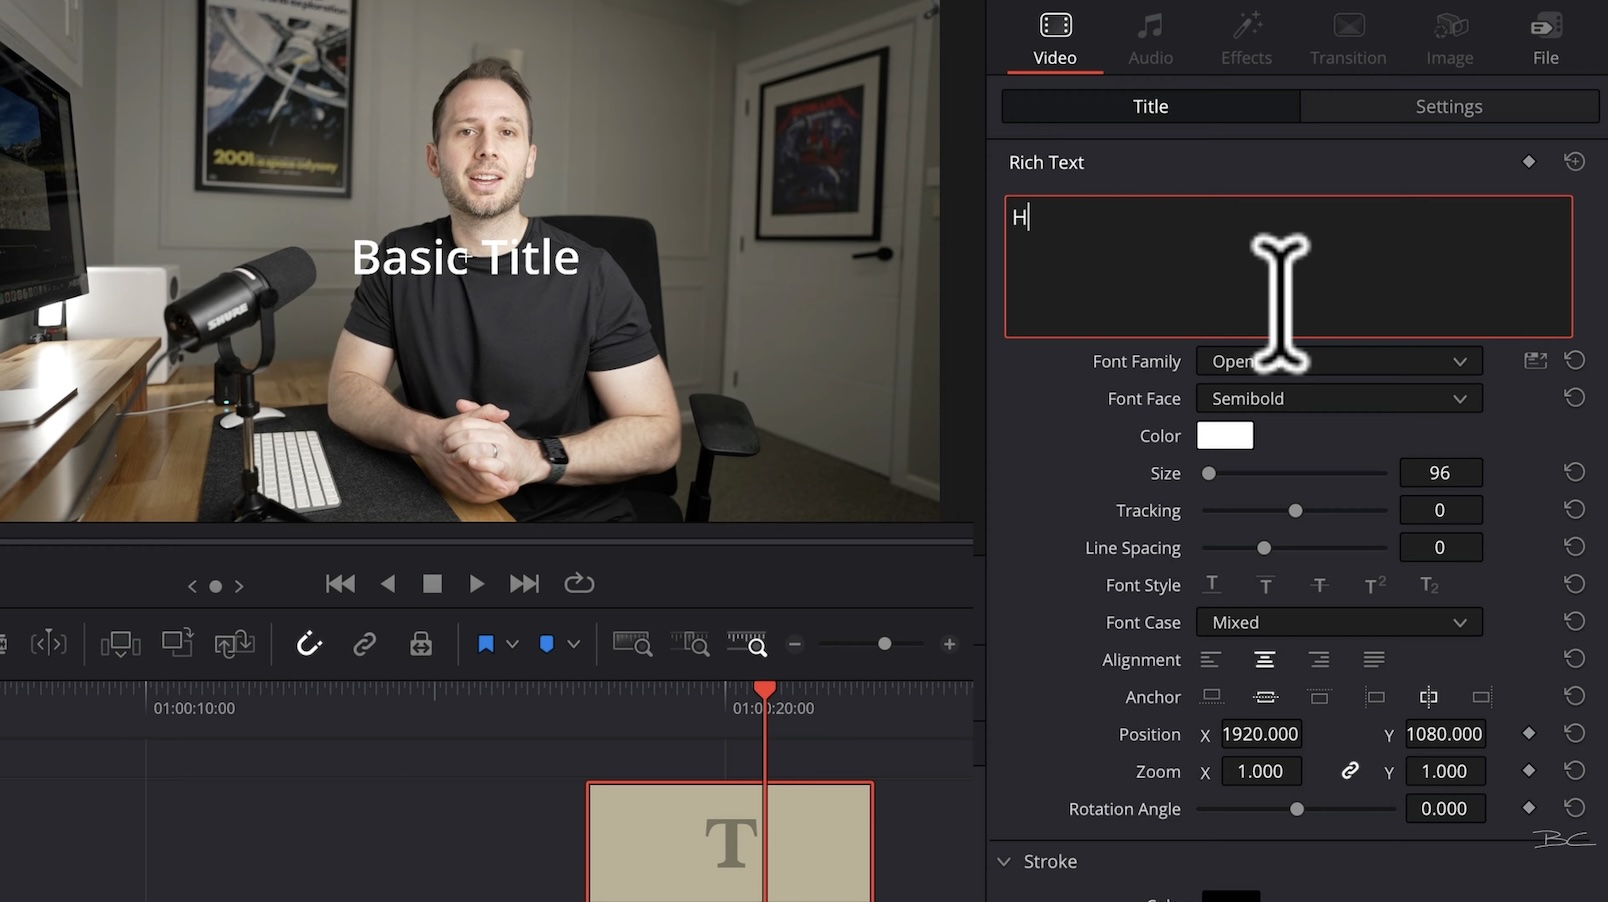
You can also reposition the text by changing the position coordinates until you're happy with where it sits in the video.
The edges can be dragged to make the text cover more of your overall video, and you can add a simple fade by clicking and dragging the white marker icon.
9. Adding Transitions
If you want to add transitions to your video, head to the bottom left where the effects live and click Video Transitions.
Here you'll find a whole bunch of preset transitions.
To add one, click and drag it onto the outer edge of a clip.
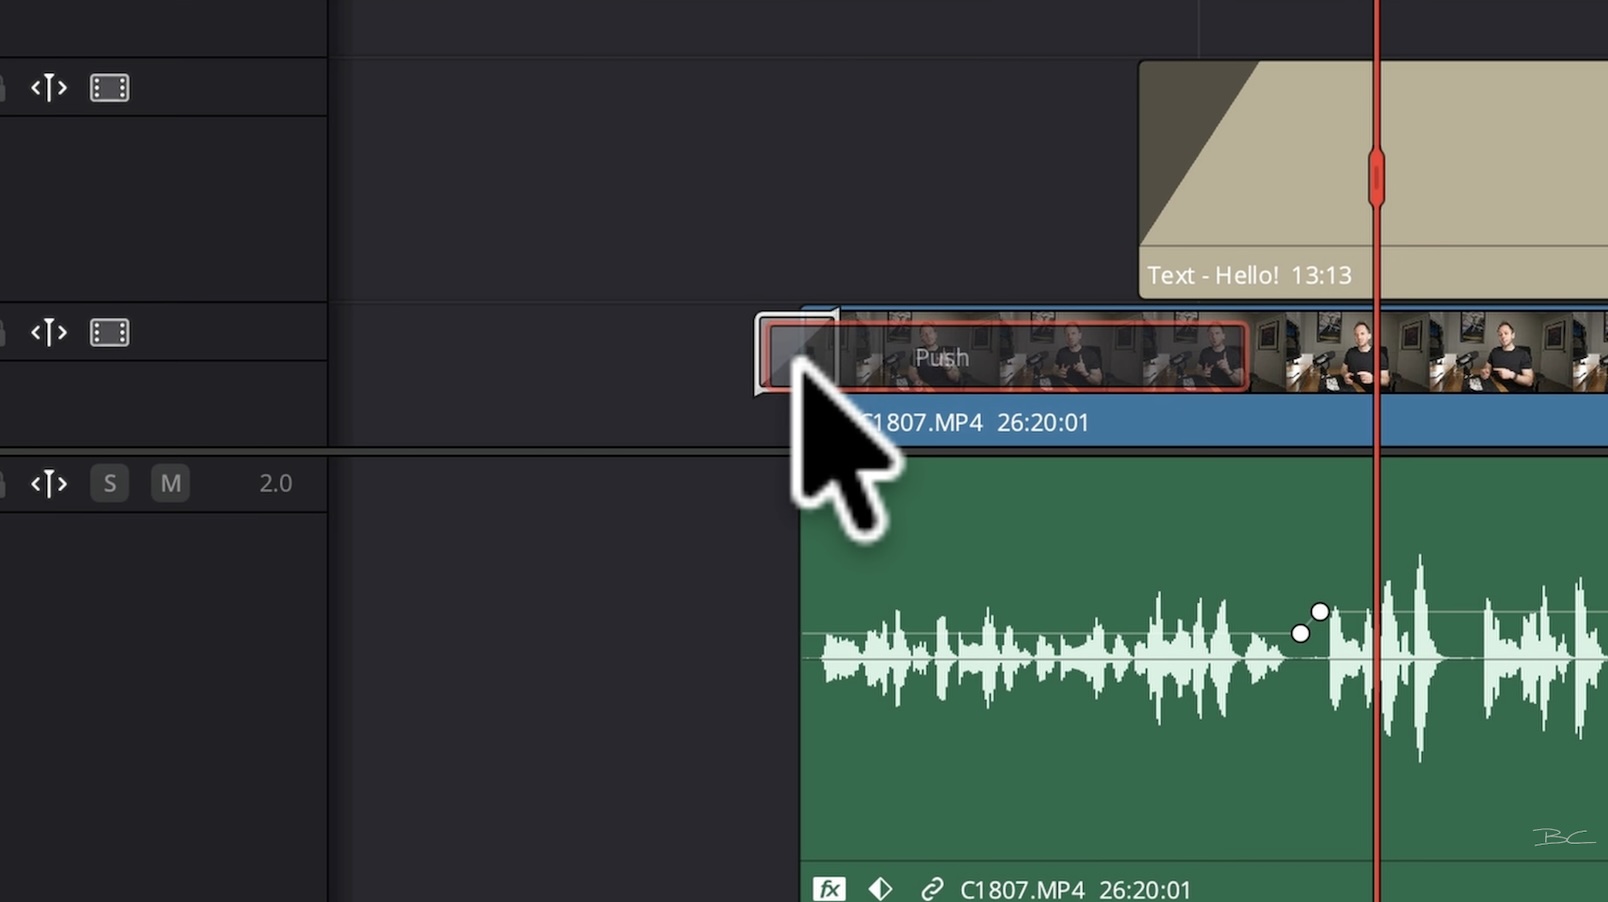
If you're working with two clips on the same timeline, you can also drag and drop the transition between the two clips, and it will apply the same transition effect.
10. Keeping Colour Correction Simple
DaVinci Resolve was originally known for being the world's best colour correction software, and it still is. There are obviously a lot of different menus here and so much you can do when it comes to colour correction.
Again, though, if you're just starting out, I'd recommend keeping your workflow as simple as possible.
Click on the clip you want to colour correct, then come down to the colour wheels.
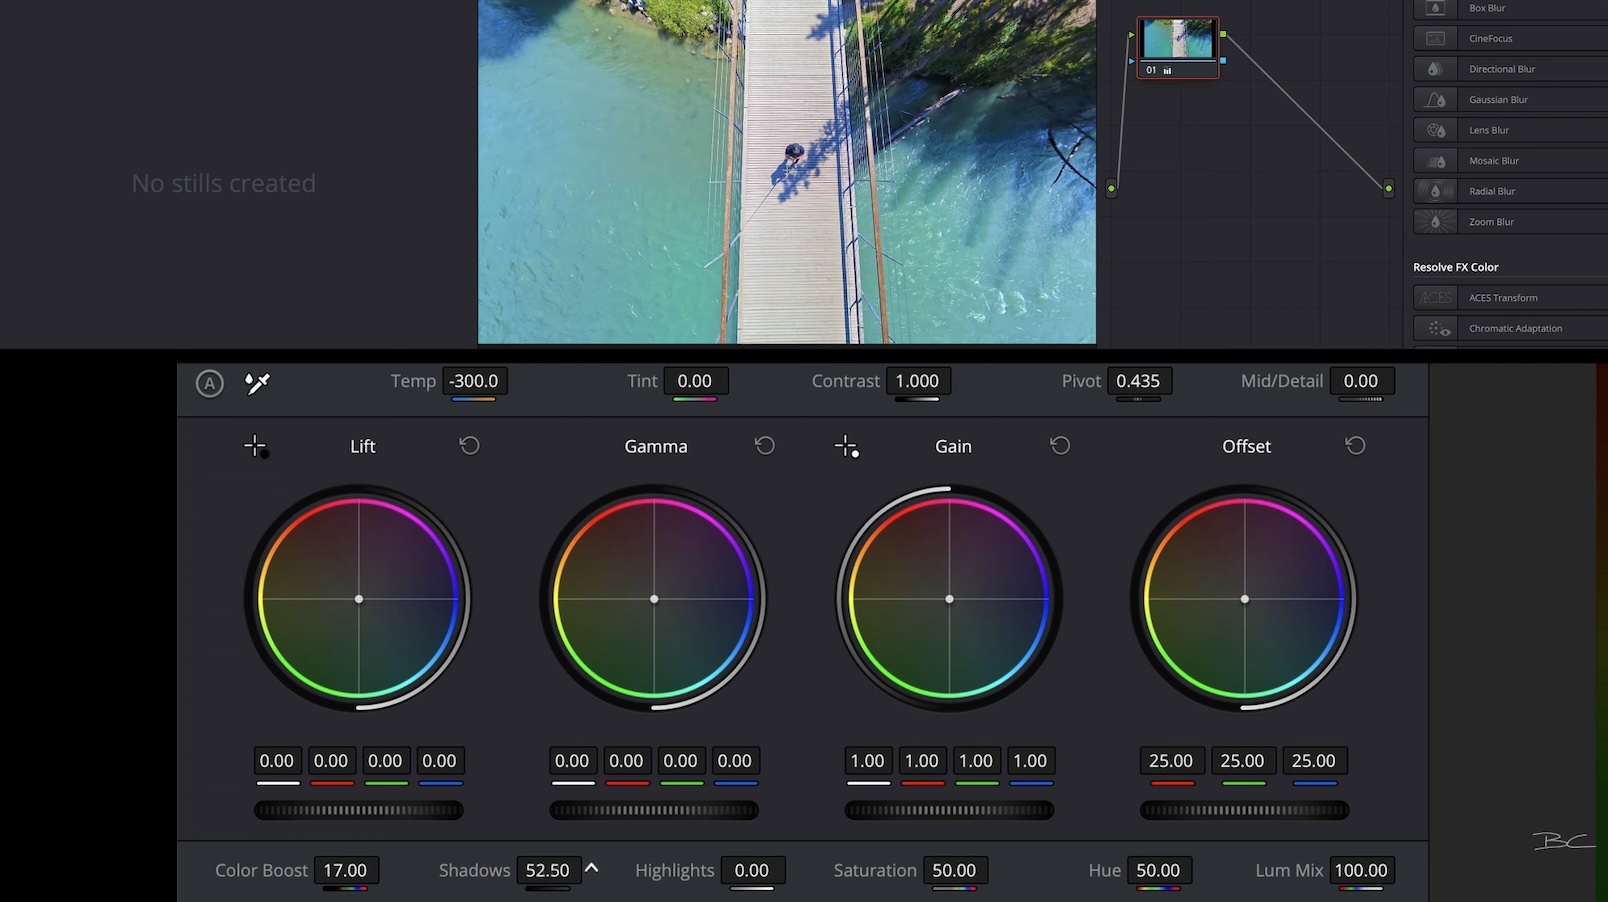
One thing I'd recommend adjusting is the Colour Temperature, since shots can sometimes be either too warm or too cool. This will help you adjust that.
Colour Boost will make your colours look just a bit more colourful. However, I'd avoid dragging it all the way up to 100 unless you want your clip to look like it's out of a Disney movie.
You can also adjust the Shadows. Dragging this across allows you to selectively lighten the shadowy areas of your shot. Finally, there are the Highlights. By dragging them down, you can bring back detail in some of your brighter highlights. Again, though, you won't want to go too far with these.
Go ahead and colour correct your clips until you're happy with how they look.
11. Exporting Your Finished Video
Once your edit is finished, the final step is heading over to the Deliver tab.
Before exporting, you'll want to set an in and out point. This tells DaVinci which part of the timeline you actually want to include in your final export.
Go to the very start of your timeline and zoom in to the very first frame. Press I on your keyboard to set the in point.
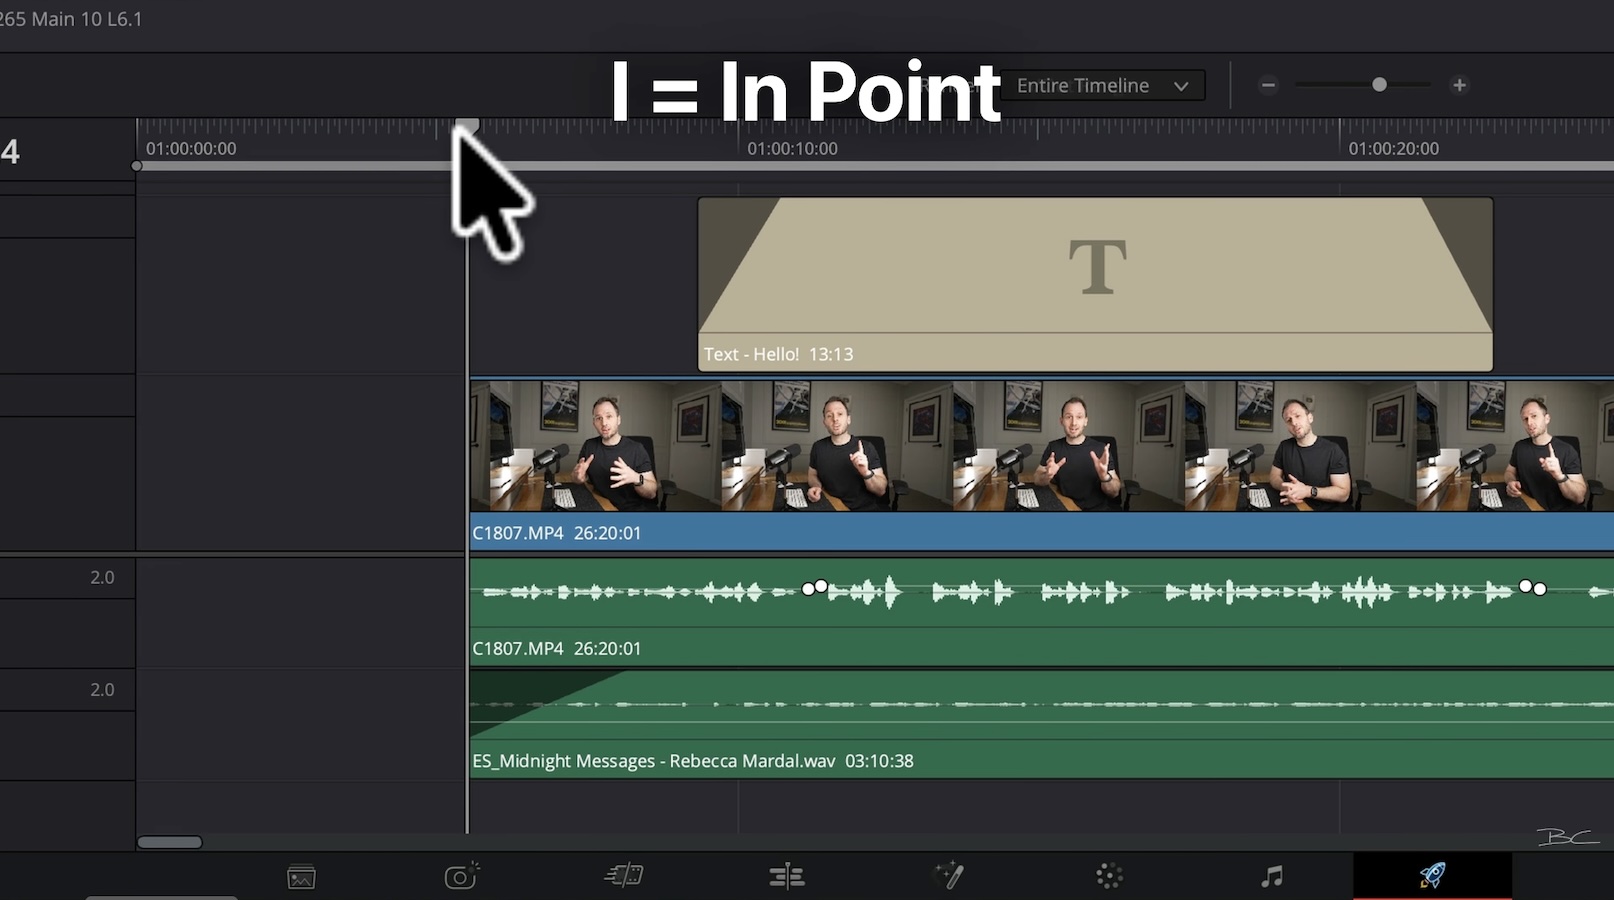
Then go to the very end of the timeline and press O on the keyboard to set the out point.
I'd recommend keeping the export settings simple by clicking the dropdown and choosing H.265 Master. This will help keep your file size down while retaining high video quality.
It's important to check your export settings to make sure you're exporting at the resolution and frame rate you want. If it's set to Timeline Resolution and Timeline Frame Rate, it will match the numbers we set at the start of the project.
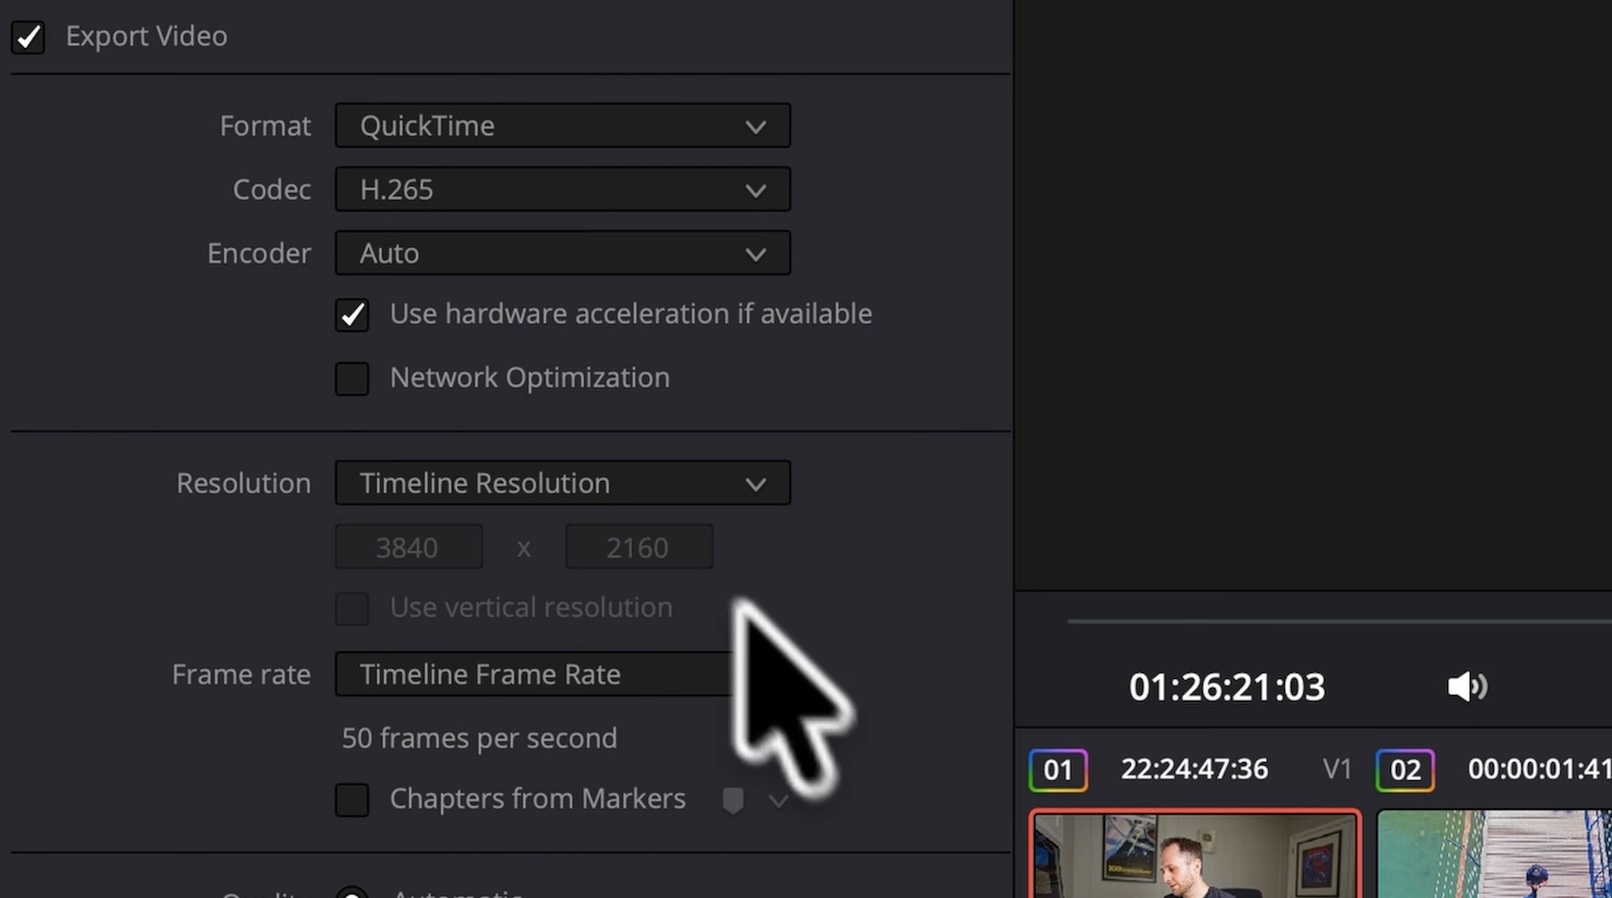
Give your file a name, choose a save location, and then click Add to Render Queue.
This will send it to the right-hand side, where all you need to do is click Render All. Your video should then export in a few minutes.
Next Steps
Now that you have your first project up and running, you don't need to learn every feature of DaVinci Resolve. With thousands of features, trying to master everything can quickly become overwhelming.
The truth is, 90% of DaVinci Resolve is unnecessary for most projects. You just need the right 10% in the right order to produce professional-looking videos you're proud of — and that's exactly what I teach inside DaVinci Resolve Simplified.
I've taken the workflow I've refined over 20 years of editing and stripped away everything a beginner doesn't need, giving you a simple, step-by-step path from starting a project to final export.
Blog Author