The Best Insta360 X5 Photo Modes for Virtual Tours
Jul 02, 2025
If you're using the Insta360 X5 for virtual tours, the settings you choose will either save you hours or cost you hours. Get them wrong and your shots will be noticeably lacking in quality. Get them right and they'll wow viewers — and maybe even win you your first paid client.
In this post, I’ll show you why one of the simplest photo modes on the Insta360 X5 is by far the best choice for professional-looking virtual tours and a streamlined workflow.
Understanding Insta360 X5 Photo Modes for Virtual Tours
One major change in the Insta360 X5 compared to the X4 and previous models is that there’s now only one main photo mode. Within this mode, you can choose all the settings relevant for virtual tour photography.
To access these:
- Tap the bar at the bottom of the touchscreen.
- You’ll see options for self-timer, resolution, and various photo formats.
Mode 1: HDR Photo Off – 72MP + PureShot
The most basic setup is HDR photo off with a resolution of 72 megapixels — ideal for casual social media shots where boosting dynamic range isn’t essential.
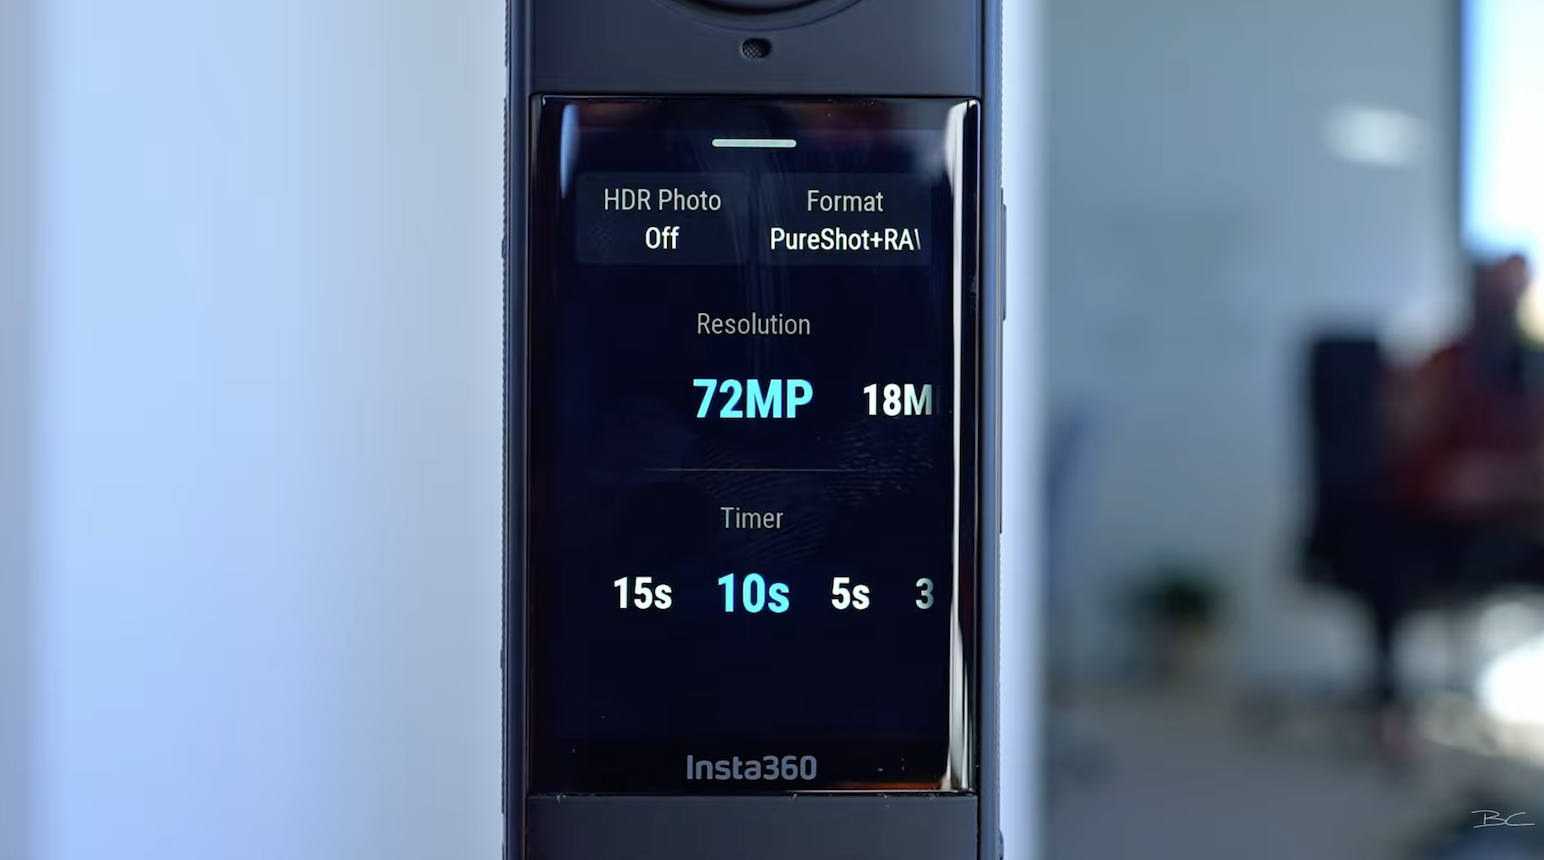
Under format, you can choose PureShot or PureShot + RAW. PureShot, now the standard shooting mode, automatically enhances image quality by boosting dynamic range, reducing noise, and sharpening details before any editing.
At a minimum, you’ll be using PureShot, but if you want a RAW DNG file as well, you can enable it to shoot both simultaneously.
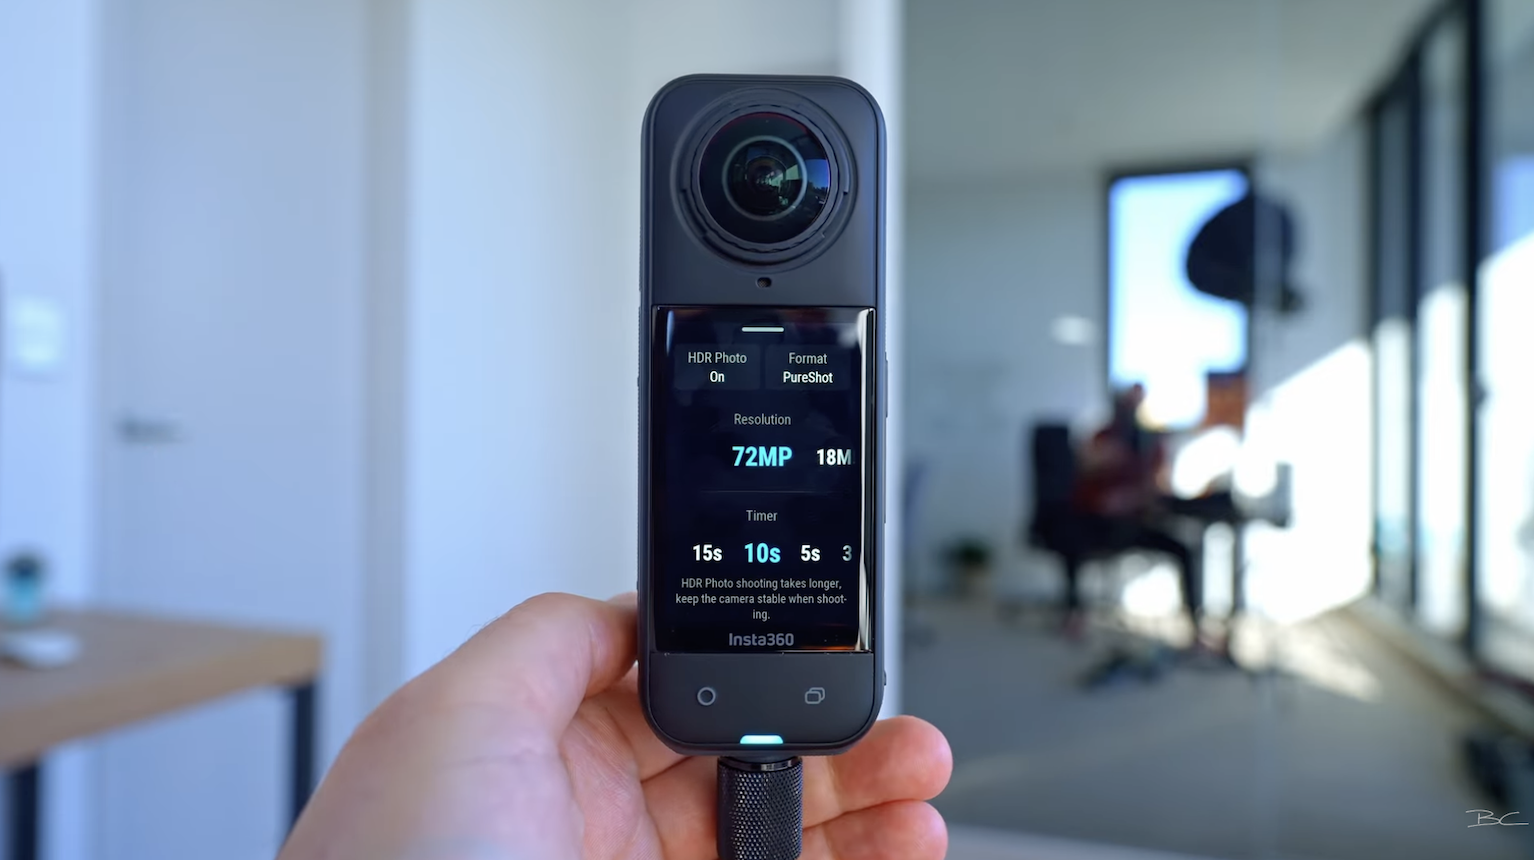
Mode 2: HDR Photo On – 18MP or 72MP
Next up is HDR Photo On, which also offers both PureShot and PureShot plus RAW. When HDR is enabled, the camera automatically captures three exposures and blends them in post to create a high dynamic range image. You can shoot in either 18MP or 72MP resolution — and for virtual tours, 72MP is definitely the way to go.
Mode 3: AEB (Auto-Exposure Bracketing)
Then there’s AEB (Auto-Exposure Bracketing), a more manual take on HDR. You can choose how many shots to capture (up to seven) and control the exposure steps between them. There’s even a hidden menu: swipe across and you’ll find you can go up to four stops apart with three photos, or up to 1.3 stops apart with seven.
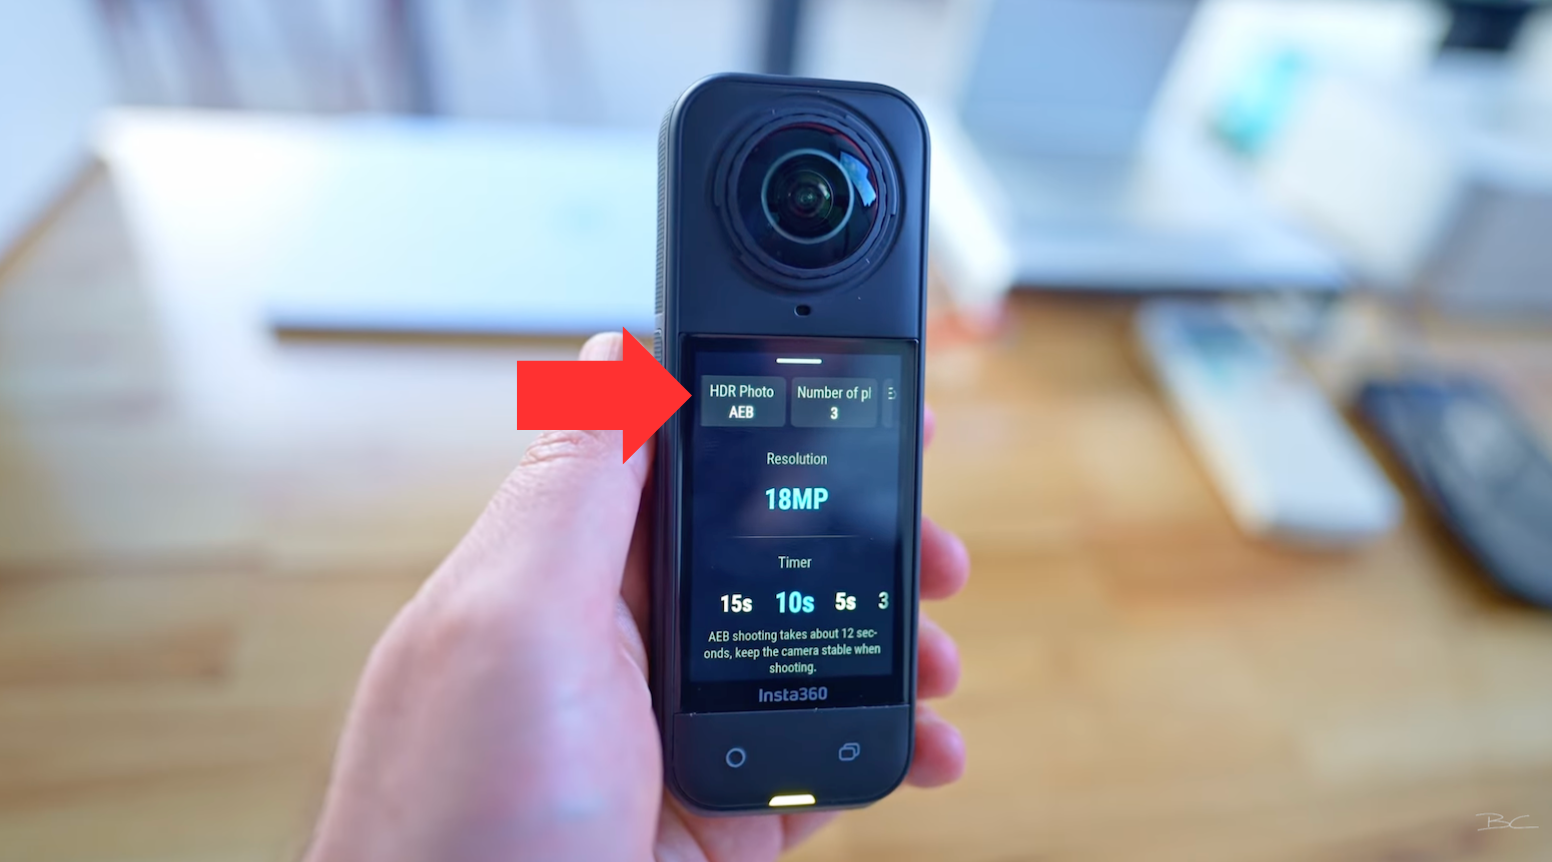
It’s more advanced and similar to how traditional DSLR photographers create HDR images, but the trade-off is that resolution maxes out at just 18MP — a significant drop from the other two modes.
So, What’s the Best Insta360 X5 Photo Mode for Virtual Tours?
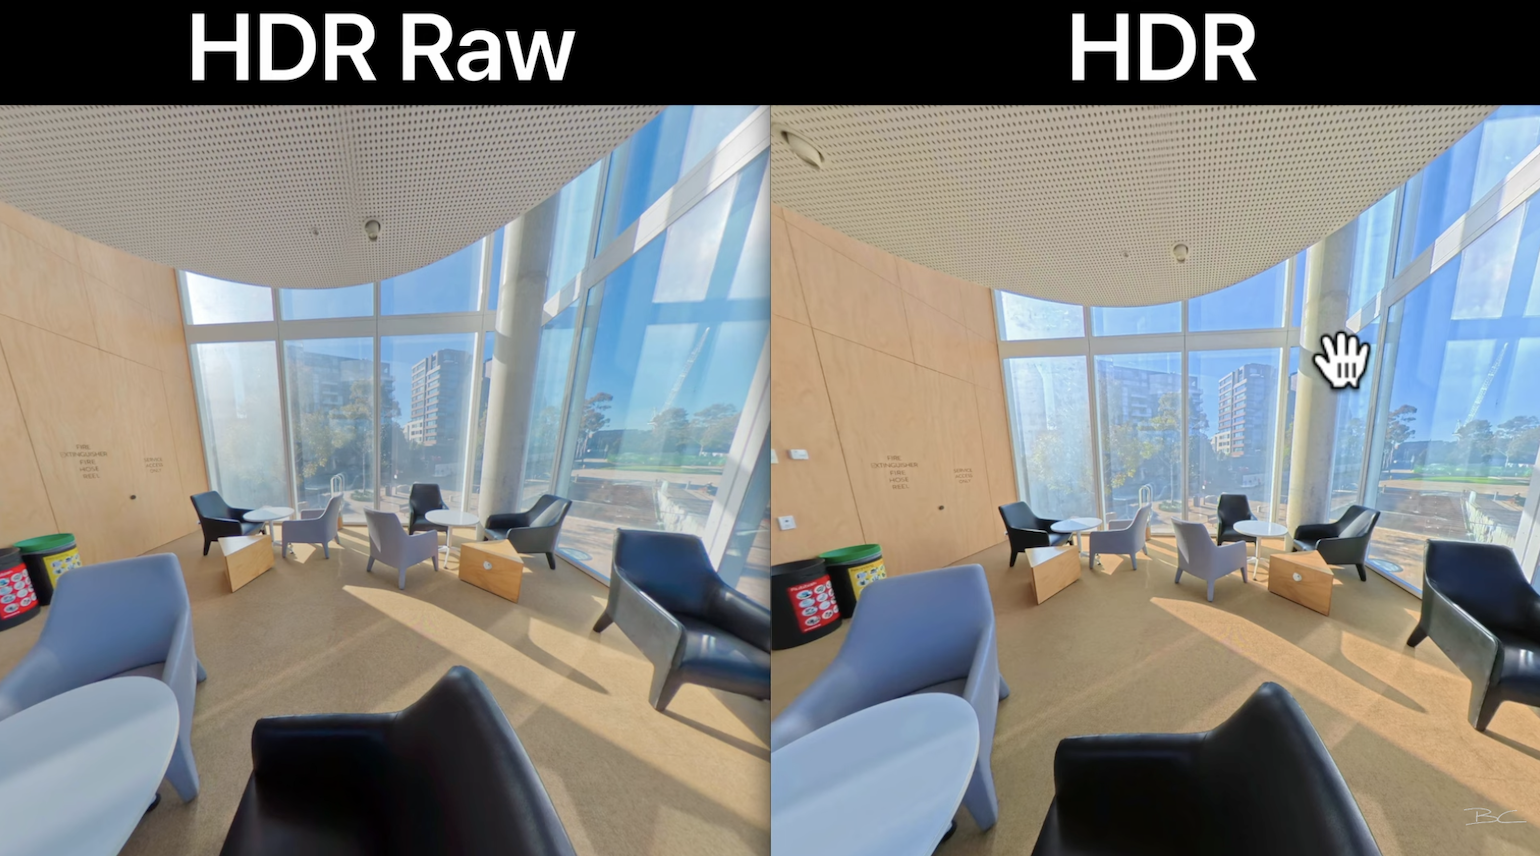
I tested them side by side. On the left, a standard PureShot image straight from the camera; on the right, an HDR photo processed in Insta360 Studio.
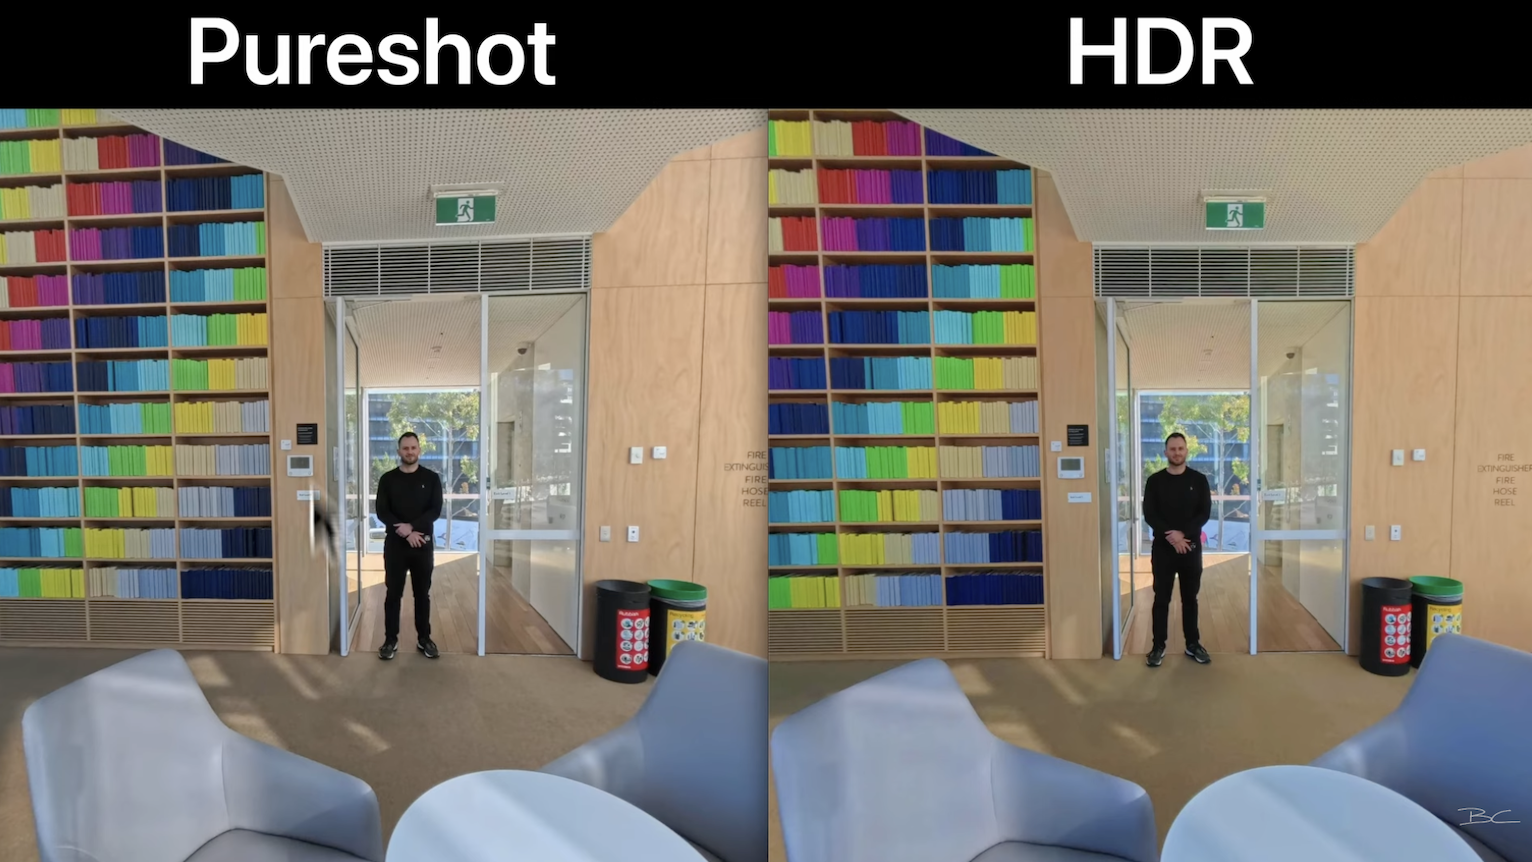
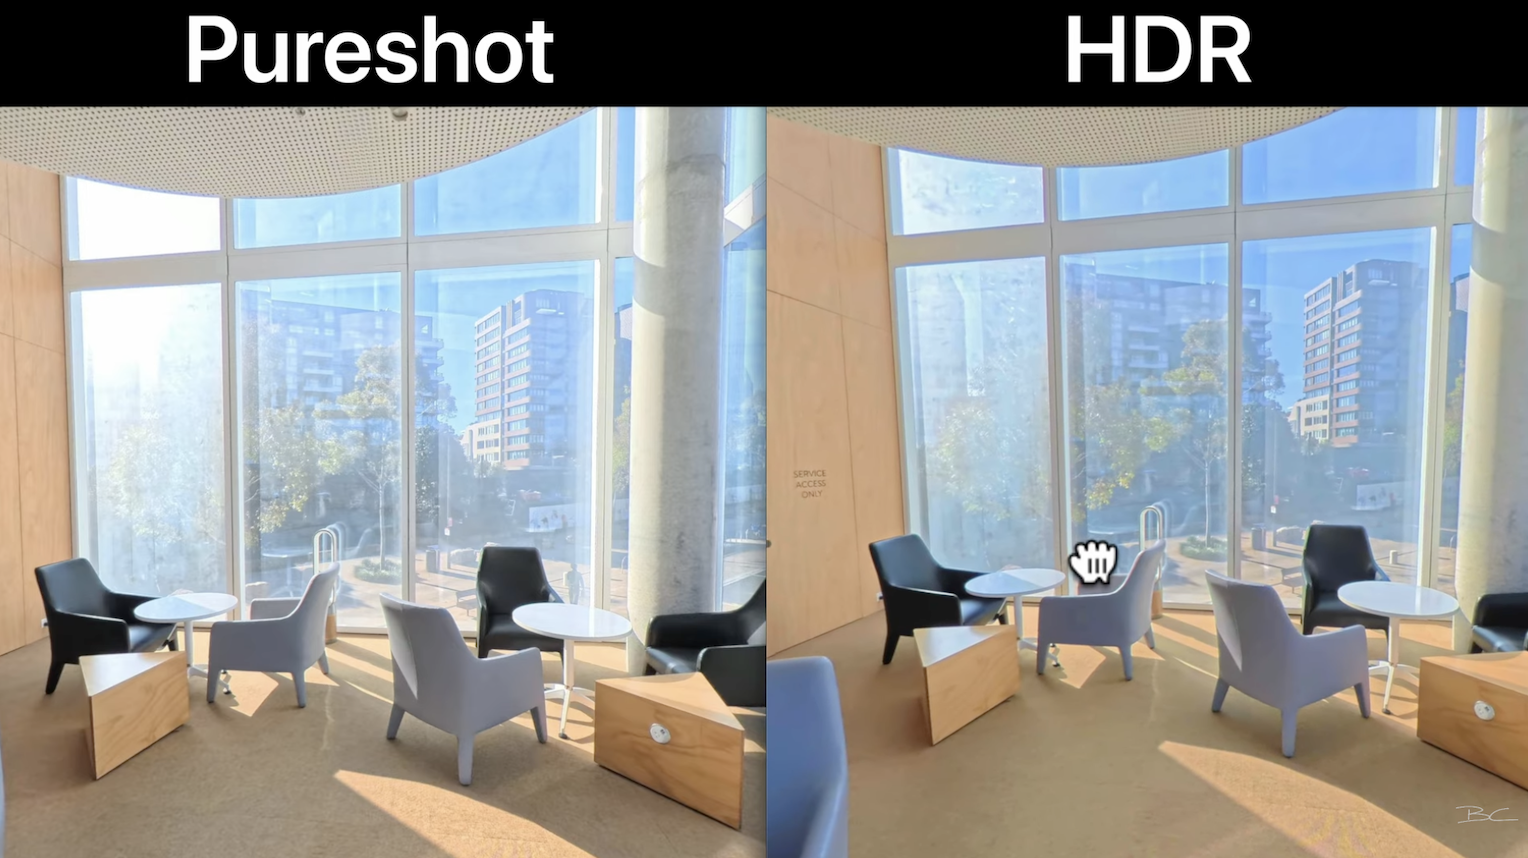
Right away, the HDR version handles dynamic range better, particularly around bright windows. It captures more detail in highlight areas, and when shifting the viewpoint, the improvement continues — the HDR version simply preserves more detail throughout.
In terms of sharpness, both images (at 72MP) hold up well, and I wouldn’t say one is significantly sharper than the other. So based on dynamic range alone, HDR clearly outperforms the single-shot PureShot.
Yes, there’s some mild purple fringing with the X5, but it’s much less noticeable than older models or other cameras and hardly a deal-breaker with virtual tours are typically viewed from a wider perspective.
HDR vs Bracketing (AEB)
Now let’s compare:
- Left: AEB (edited in Affinity Photo)
- Right: HDR (Insta360 Studio)
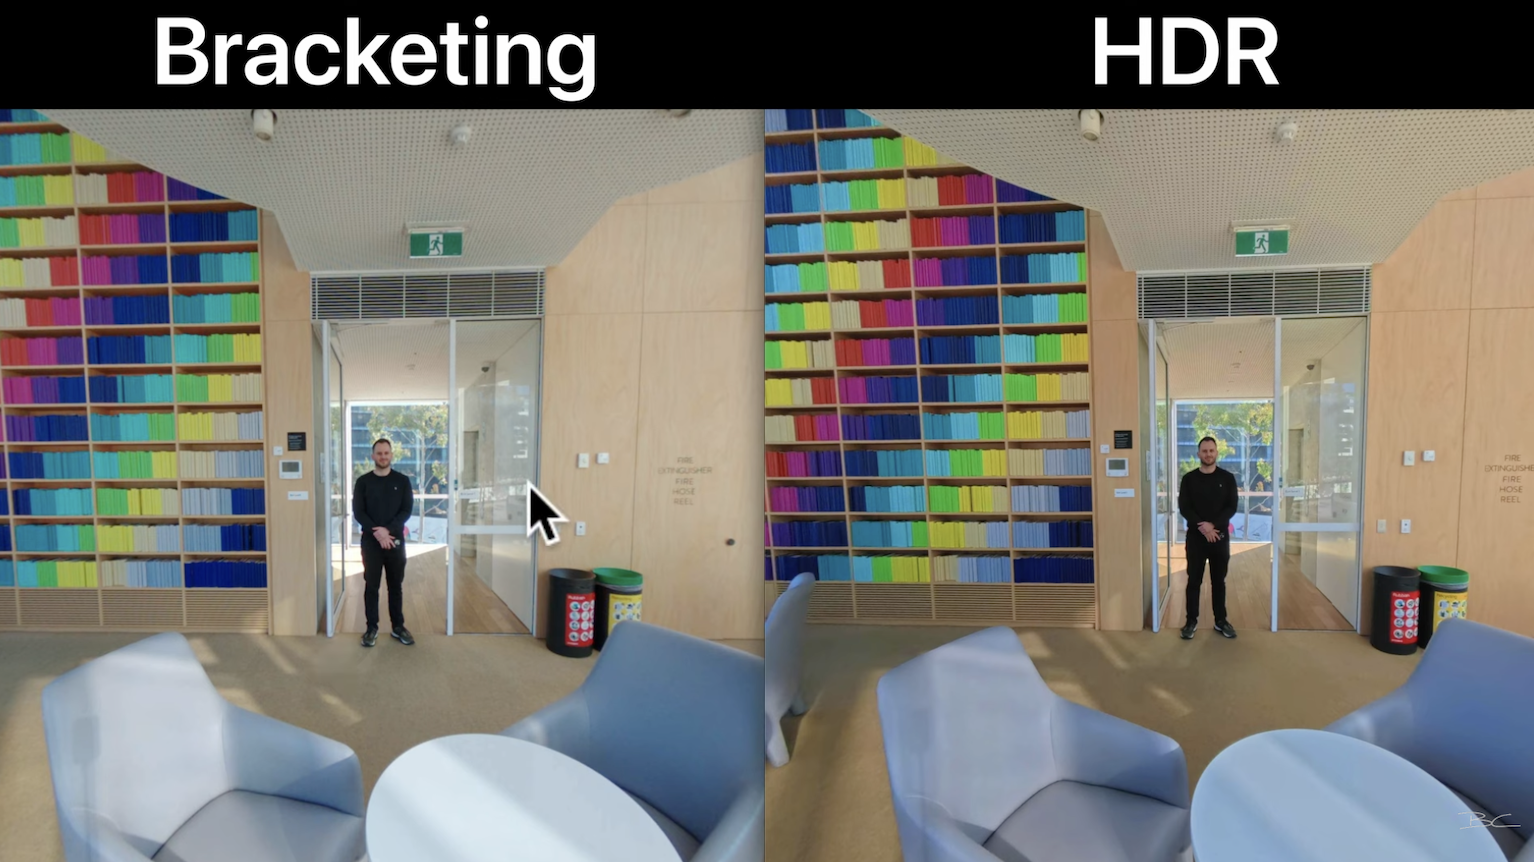
Again, HDR wins. The bright window retains far more detail, while the bracketed version shows blown-out highlights. Sharpness also takes a hit with bracketing, due to the 18MP cap, making shots look noticeably softer unless you’re using a very wide angle.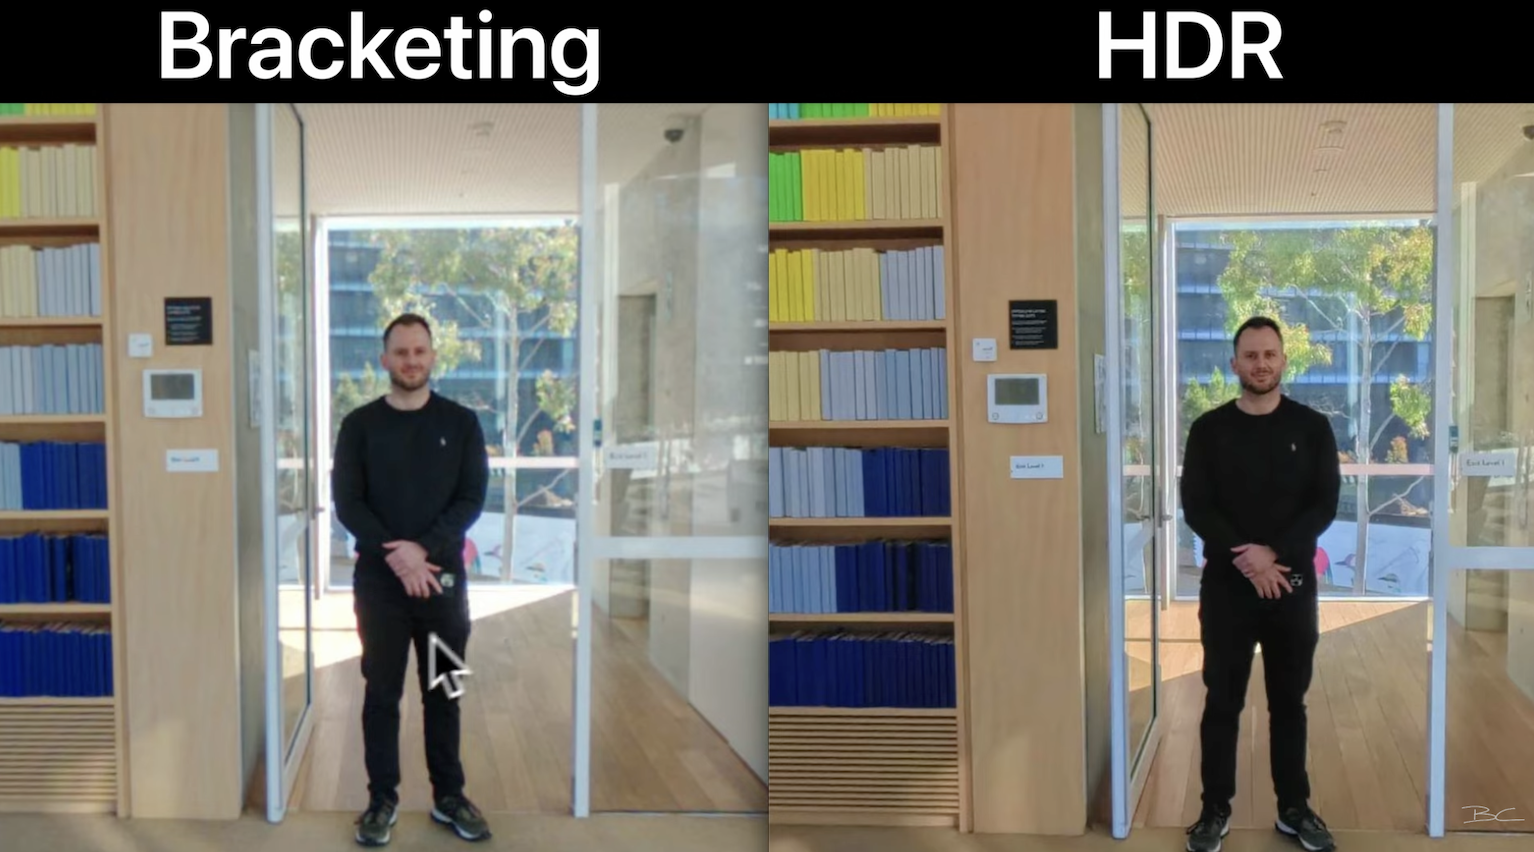
Bottom line:
For Insta360 virtual tour photography, inbuilt HDR is a clear winner over AEB.
Should You Use RAW (DNG) with the Insta360 X5?
While RAW gives you more flexibility in post (pulling up shadows, recovering highlights), it introduces a much heavier workflow — more software, more time, and more technical steps, especially when dealing with multiple images for a virtual tour. So the payoff needs to be worth it.
I compared a RAW version edited in Affinity Photo (left) against the same HDR shot processed in Insta360 Studio (on the right). Personally, I prefer the HDR version. It has slightly better detail, contrast, and colour.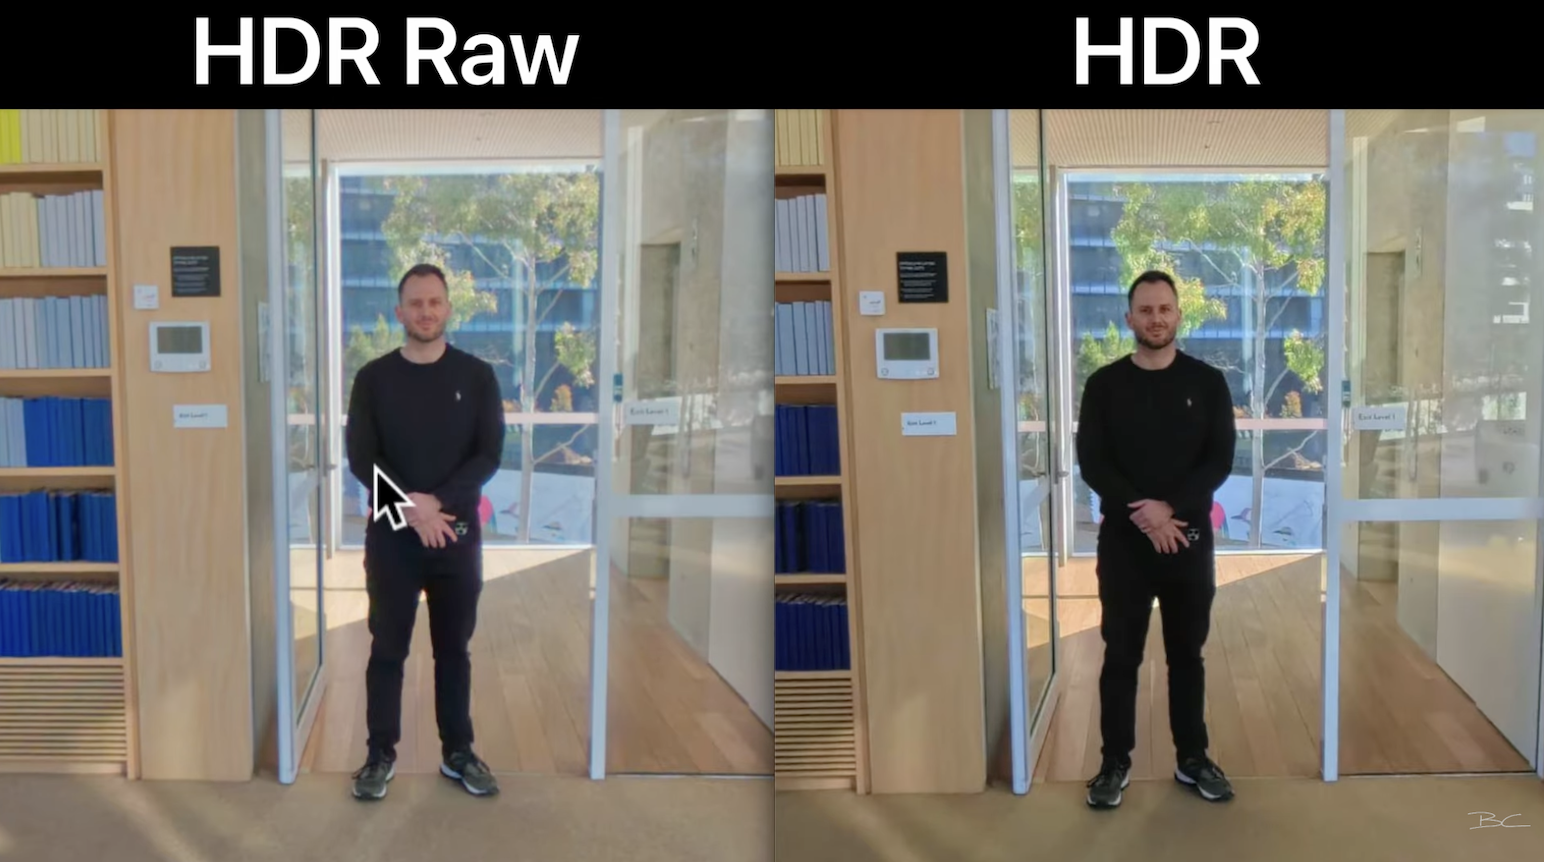
And when it comes to dynamic range, both are strong — but again, the HDR edges ahead, especially in the brightest parts of the shot. Also, Insta360 Studio’s built-in color correction tools give you everything you need, with less hassle.
Winner: HDR again — better contrast, colours, and detail, all with fewer editing steps 🎯
Color Correction in Insta360 Studio
Speaking of color correction, you’ll find all the usual sliders under the Media Processing tab in Insta360 Studio — highlights, shadows, vibrance, color temp. It’s totally optional, as the X5 delivers excellent images straight out of the camera, but it’s there if you want more control.
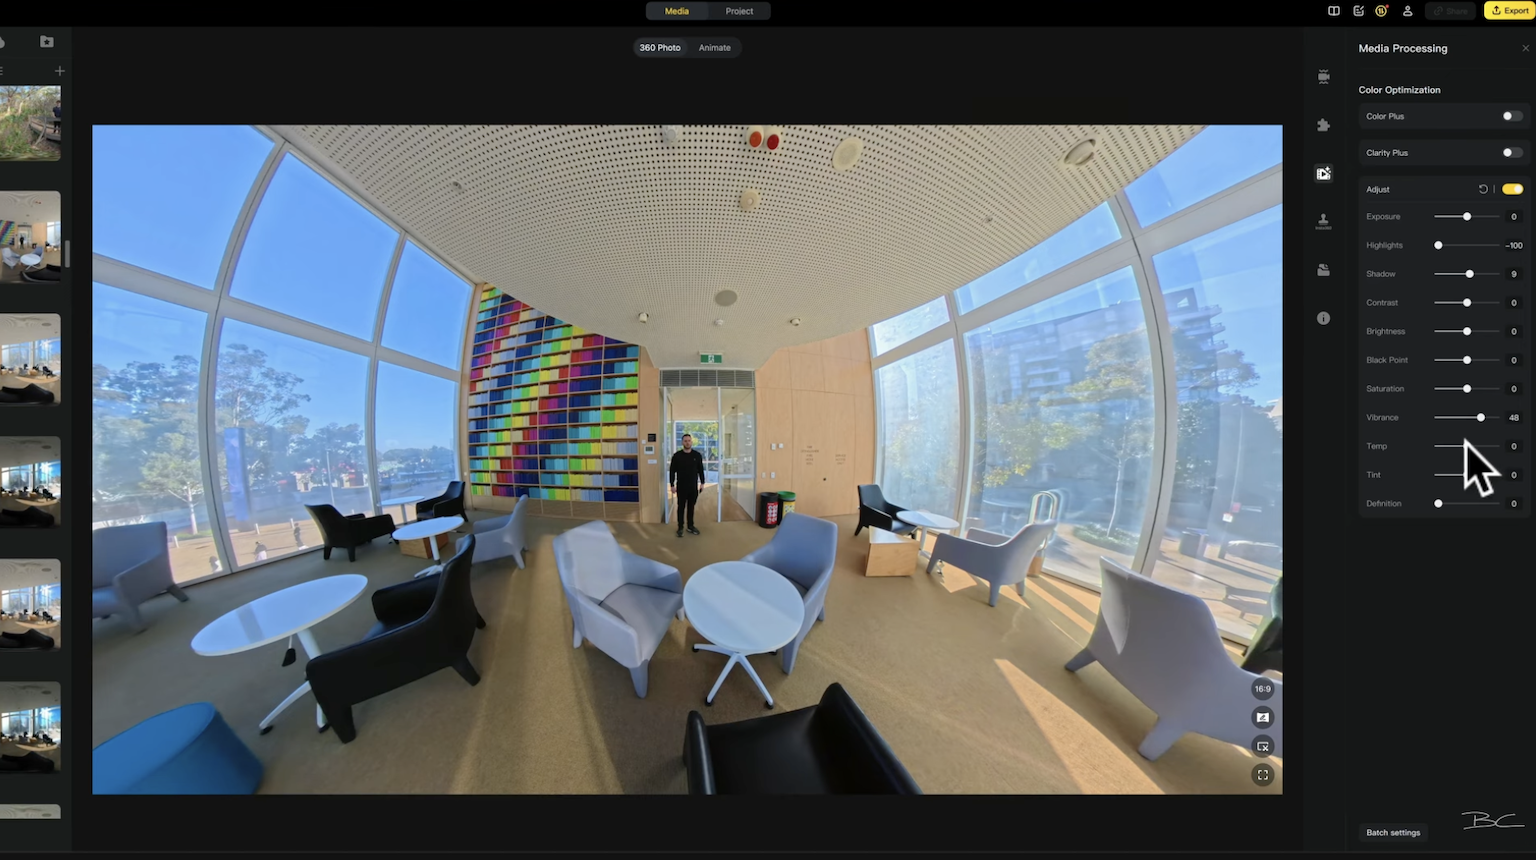
You can even batch edit your photos if they were shot in similar lighting — a huge time-saver for virtual tours. Just note: color correction in Studio doesn’t work on DNG (RAW) files, so if you do want to edit RAW, you’ll still need to export and use another program.
I’ve linked all the samples here if you’d like to check them out.
Final Recommendation: Best Settings for Virtual Tours ✅
I think it's obvious by this point which photo mode I recommend for virtual tours, which is HDR Photo On with PureShot plus RAW. That gives you a high-quality image straight out of the camera, and the RAW file acts as a backup if something goes wrong. And of course, always use 72MP resolution.
Why This Insta360 X5 Workflow is a Game-Changer
I always advocate for the simplest workflow that delivers the best results. The X5 is finally a camera that lets you do just that — no more tedious multi-step processes like with previous Insta360 models or even the old Theta Z1, which was once the go-to for virtual tours but required far more editing work.
And with Insta360 Studio automatically merging HDR shots, doing color correction, and optimizing stitching right inside the software, it really does become an all-in-one workflow. You can even test stitching options using the Stitching Optimization menu — a lifesaver when dealing with imperfect seams or ghosting.
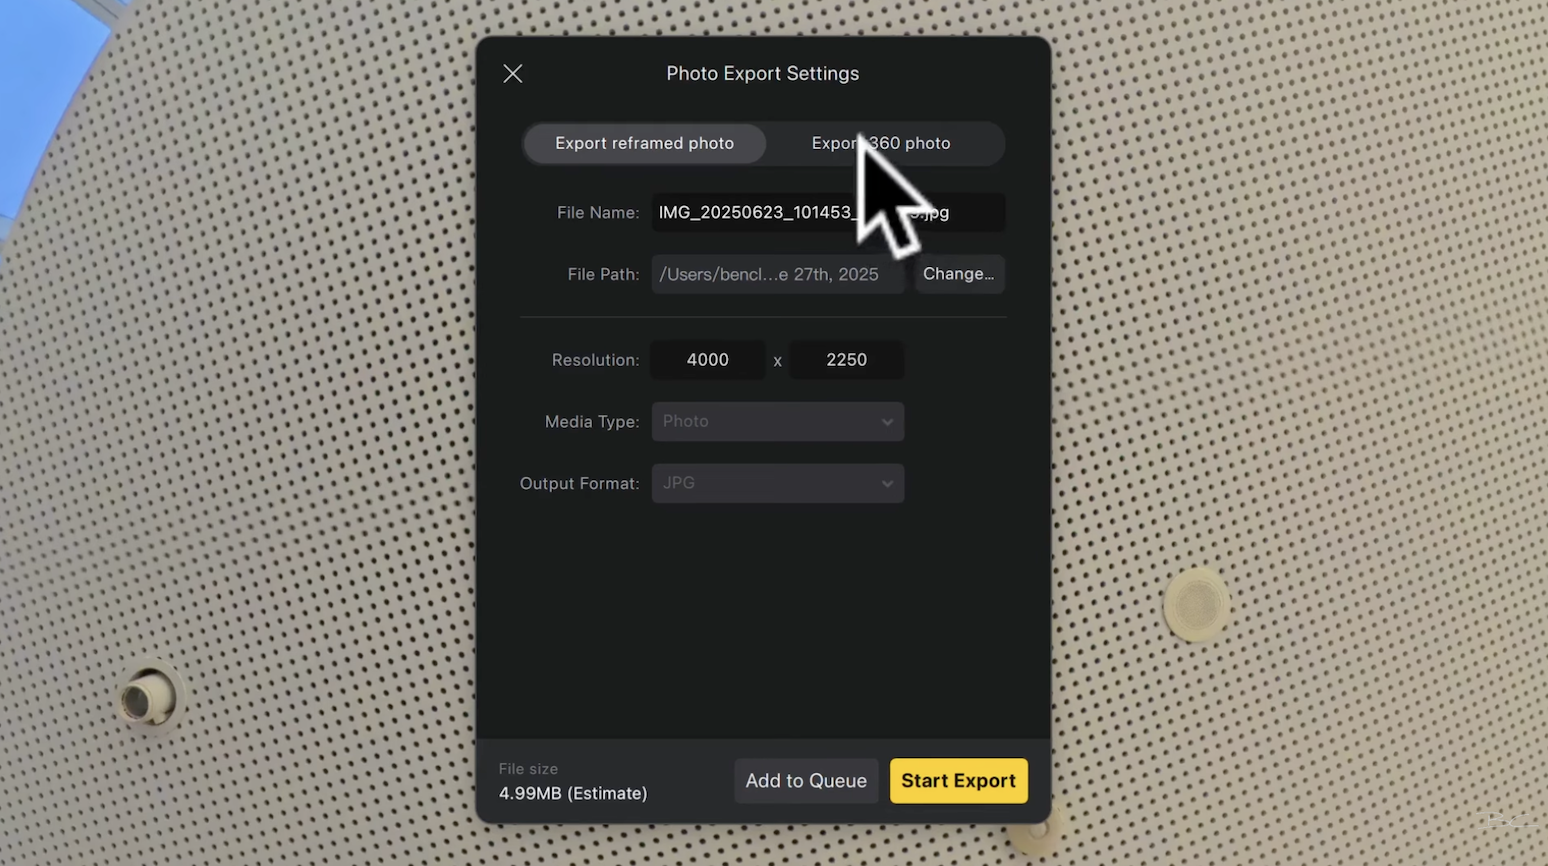
Once your shots are ready, just go to the Export menu, choose Export 360 Photo (not reframed), and hit Start Export.
What About Tripod Removal?
The only thing Insta360 Studio doesn’t handle is tripod removal. Use:
These are both 360 photo friendly. That said, you don’t need to learn Affinity Photo for colour correction. With the HDR + Studio workflow, there’s no need for extra software, plugins, or complicated editing. You get excellent results with minimal effort — and a faster turnaround for your tours.
Ready to Start Your Virtual Tour Business?
In short, this workflow is a massive win. It produces images good enough to charge for, and with it, you can start offering virtual tour services to clients in your area using just the Insta360 X5.
If you want to learn how to do that, my Virtual Tour Pro course covers everything you need — from choosing a niche and setting up your business, to pricing, packaging, and pitching your services.
Blog Author