The Only Free Virtual Tour Platform Worth Using in 2025
Sep 17, 2025
Right now, there are hundreds of virtual tour platforms out there that can create stunning 360° tours for just about any use case. The problem? Not one of these platforms offers a free option that’s genuinely usable long-term. Most force beginners or casual creators into monthly or yearly subscriptions for software they’ll barely use.
While many platforms promote a “free” option, it usually means either a short trial period or a stripped-back version with so many limits you can barely publish one tour. That’s why Panoee stood out to me—it’s one of the only platforms that gives you a feature-rich free plan that you can actually use without restrictions.
Panoee isn’t brand new, but it’s definitely a hidden gem. With unlimited tours and 3GB of storage in the free plan, it’s already far more generous than competitors. But what makes it worth your time are the tools built into the platform.
In this article, i'll share the main reasons you should consider Panoee as your go-to virtual tour software 👇🏻
Truly Free Plan
Panoee’s free package actually feels usable. You can upload unlimited tours with up to 3 GB of storage, which works out to roughly 150 photos if you’re using a point-and-shoot 360 camera. That’s a generous amount of space compared to other platforms, which often limit you to just a handful of tours or a couple hundred megabytes before pushing you into a subscription.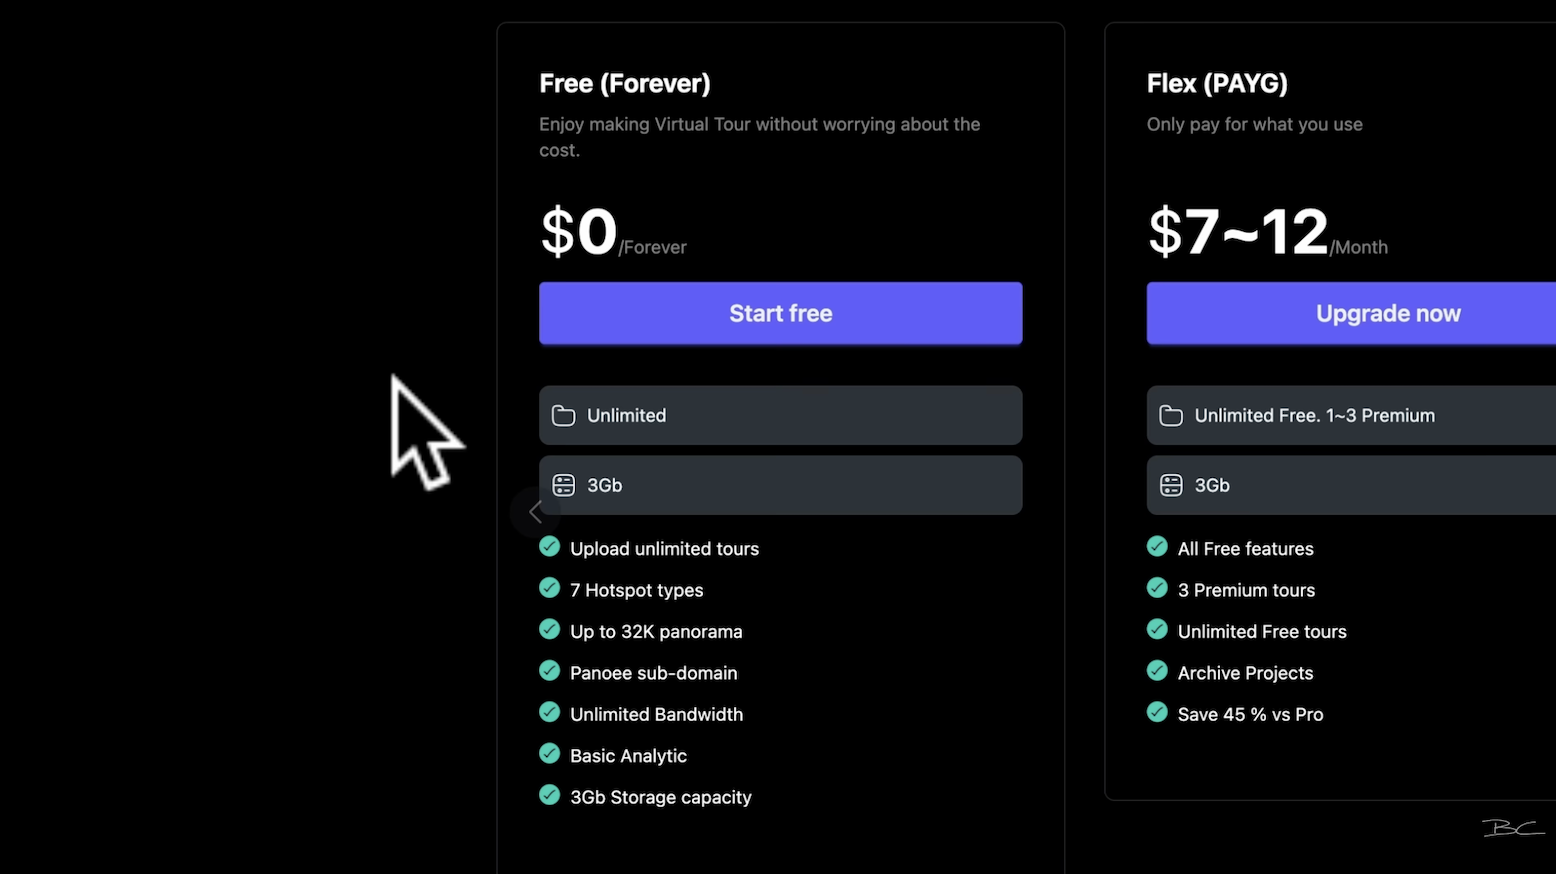
Simple Interface
Starting a project is really straightforward. You give your tour a name, upload your stitched 360° photos, and you’re ready to go. The layout feels familiar if you’ve used other virtual tour software: a big interactive preview in the middle, tools on the sides, hotspots and media at the bottom, and editing steps across the top.
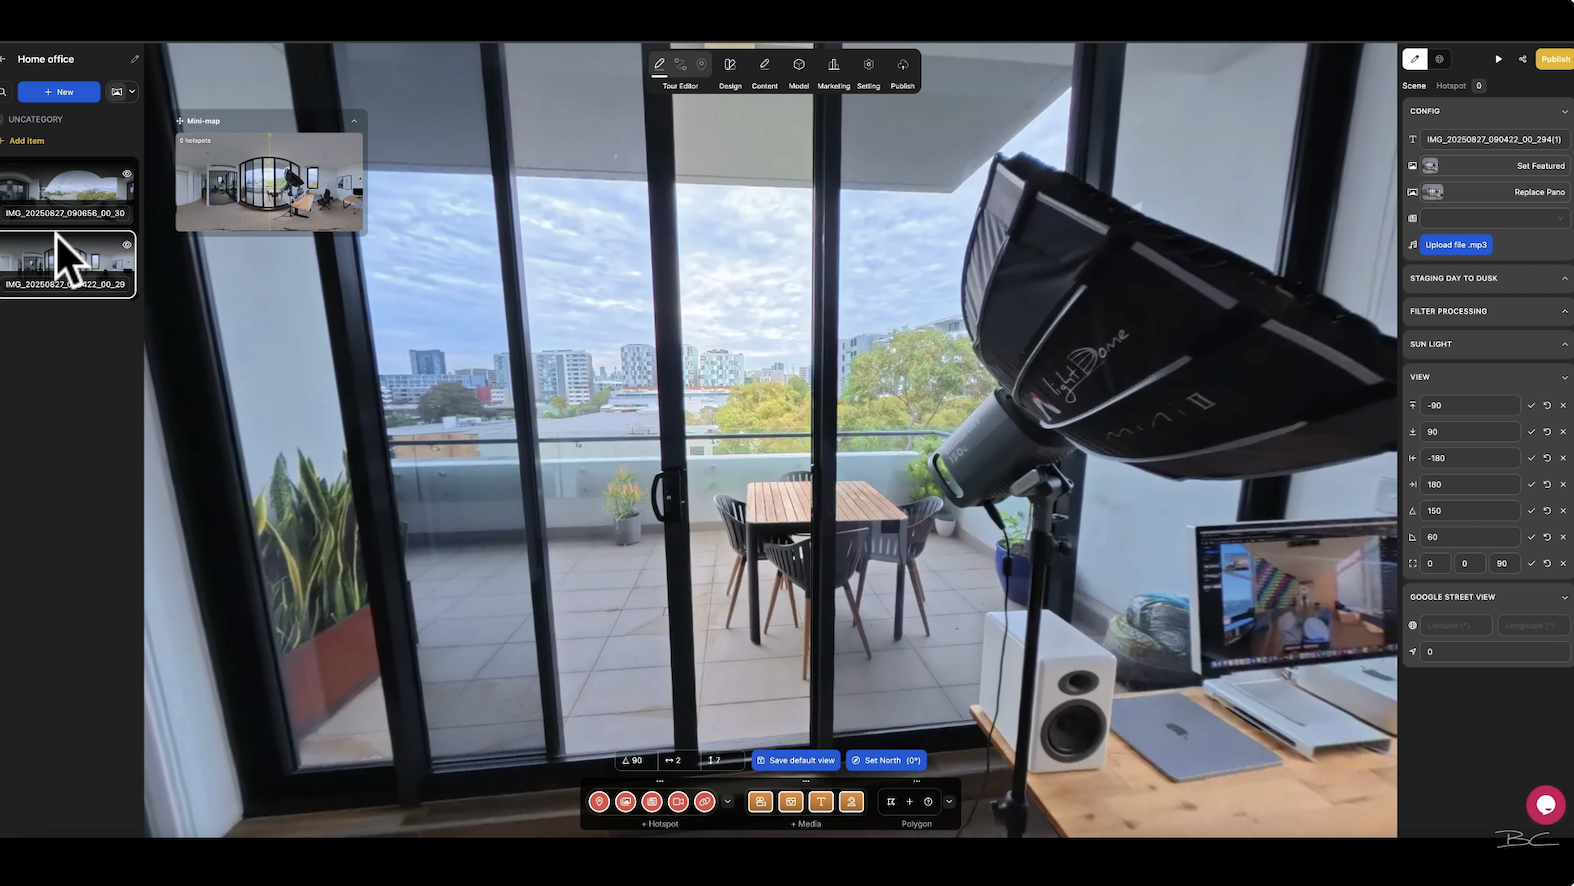
It might look a bit intimidating at first, but you’ll only use a few of the controls. You can zoom in and out to set your view, rename your shots so they’re easy to keep track of, and save a default view for each scene so your tour always opens in the right direction.
Hotspot Customisations
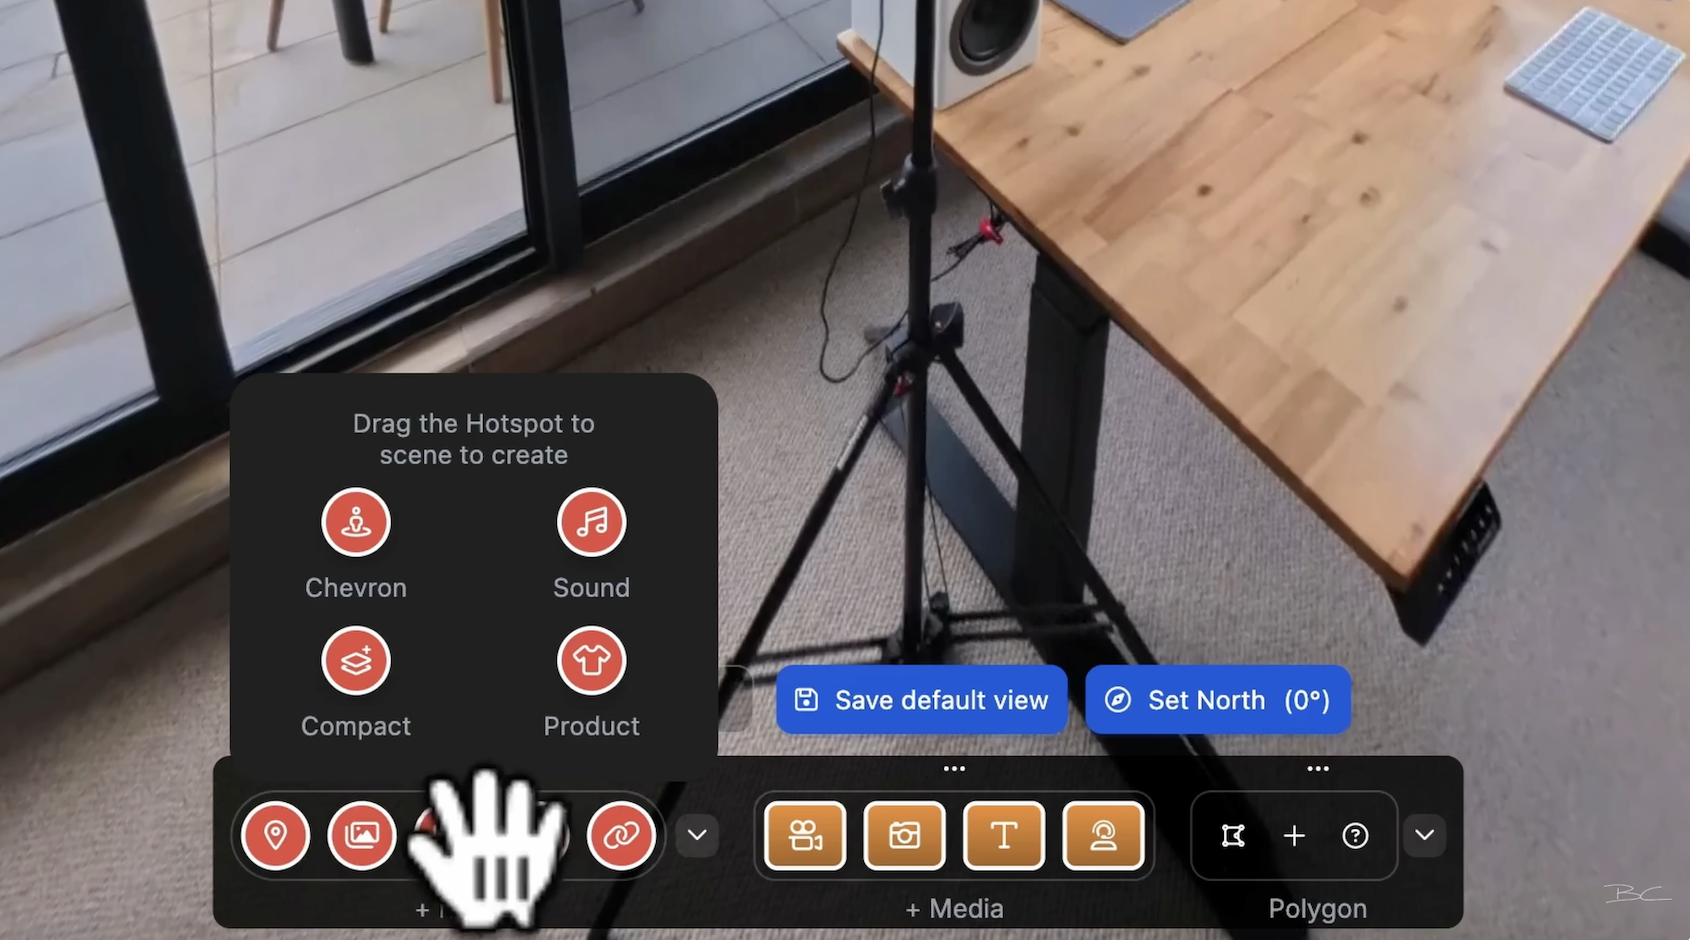
Connecting photos is simple — just drag the photo where you want the hotspot, drop it in place, and adjust as needed. You can rename hotspots, delete them, or move them around in seconds.
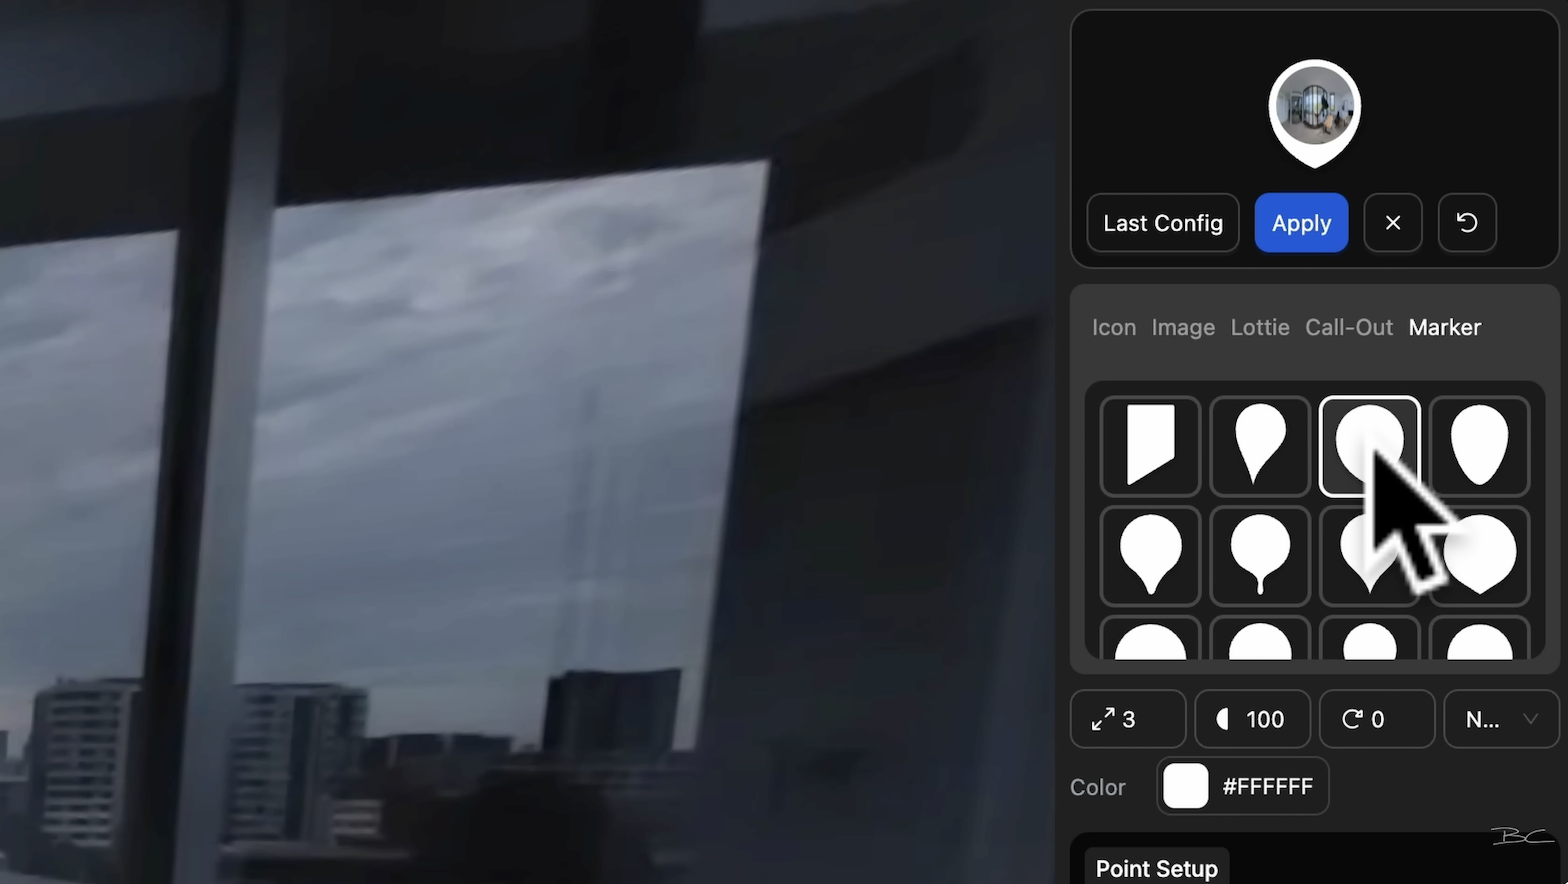
Something I’m definitely impressed with is how much control you get over customising these hotspots. You can switch to icons, images, or my favourite, the marker, which shows a little preview of the next scene. You can even resize and reposition them until they look just right.
Media & Interactive Elements
Panoee gives you a good mix of creative tools to make your tours feel more polished. You can set custom thumbnails with a single click, swap or update photos if you’ve re-edited them, and even add articles (little info pop-ups) to share extra details.
There are fun extras too, like adding background music or using the Day to Dusk feature if you’ve shot the same spot at different times. Filters and colour correction are there if you need them, but I’d always recommend editing your photos elsewhere (like Insta360 Studio) for the best results. With the Sunlight filter, you can add a natural lens flare that looks great in outdoor settings.
Beyond hotspots, you can add other media directly into your 360 photos—images, videos, text, or even a live chat box. Placing and editing these is simple and intuitive, and deleting them is just as easy. There’s also a Polygon option for more advanced edits.
Customisation Options
Even on the free plan, you get a surprising amount of control over your tour’s look. You can add your own logo, customise the nadir, adjust menu layouts, move thumbnails, and change fonts and colours.
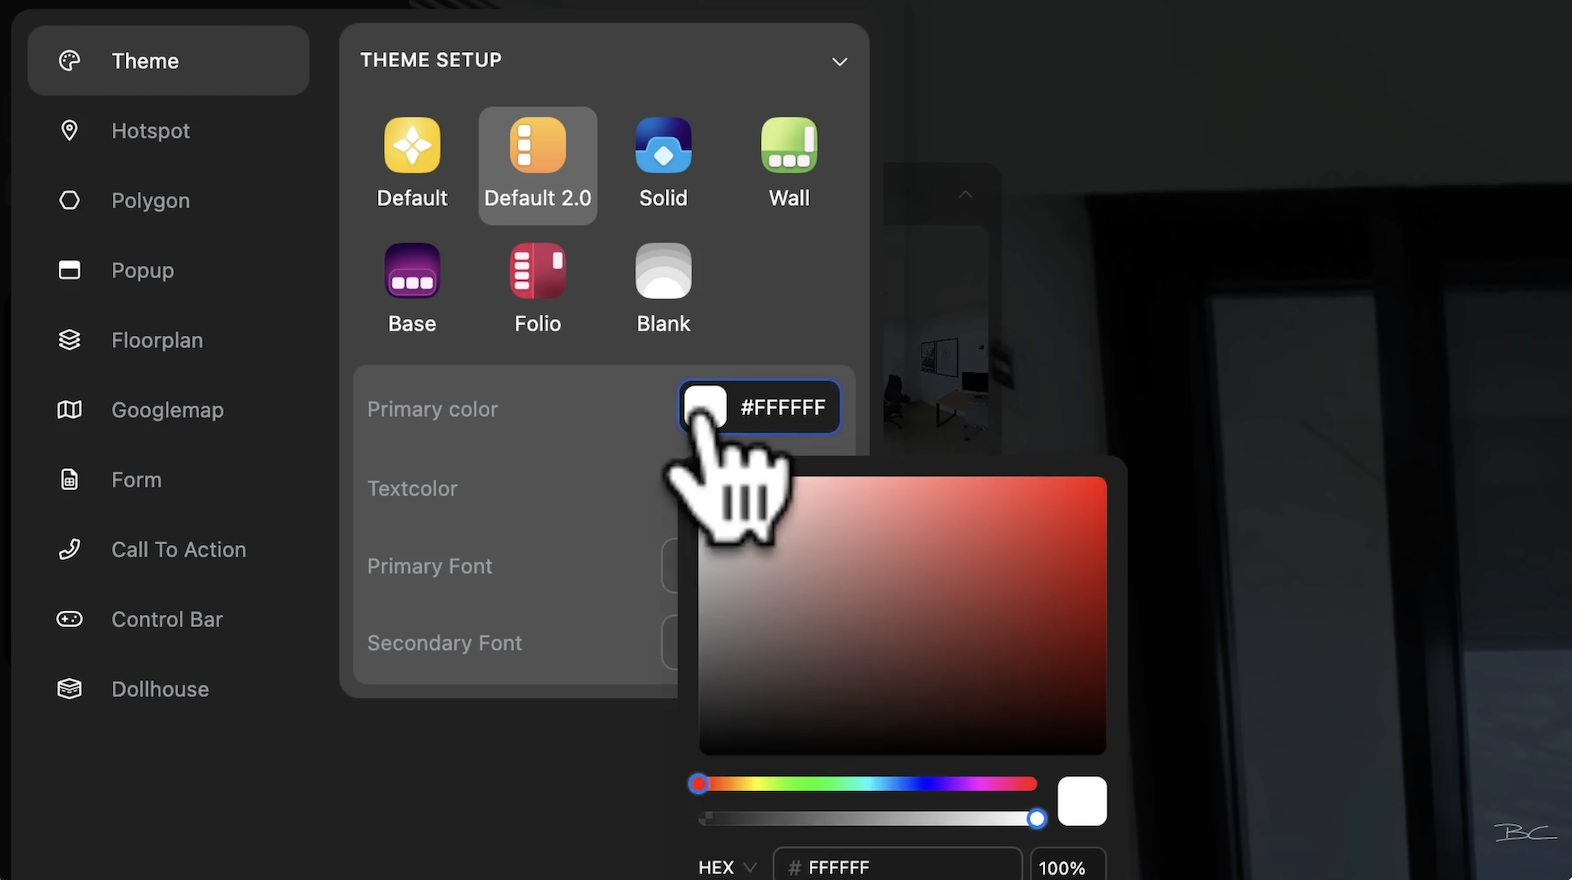
Some features—like Dollhouse view, Google Maps integration, and Floor Plans—are part of the paid plans, so for most beginners, sticking to the theme options is more than enough to create a visually appealing tour.
Before publishing, you can tweak a few key settings related to branding. For example, a “Created with Panoee” logo in the bottom-left corner can either be turned off entirely or customised to match your branding.
You can also add a custom nadir—an image that stays anchored in the 360 view. I created a simple circular logo in Canva with a transparent background, and once uploaded, it moved naturally with the tour. You can even adjust its size, making it smaller or larger depending on your preference.
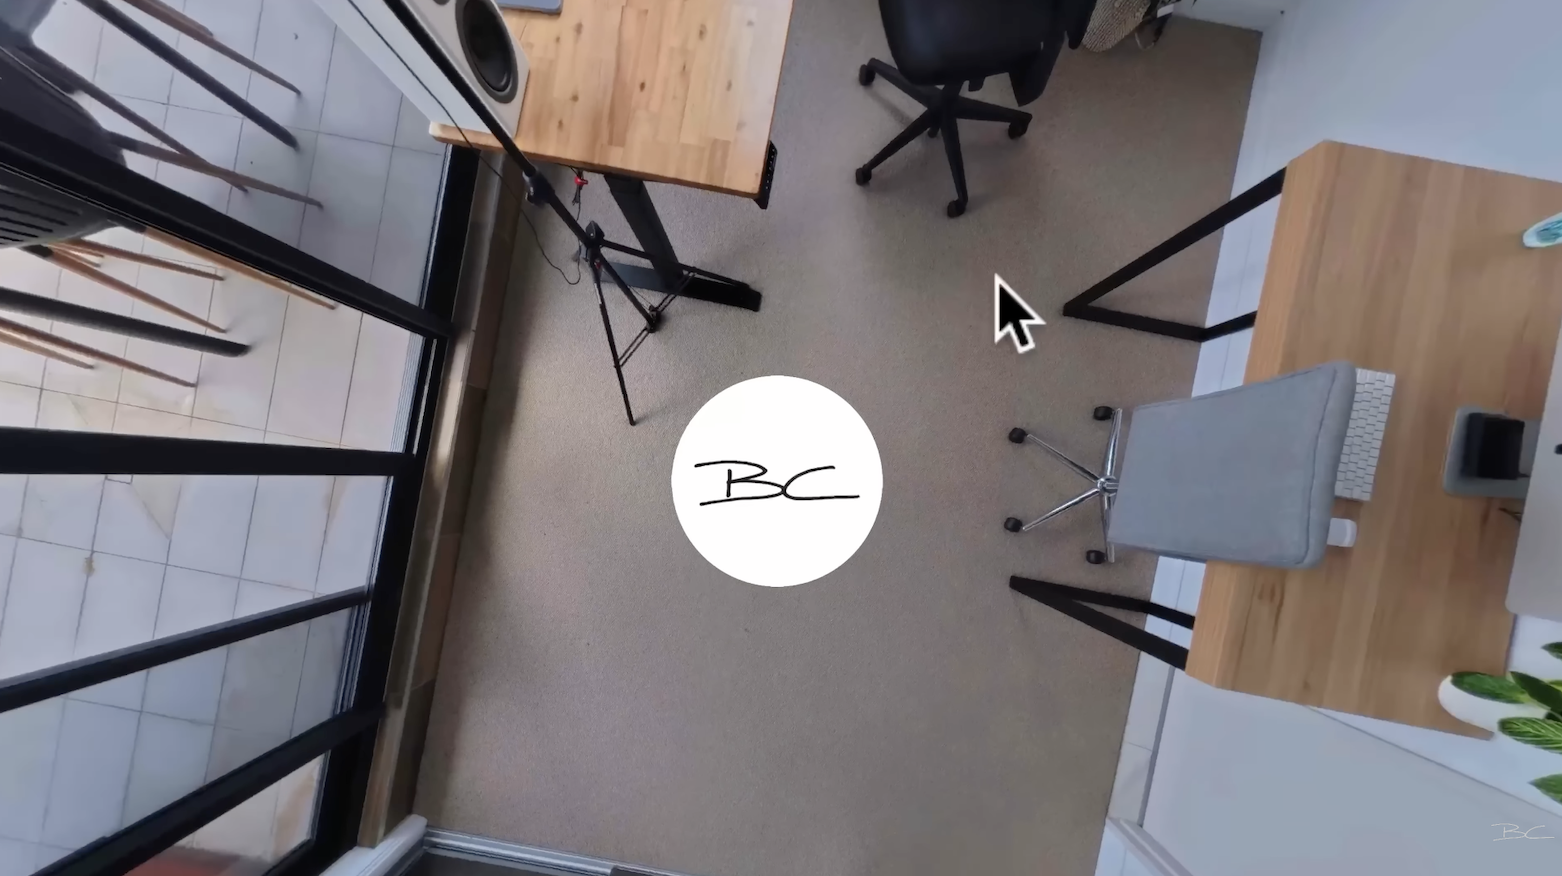
Photo Adjustments & View Limits
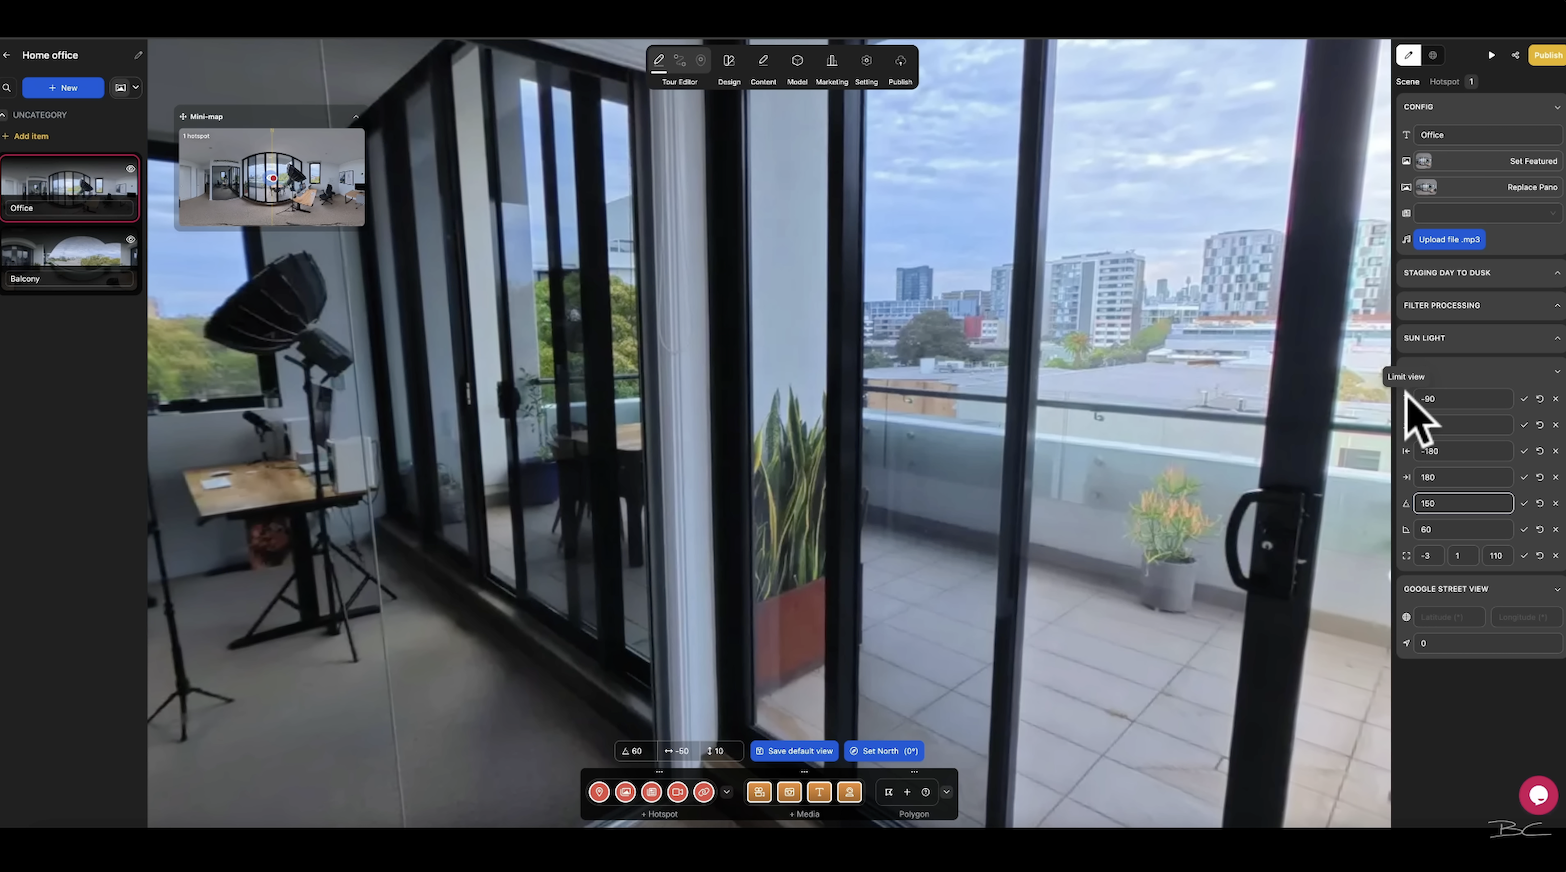
With virtual tours, you need to be careful—zoom out too far and the image can look distorted and fisheye, zoom in too close and it can highlight lower-quality areas. Panoee makes this simple with intuitive controls, letting you set limits on zoom quickly and easily. I found it really straightforward to dial in the right settings so the tour feels natural, and the changes apply instantly.
Consistency across photos is easy too. You can replicate settings from one image to the next without any hassle, which saves time and keeps the tour looking cohesive.
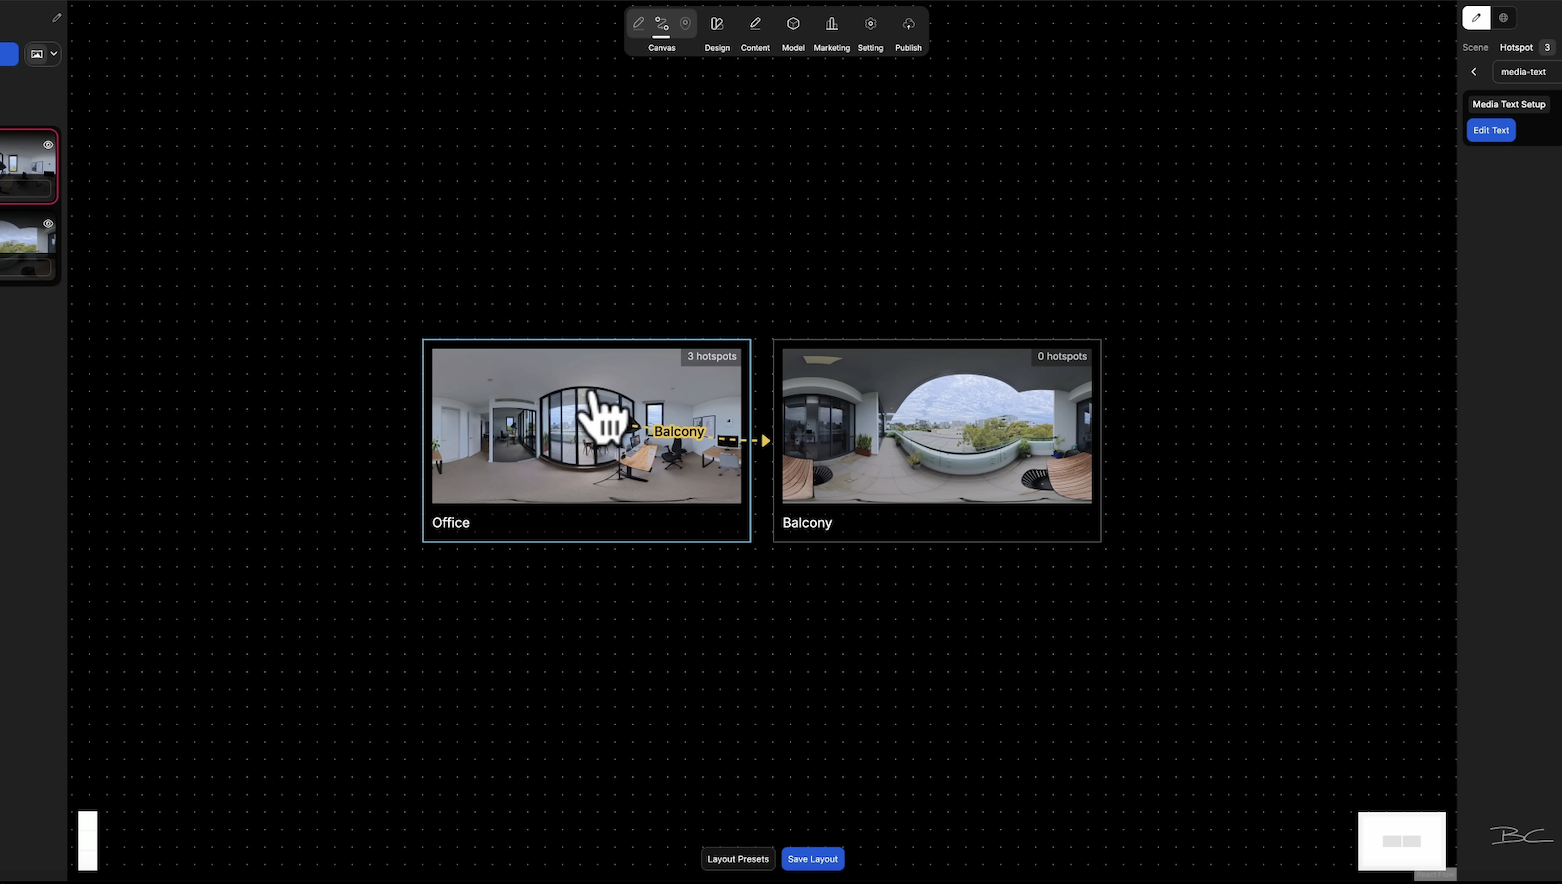
Tour Overview
This is a feature that isn't offered by most platforms—you can see a visual map of your whole tour. It makes it much easier to plan or edit when you’ve got multiple shots connected.
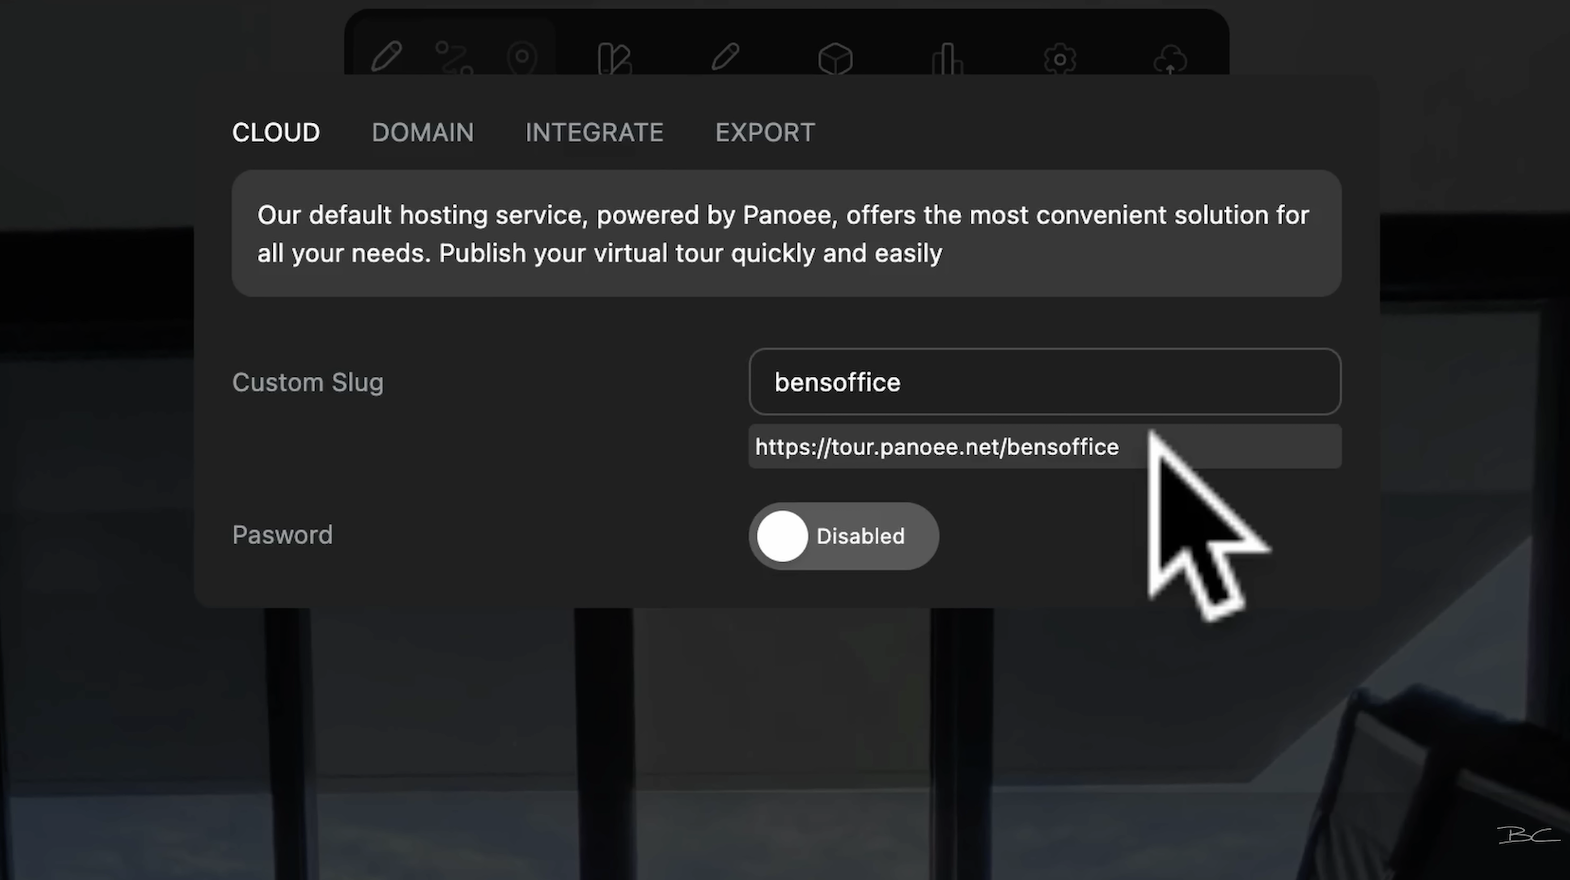
Easy Publishing
Once your tour is ready, publishing is simple. Just hit publish, set it to public, and your tour is live. What I really like is that even on the free plan, you get a custom subdomain (e.g. tour.panoee.net/bens-office), which makes sharing easy and professional. Some advanced URL options do require a paid upgrade, but the free subdomain alone is more than enough to get started.
Final Thoughts
Panoee is a fantastic starting point if you’re new to virtual tours. You don’t need to invest money upfront, and you’ll still get nearly all the features a beginner or intermediate creator would need.
It’s not a one-size-fits-all solution. If you eventually need advanced options like a dollhouse view or deeper branding customisation, platforms like 3D Vista, Kuula, or TeliportMe might be better. But for anyone dabbling, learning, or even creating tours for small businesses, Panoee gives you more than enough to start charging for your work.
And when you are ready to turn your tours into a business, that’s where my Virtual Tour Pro course comes in. Inside, I’ll show you step by step how to create professional tours, find businesses that will pay for them, and what to say to land your first client. If you follow the course step by step, you'll make back the entire course cost with your very first paid tour!
Blog Author