How to Create a Virtual Tour with the Insta360 X5 In 2026 (Free & Easy)
Dec 23, 2025
If you're looking to create a 360 virtual tour using a camera like the Insta360 X5, the wrong workflow can quickly waste both time and money. Poor shooting settings, the wrong editing software, or low-quality images can make great spaces look amateur.
In this guide, I’ll show you how to get the best possible image quality from the Insta360 X5 while keeping things fast and efficient, using the best free software from shooting through to building your virtual tour.
This article offers a preview of my Virtual Tour Pro course, where I teach the complete workflow for creating professional virtual tours you can charge for — even with a consumer 360 camera like the X5.
Gear Needed for a 360 Virtual Tour
I'll be using the Insta360 X5. I’ve linked it here if you're looking to purchase one, and it may even come with a freebie or two!
Aside from the camera, the only other essential piece of gear is a monopod. While travelling, I wanted to pack light, so I combined:
-
A selfie stick from the Best 360 Monopod
Because most accessories use a standard 1/4-inch tripod thread, compatibility between brands is rarely an issue.
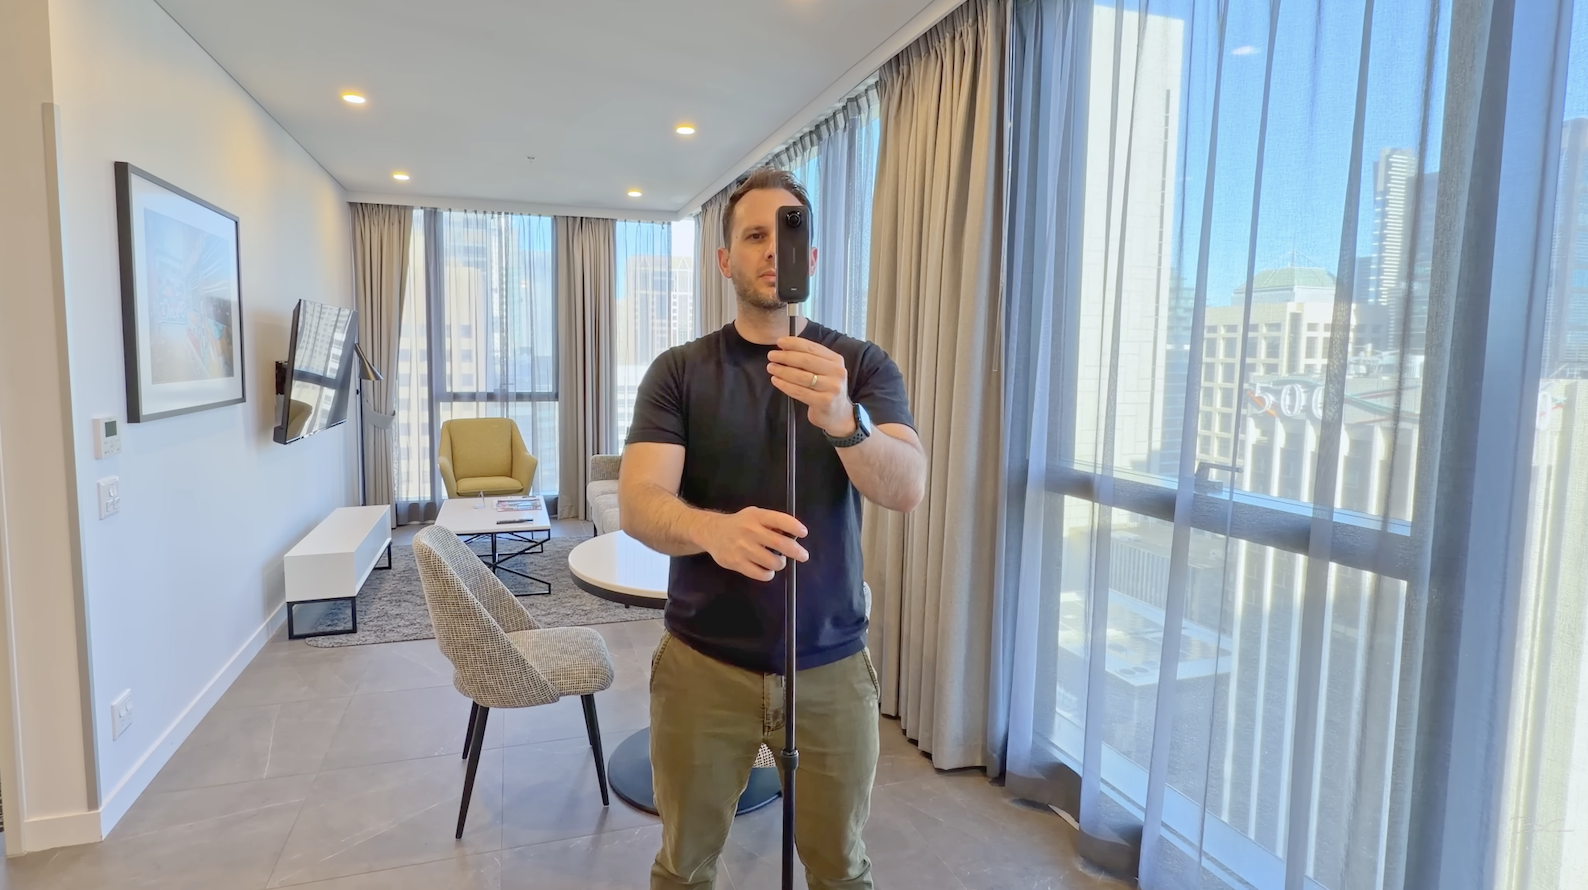
If you’re looking to invest in a dedicated option, the Bushman Monopod Pro is a solid higher-end choice, while the Best360 Monopod is a more affordable alternative. Whichever option you choose, make sure the camera extends to eye level, as this creates the most natural viewing height in a virtual tour.
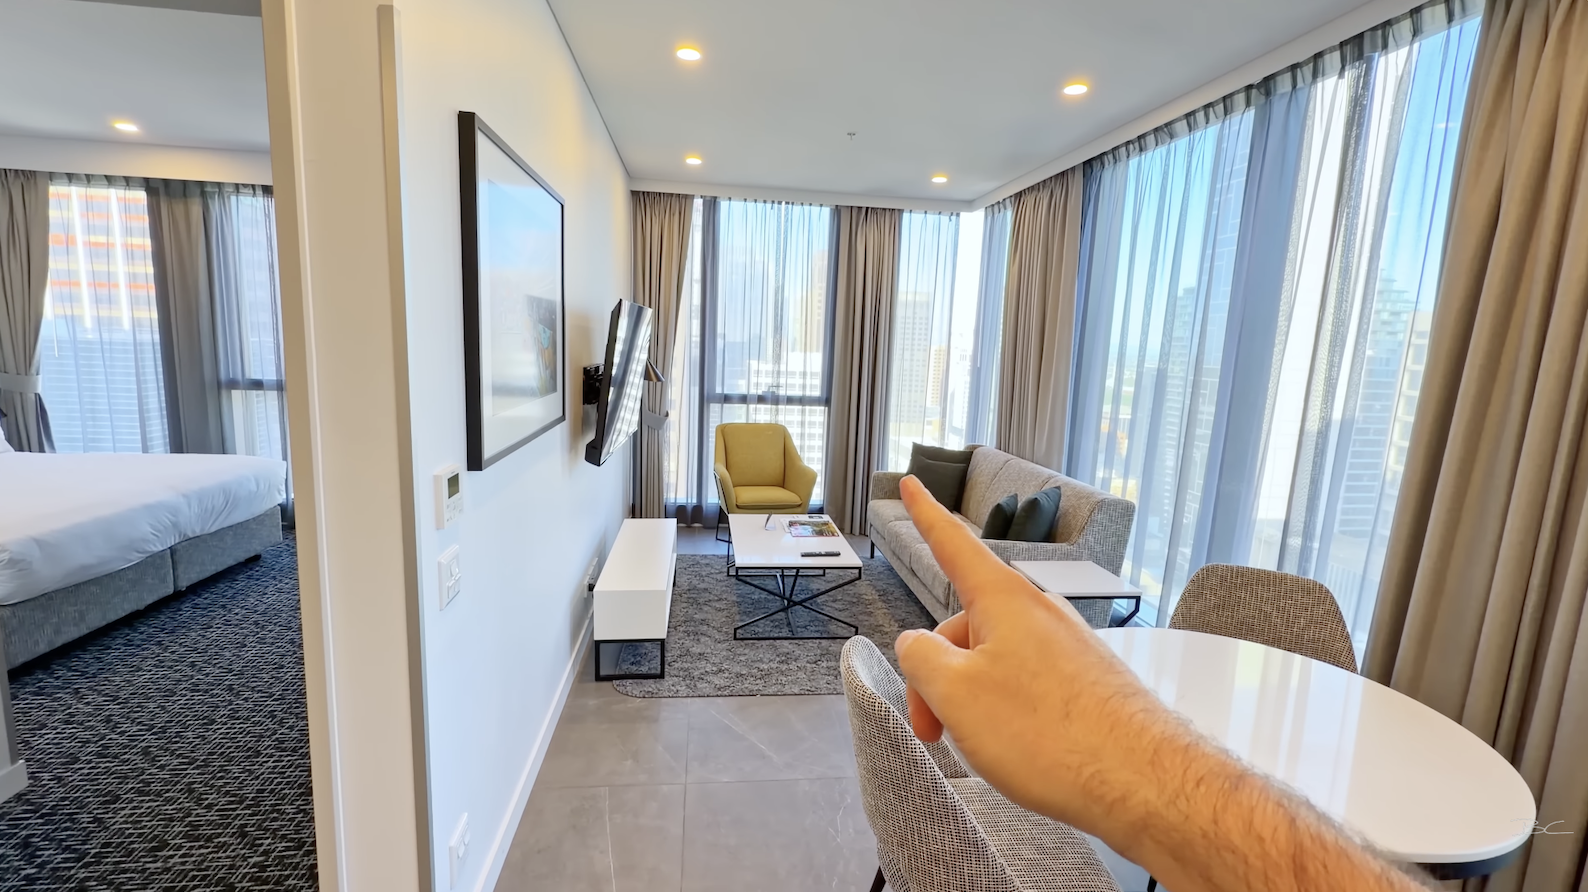
Preparing the Space Before Shooting
Before turning the camera on, it’s important to make the space look presentable. Even if the location is already tidy, it’s worth doing a quick walk-through to remove clutter, hide rubbish bins, fluff pillows, and tidy any surfaces that might distract from the room.
To help the Insta360 X5 expose the space properly, you’ll also want to:
-
Open all internal doors to create clear sightlines
-
Open curtains and blinds as much as possible
-
Turn on interior lights, even during the day
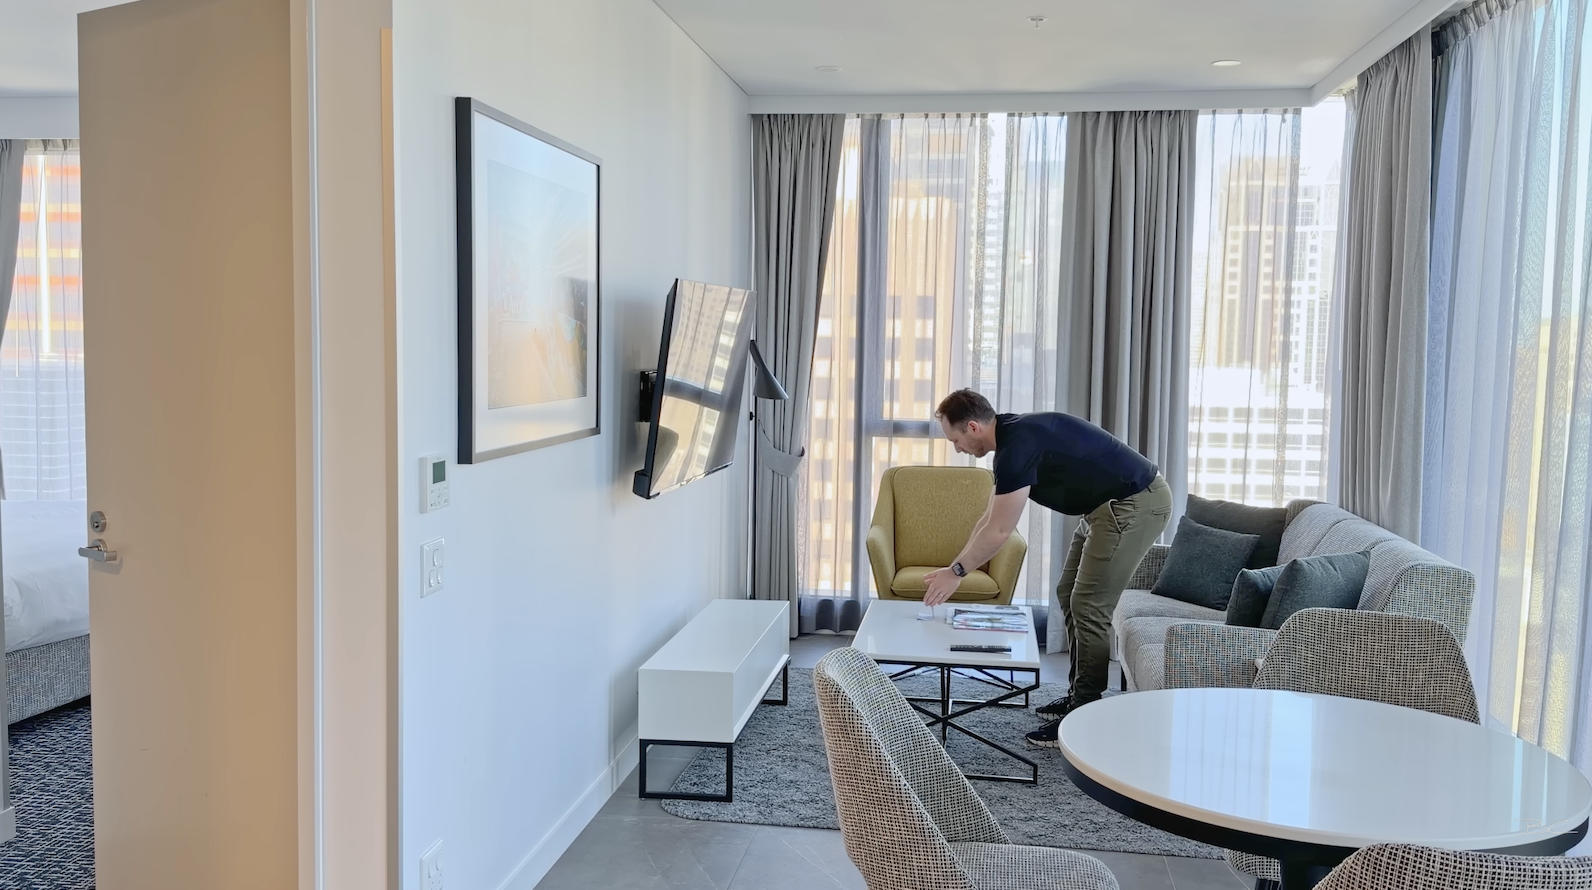
These small steps make a noticeable difference to overall image quality and how easily the virtual tour flows from room to room.
Best Insta360 X5 Settings for Virtual Tours
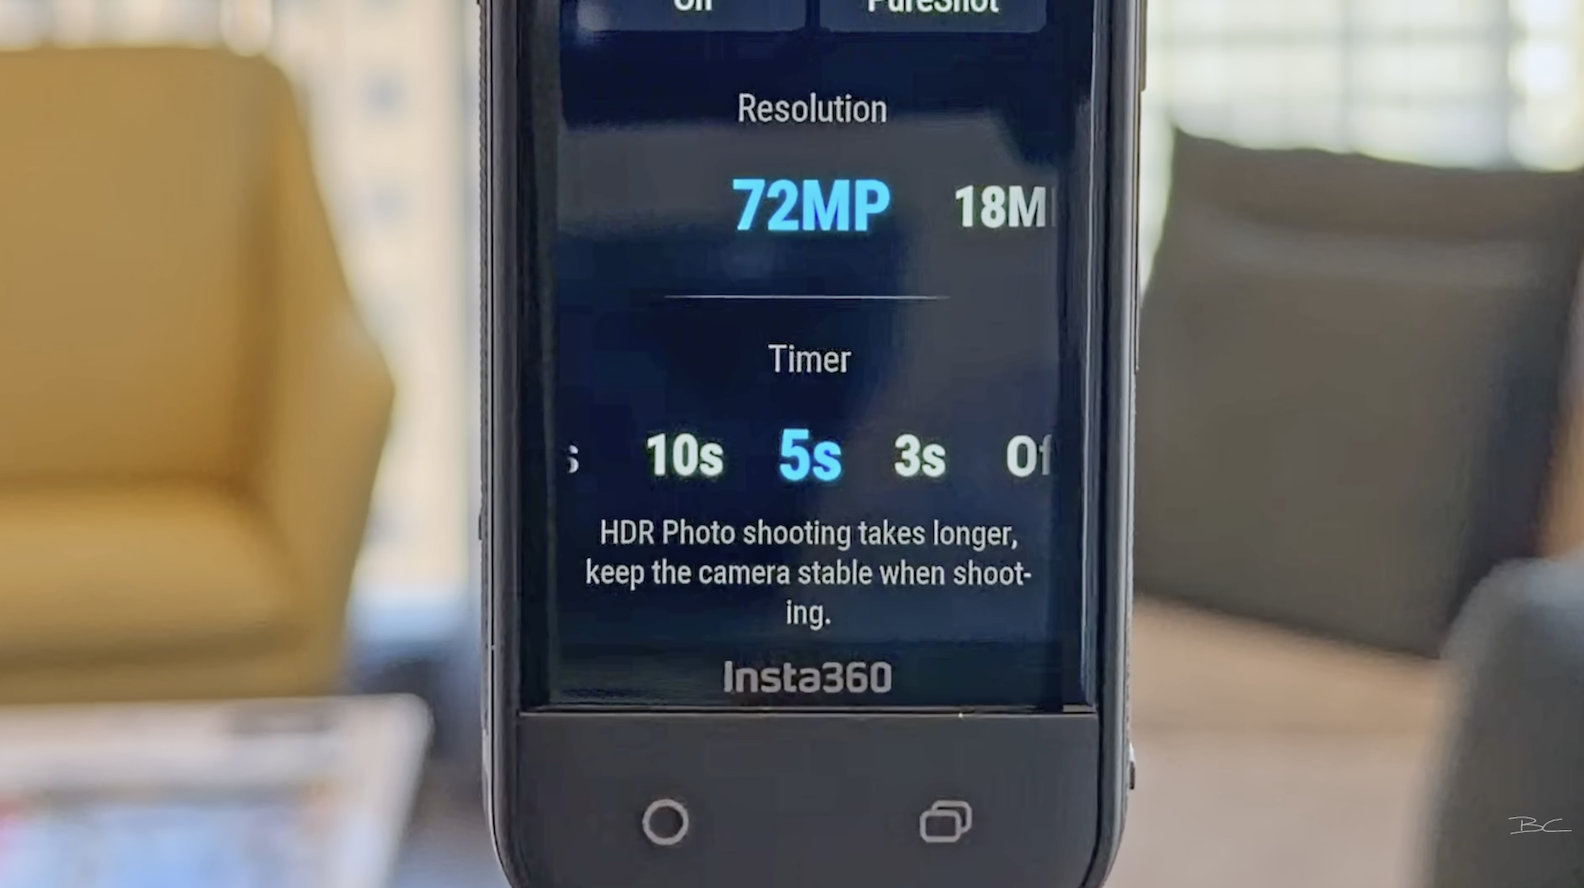
Once the camera is on, switch to Photo Mode, confirm the resolution is set to 72 megapixels, and enable the self-timer. A five-second timer works well, as it gives you enough time to move out of frame after pressing the shutter.
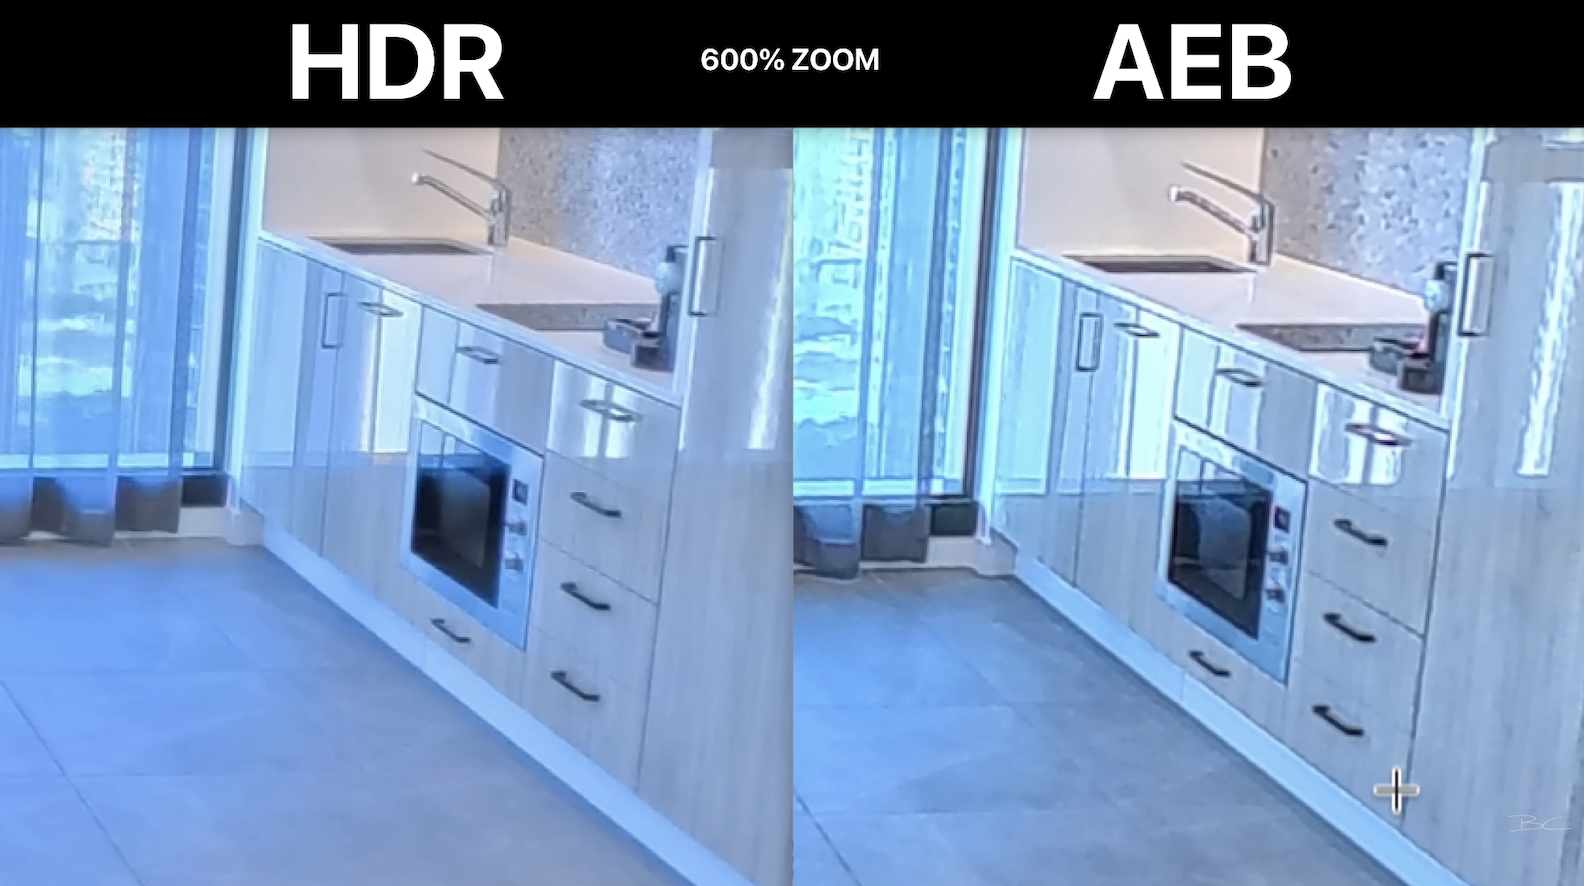
One of the biggest challenges when shooting interior 360 photos is balancing bright windows with darker interiors. Because of this, you should avoid leaving the camera in standard photo mode. Instead, enable the HDR photo option at the top of the screen.
While many real estate photographers use auto exposure bracketing, the Insta360 X5 produces better results with HDR. Bracketing tends to introduce more noise, reduce texture quality, and slightly distort straight lines, especially around high-contrast areas. HDR photos are cleaner, sharper, and much faster to capture — which becomes especially important when shooting larger locations.
For best results, turn HDR on and enable PureShot Plus RAW. This creates a backup DNG file that can help recover highlights or shadows if needed, although in most cases the JPEG files will be more than sufficient.
How Many 360 Photos to Take Per Room
In most situations, you only need one 360 photo per room. The goal of a virtual tour isn’t to replicate Google Street View, but to capture a strong hero shot that clearly represents the space.
Larger open-plan areas may justify a second photo if there’s a meaningful change in perspective, such as a living area on one side and a kitchen or dining area on the other. Smaller rooms like bedrooms, bathrooms, and hallways typically don’t benefit from multiple shots.
It’s also important to maintain a clear line of sight between each shooting position. This ensures smooth navigation when the tour is assembled and prevents awkward transitions.
Monopod Placement and Shooting Tips
When placing your monopod, pay attention to the floor beneath it. Patterned tiles or carpet seams can make tripod removal difficult later on, so placing the monopod in the centre of a tile is ideal whenever possible.
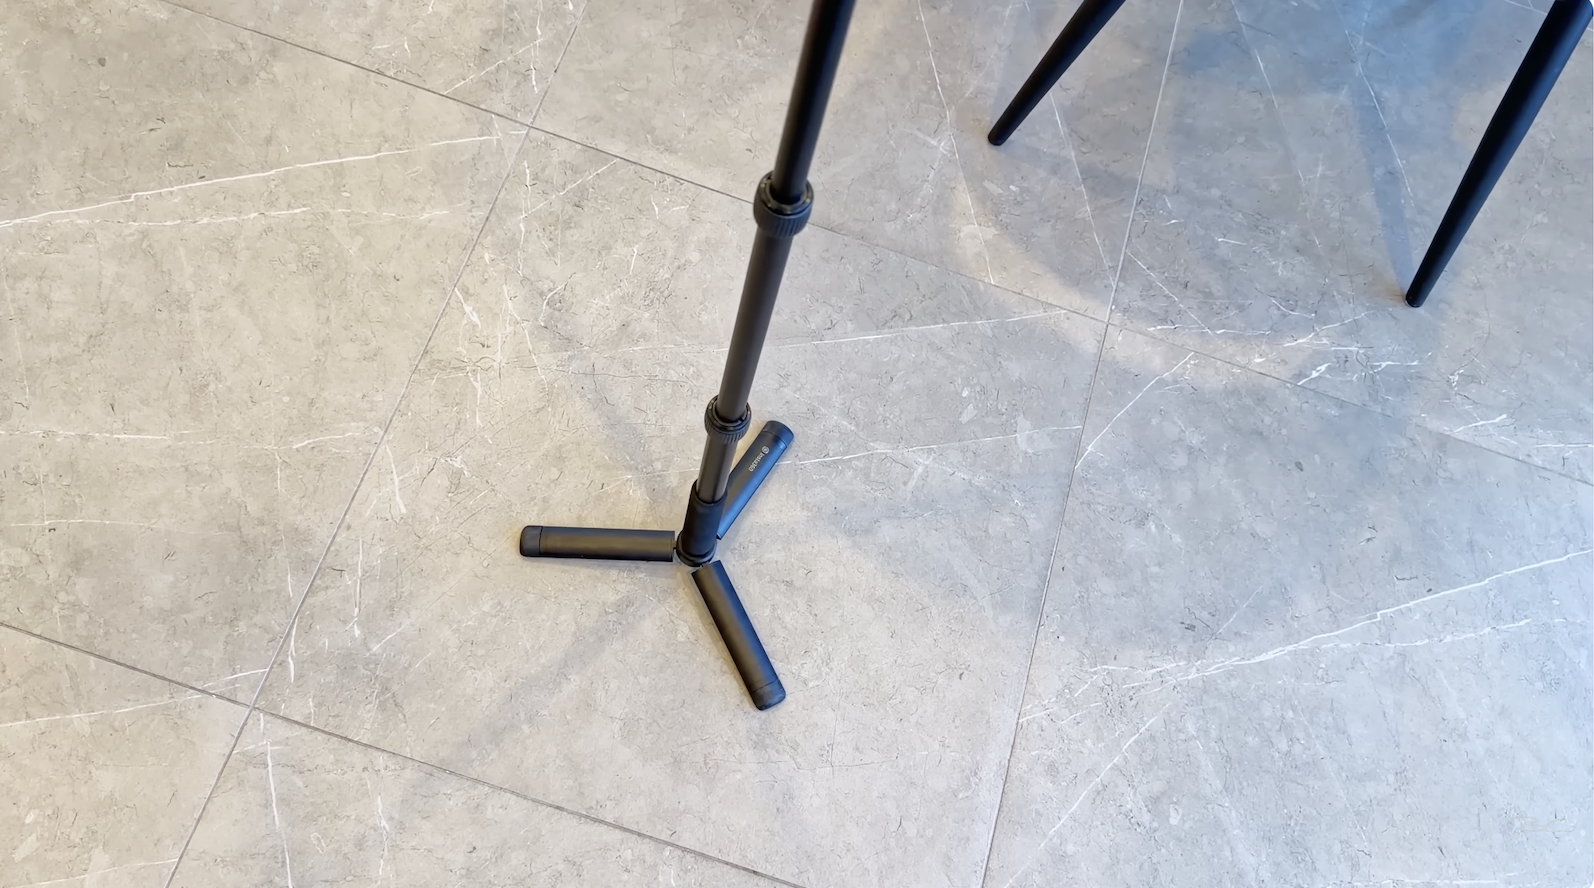
It’s also worth remembering that the sides of most 360 cameras are slightly less sharp than the front of the lens. Point these softer areas toward less important parts of the scene, such as blank walls or window frames, and keep key features directly in front of the camera.
With the self-timer enabled, press the shutter, move quickly out of frame, and wait for the photo to capture. When moving to the next position, aim to place the camera at least six feet away so the perspective feels noticeably different in the finished tour.
Reflections and Final Checks
Before taking each shot, always check for reflections. Even without obvious mirrors, reflective surfaces like TVs and windows can easily reveal the camera or monopod. If you can adjust the camera position on location to minimise reflections, it’s always worth doing so to save editing time later.
Some reflections — particularly in bathrooms — are unavoidable and can be fixed in post-production. As a general rule, anything you can fix on location will save you time in editing.
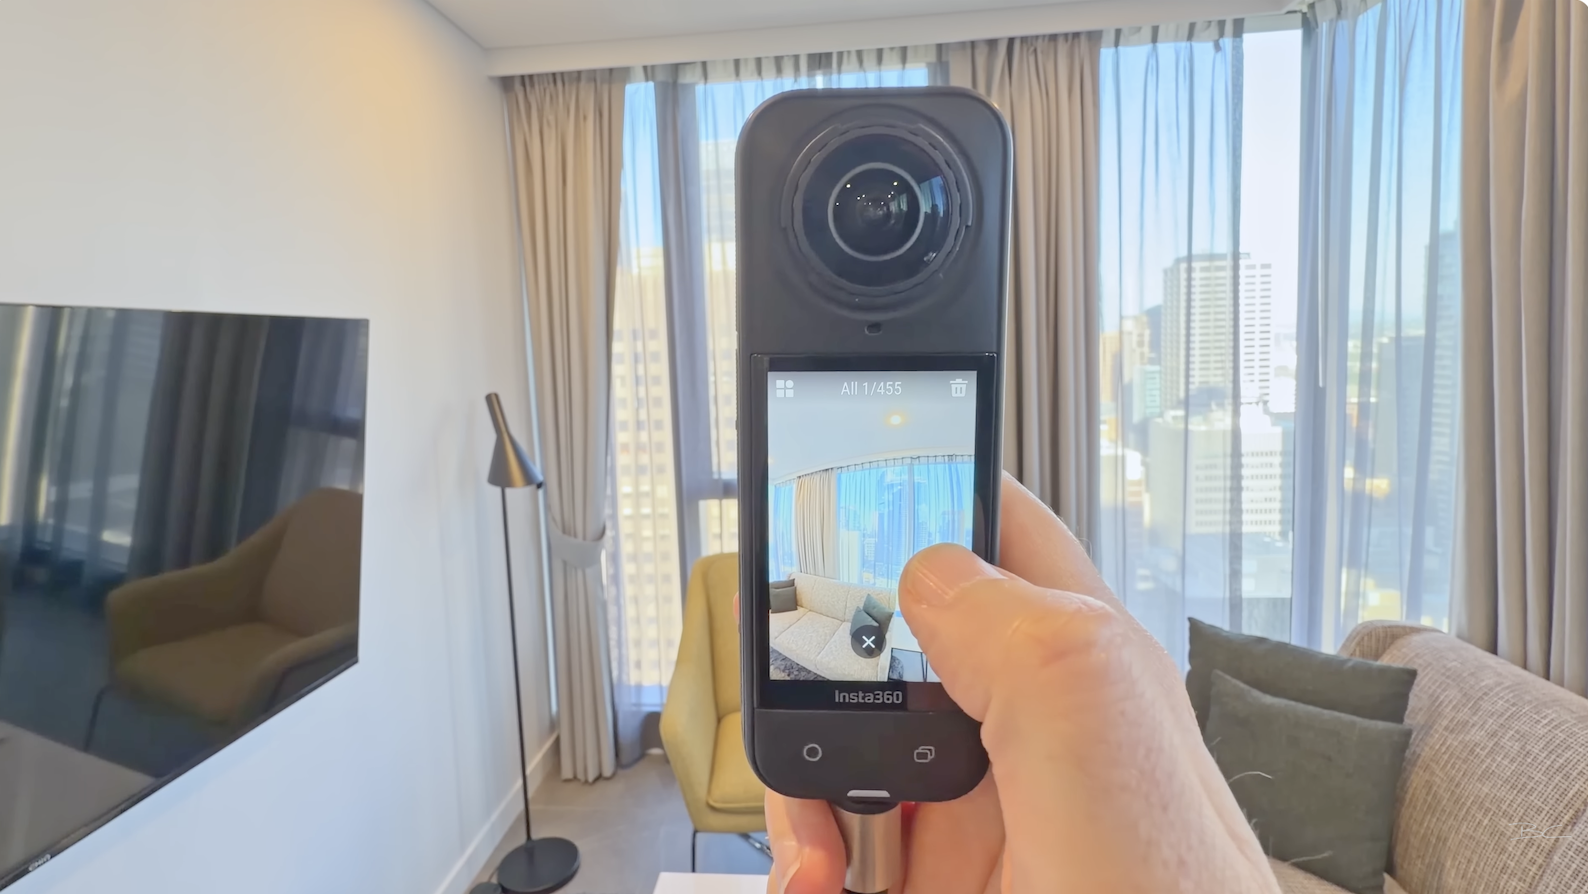
Before leaving the location, review a few images on the camera or your phone. This is your final chance to confirm exposure, composition, and that nothing unintended is visible in the frame.
Editing 360 Photos with Insta360 Studio
The first step in editing is Insta360 Studio, which is free and likely already installed if you own the camera. Once you import your images, stitching happens automatically.
You’ll see both JPEG and RAW versions of each photo. If the JPEGs look good — which they usually do — there’s no need to work with the DNG files.
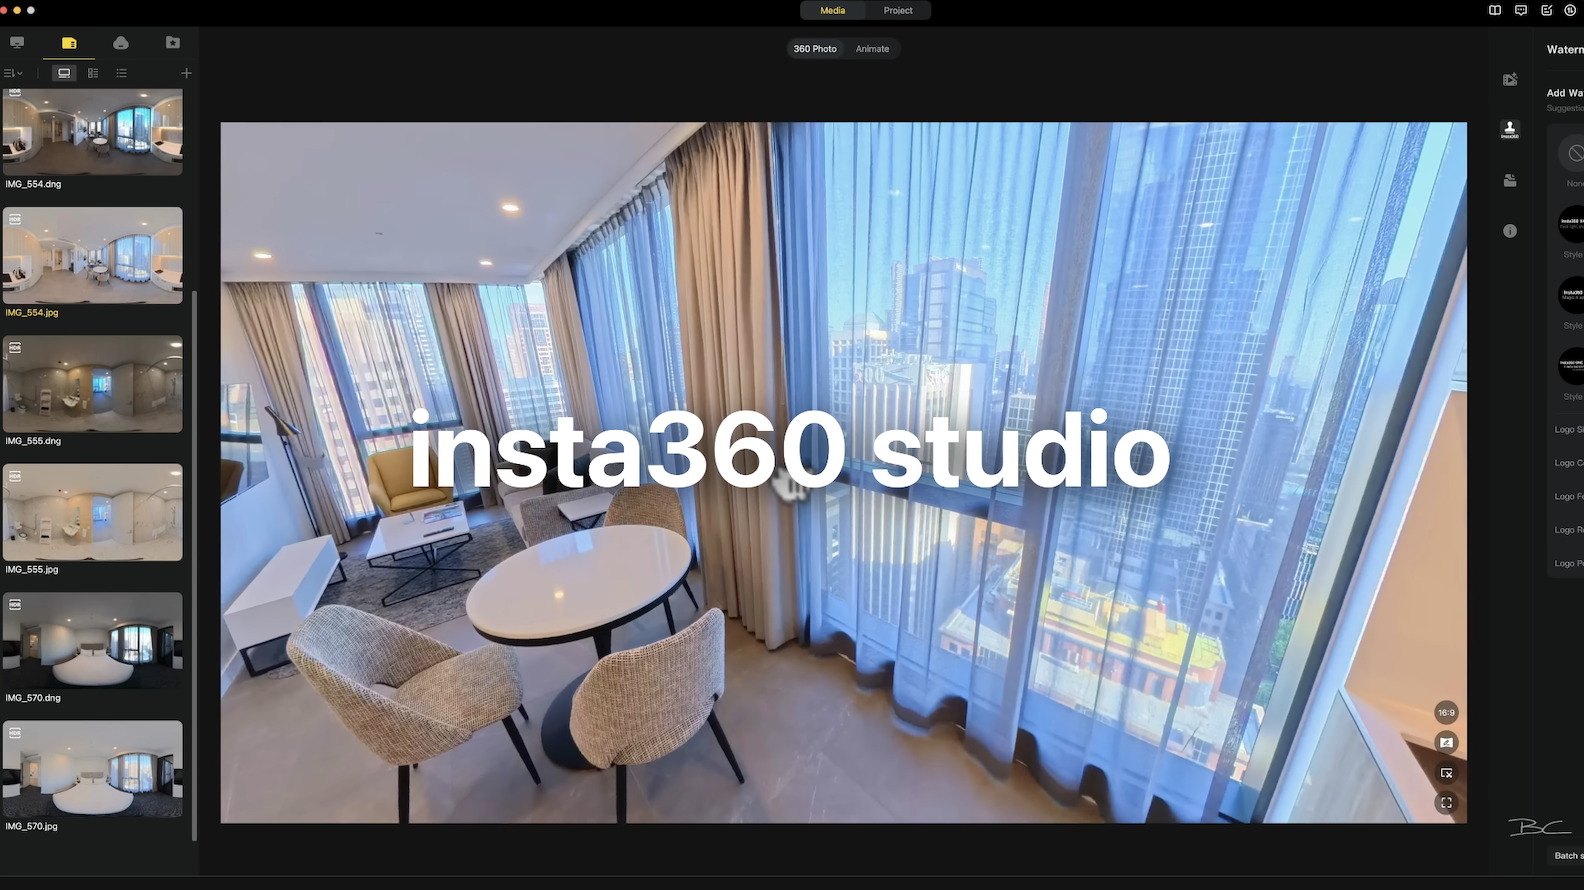
Basic colour correction can be done directly inside Insta360 Studio. I usually reduce highlights to control bright windows, add a small amount of contrast, and slightly increase vibrance. The changes are subtle but help the image feel more polished without overprocessing it.
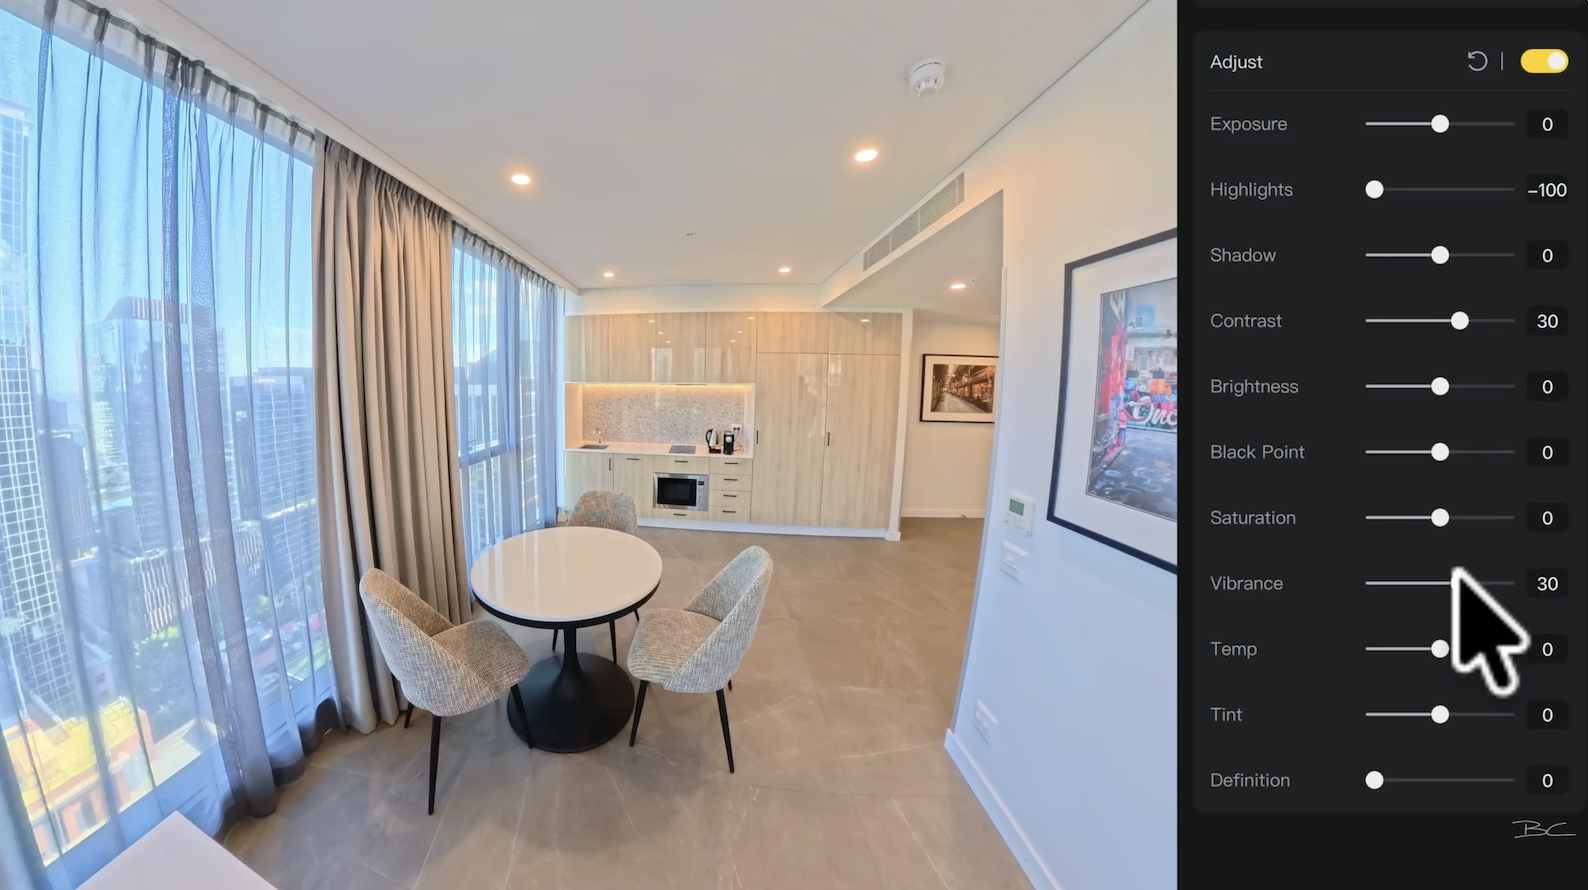
If you’ve taken multiple shots in the same space, you can use batch settings to apply the same adjustments across several images at once, which is a major time-saver.
Exporting and Removing the Tripod
When exporting your images, select all the files you want and choose Export 360 Photo at Original Resolution, making sure automatic horizon levelling is enabled. Avoid exporting reframed photos, as these are not full 360 images.
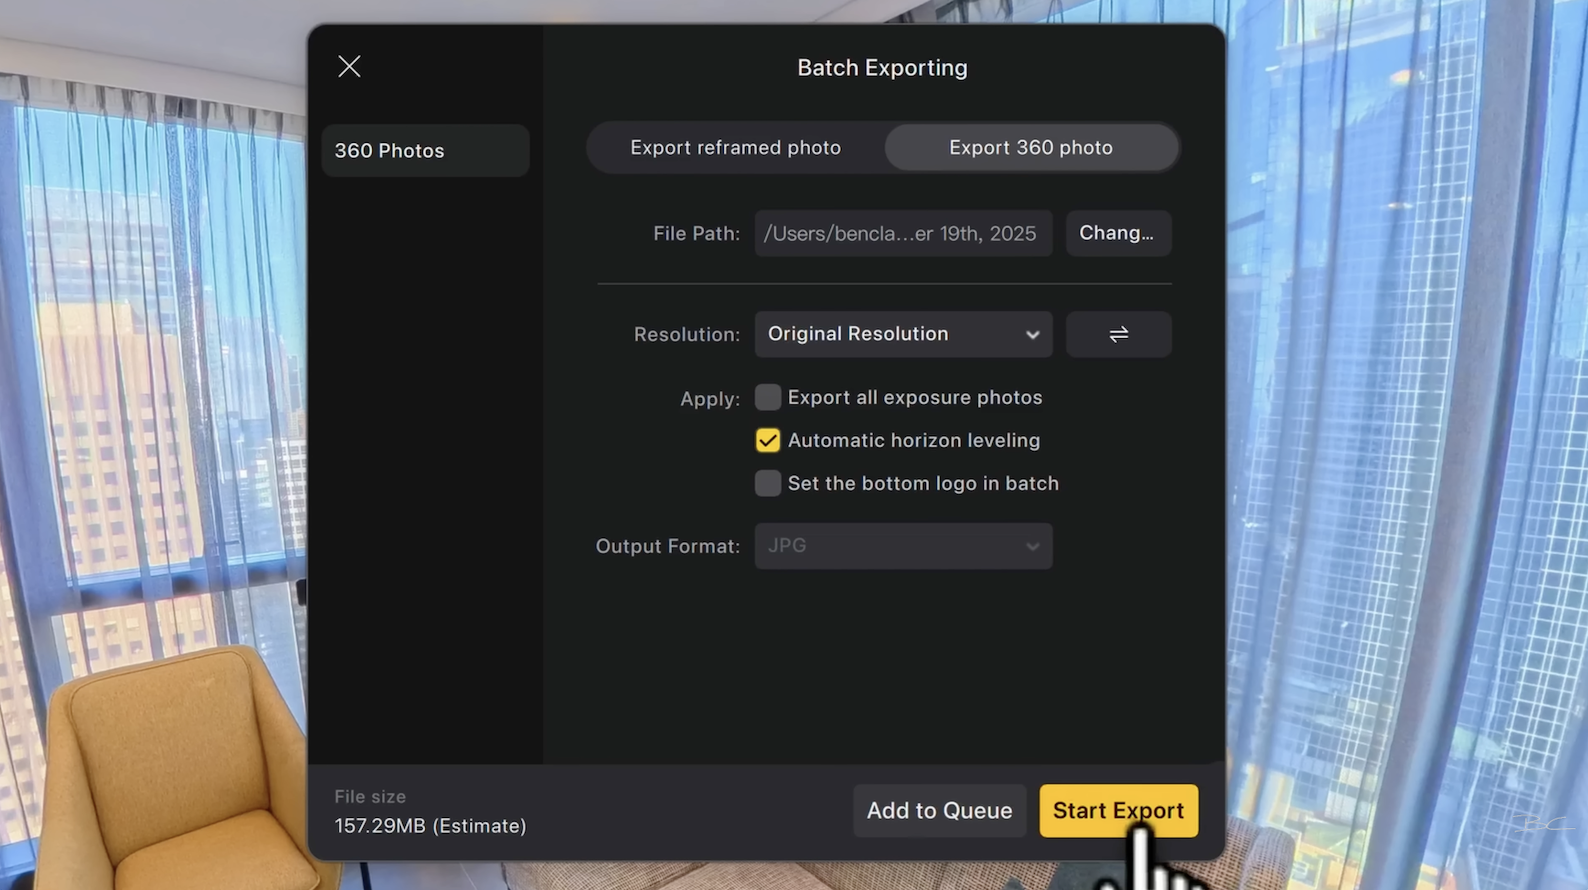
If you want a quick solution for hiding the tripod, Insta360 Studio allows you to add a custom nadir image, such as a logo, to cover the bottom of the frame. This works well for personal projects but may not suit every client.
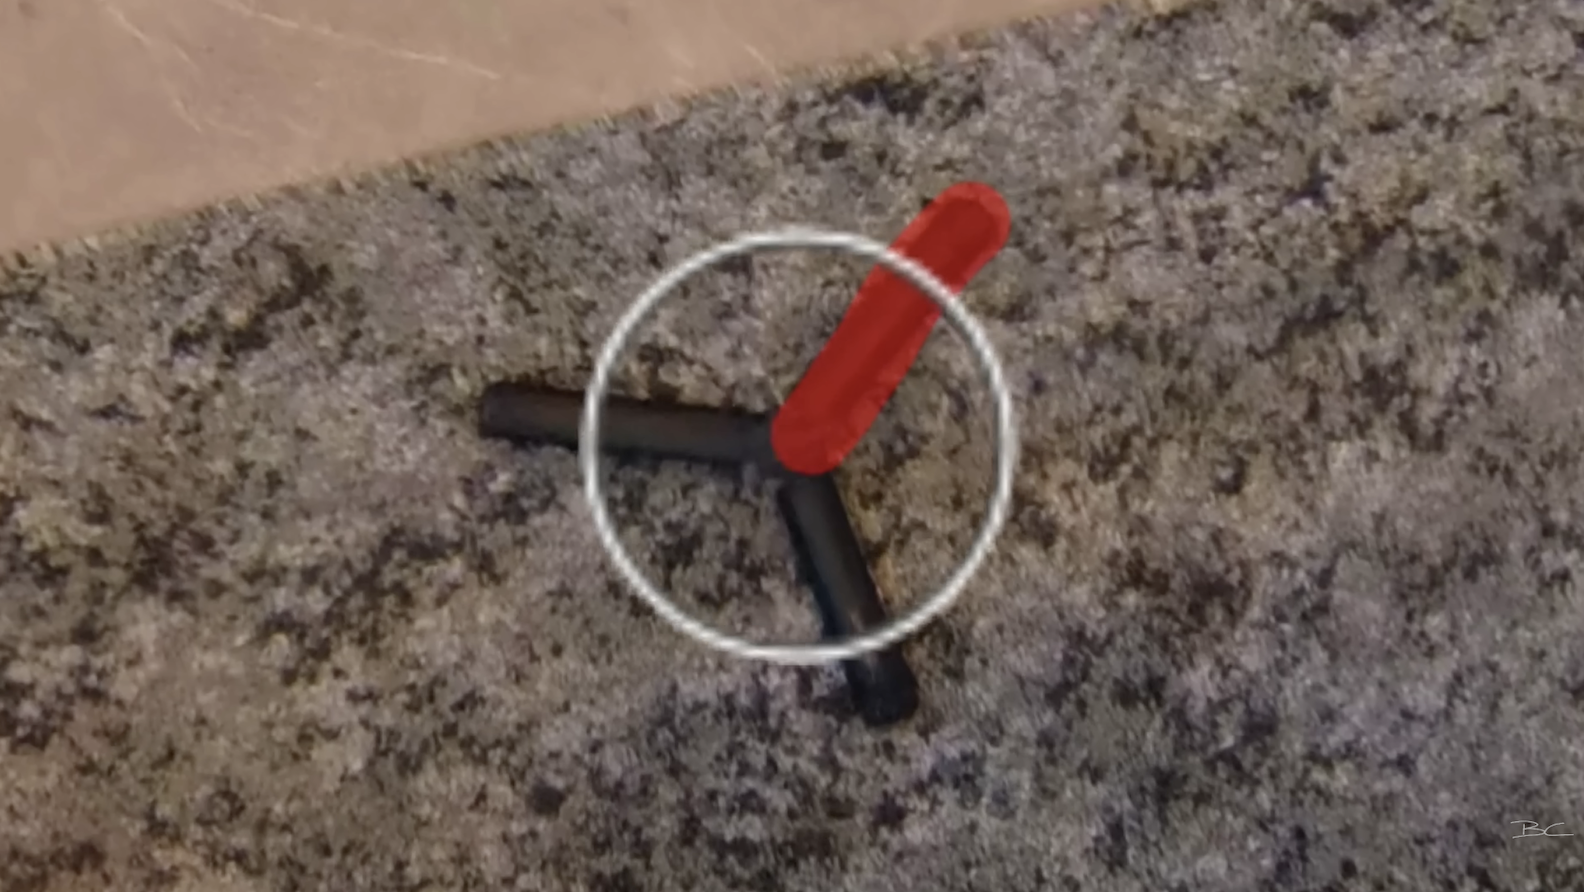
For a cleaner result, you can remove the tripod using Affinity, which is now free after being acquired by Canva. By switching to live projection and using the inpainting brush, you can remove the tripod, reflections, or small blemishes directly inside the 360 image.
Building Your Virtual Tour with Free Software
If you’re just getting started with virtual tours, the platform I recommend is Panoee. It’s beginner-friendly, free to use, and lets you build an entire virtual tour from start to finish without a subscription. Paid plans are optional, but most features are available on the free tier.
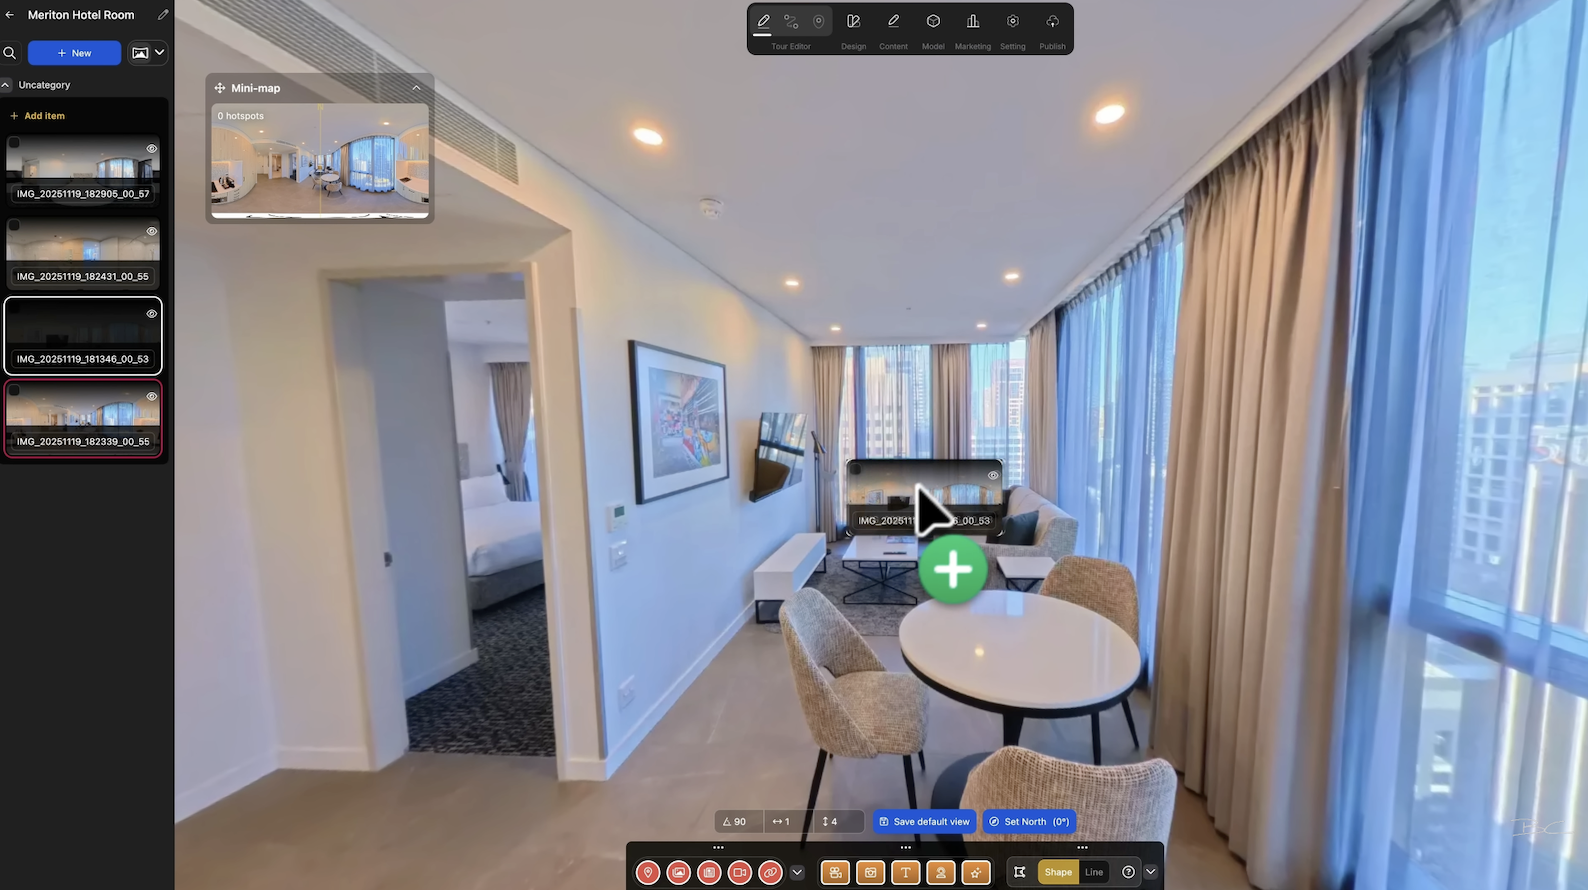
Once you’ve created an account, you simply start a new project, upload your 360 images, and connect them by dragging one scene to another. Hotspots are created automatically and can be renamed, styled, and repositioned as needed, making the whole process quick and straightforward.
Blog Author

Ben Claremont
360 Camera Expert
Recent Posts