Avoid These 360 Video Mistakes!
Aug 04, 2023
I've made a lot of mistakes with my 360 cameras over the years... silly mistake, after bad mistake, after a massive blunder!
So, when I made my latest 360 video course teaching you how to avoid making these same mistakes yourself, do you think I made any mistakes in the process?
Guilty!
So, in this article, I want to talk about the biggest 360 video mistakes that I made... while making a course about 360 video (even after literally eight-plus years of using 360 cameras!) 😅
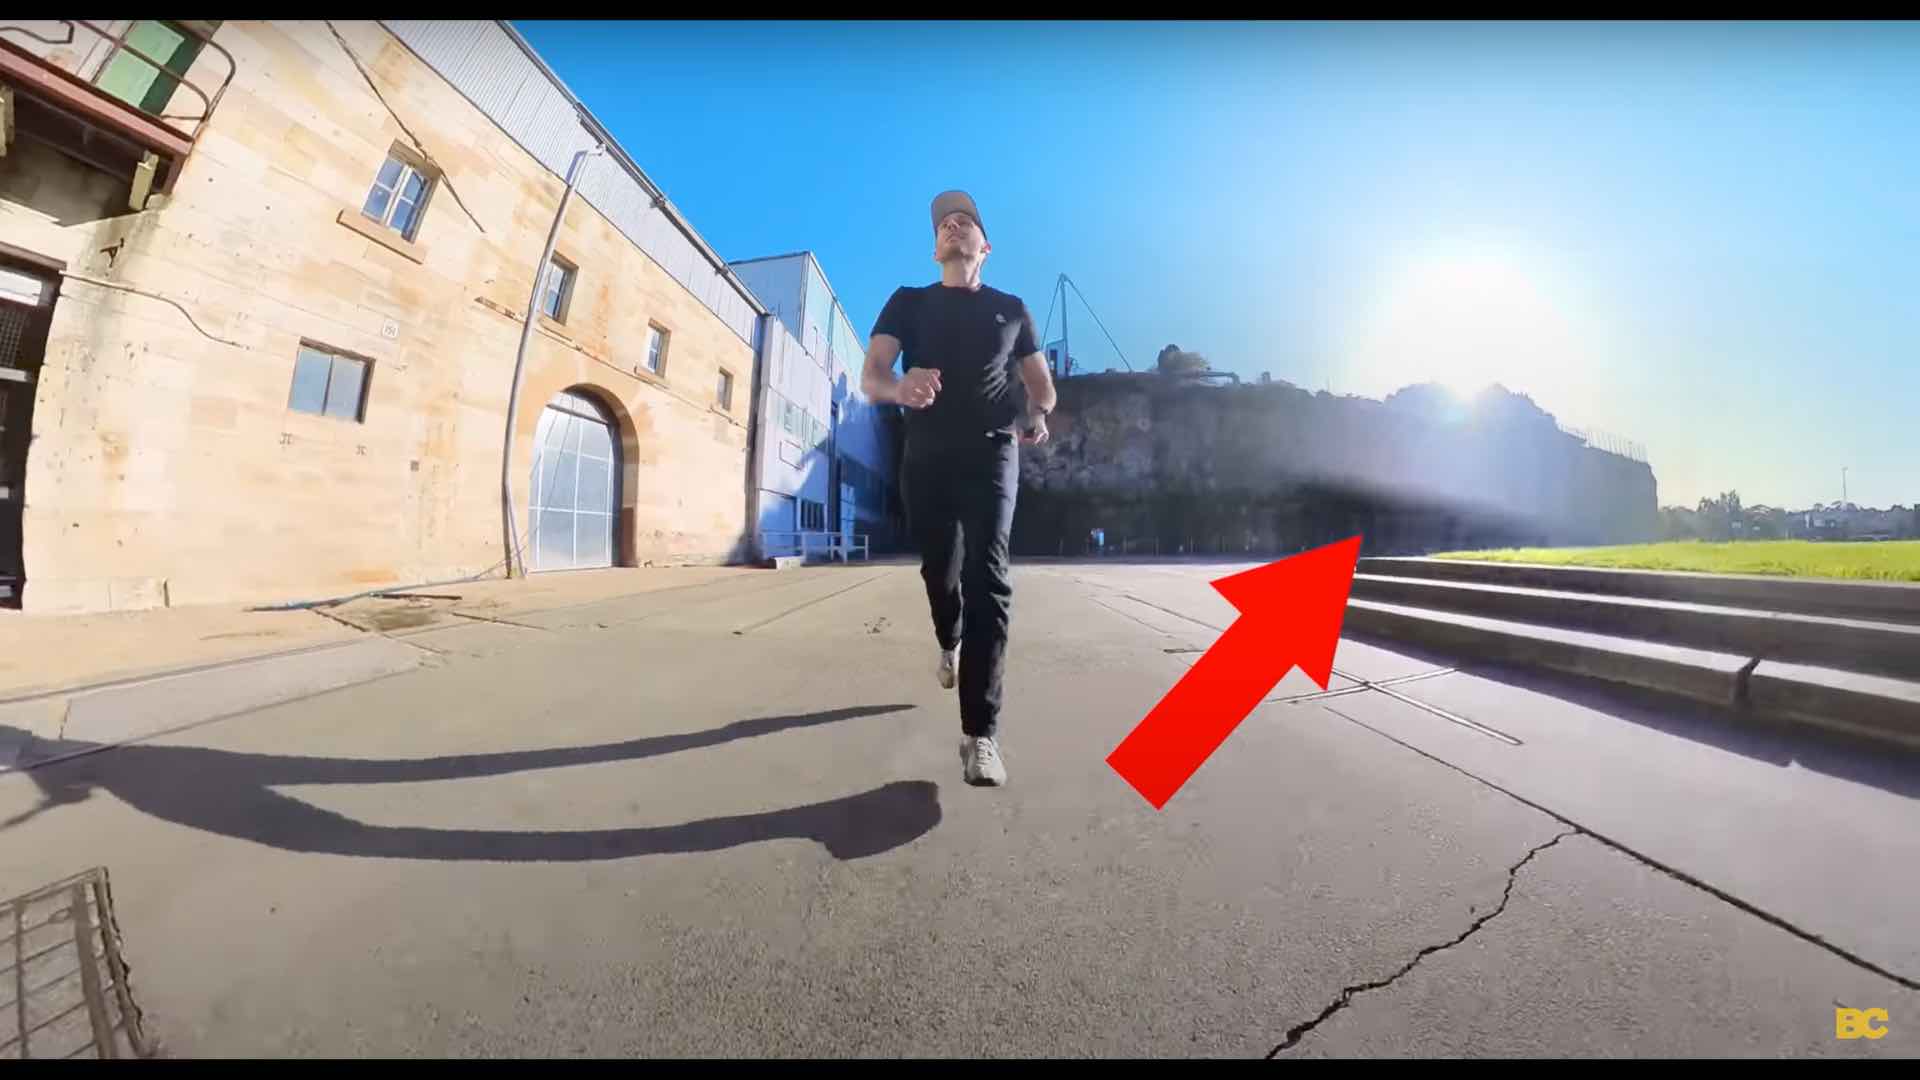
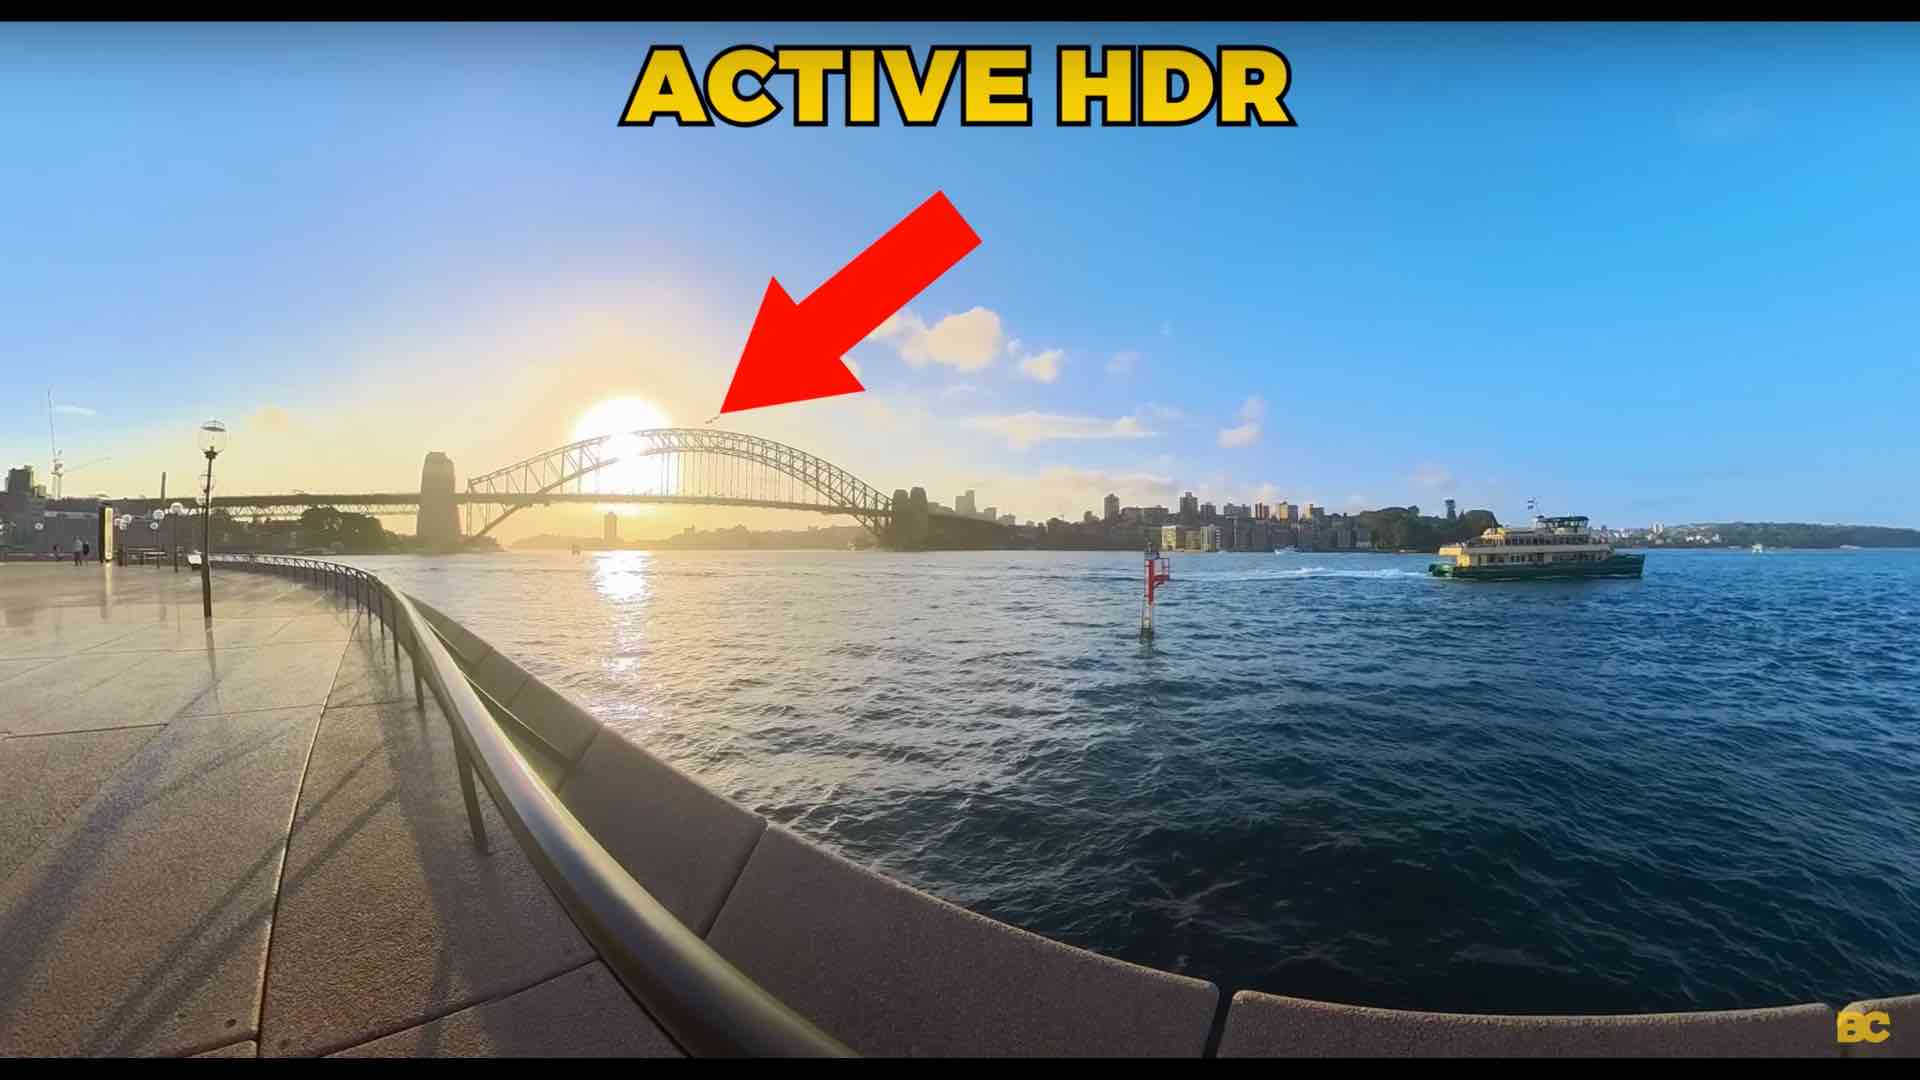
Mistake #1: Shooting too close to sunset 🌅
Sometimes when you're at an amazing location, you can shoot all day and you totally lose track of time, especially during daylight savings time which it is currently here in Sydney. The sun was going down literally before 5 PM, so I was out shooting for the course and time got away from me. It was nearly sunset before I knew it. I still had about 10 to 15 shots to get, so I just powered through and got them all.
Little did I realize, though, that the sun was shining at the camera so harshly that it caused extreme stitching issues due to one lens getting much more sun exposure than the other. For 98% of the rest of the day, this isn't going to happen because the lighting is much more even. But during that time right around sunset when the sun is extra harsh, this creates brand new stitching problems that you should be extra aware of.
In hindsight, I should have either moved to a shadier spot where the camera wasn't getting any direct contact from the sun, or used HDR video mode with the X3, which is perfectly suited to scenes like this where you've got those bright hotspots that can potentially blow out the shot. HDR video basically evens out the exposure so the lighting and brightness levels are much more even, therefore not creating the stitching line issue.
Mistake #2: Over-using Active HDR mode 🎥
What active HDR is, is essentially High Dynamic Range video, where it's capturing multiple exposures simultaneously and blending them together.
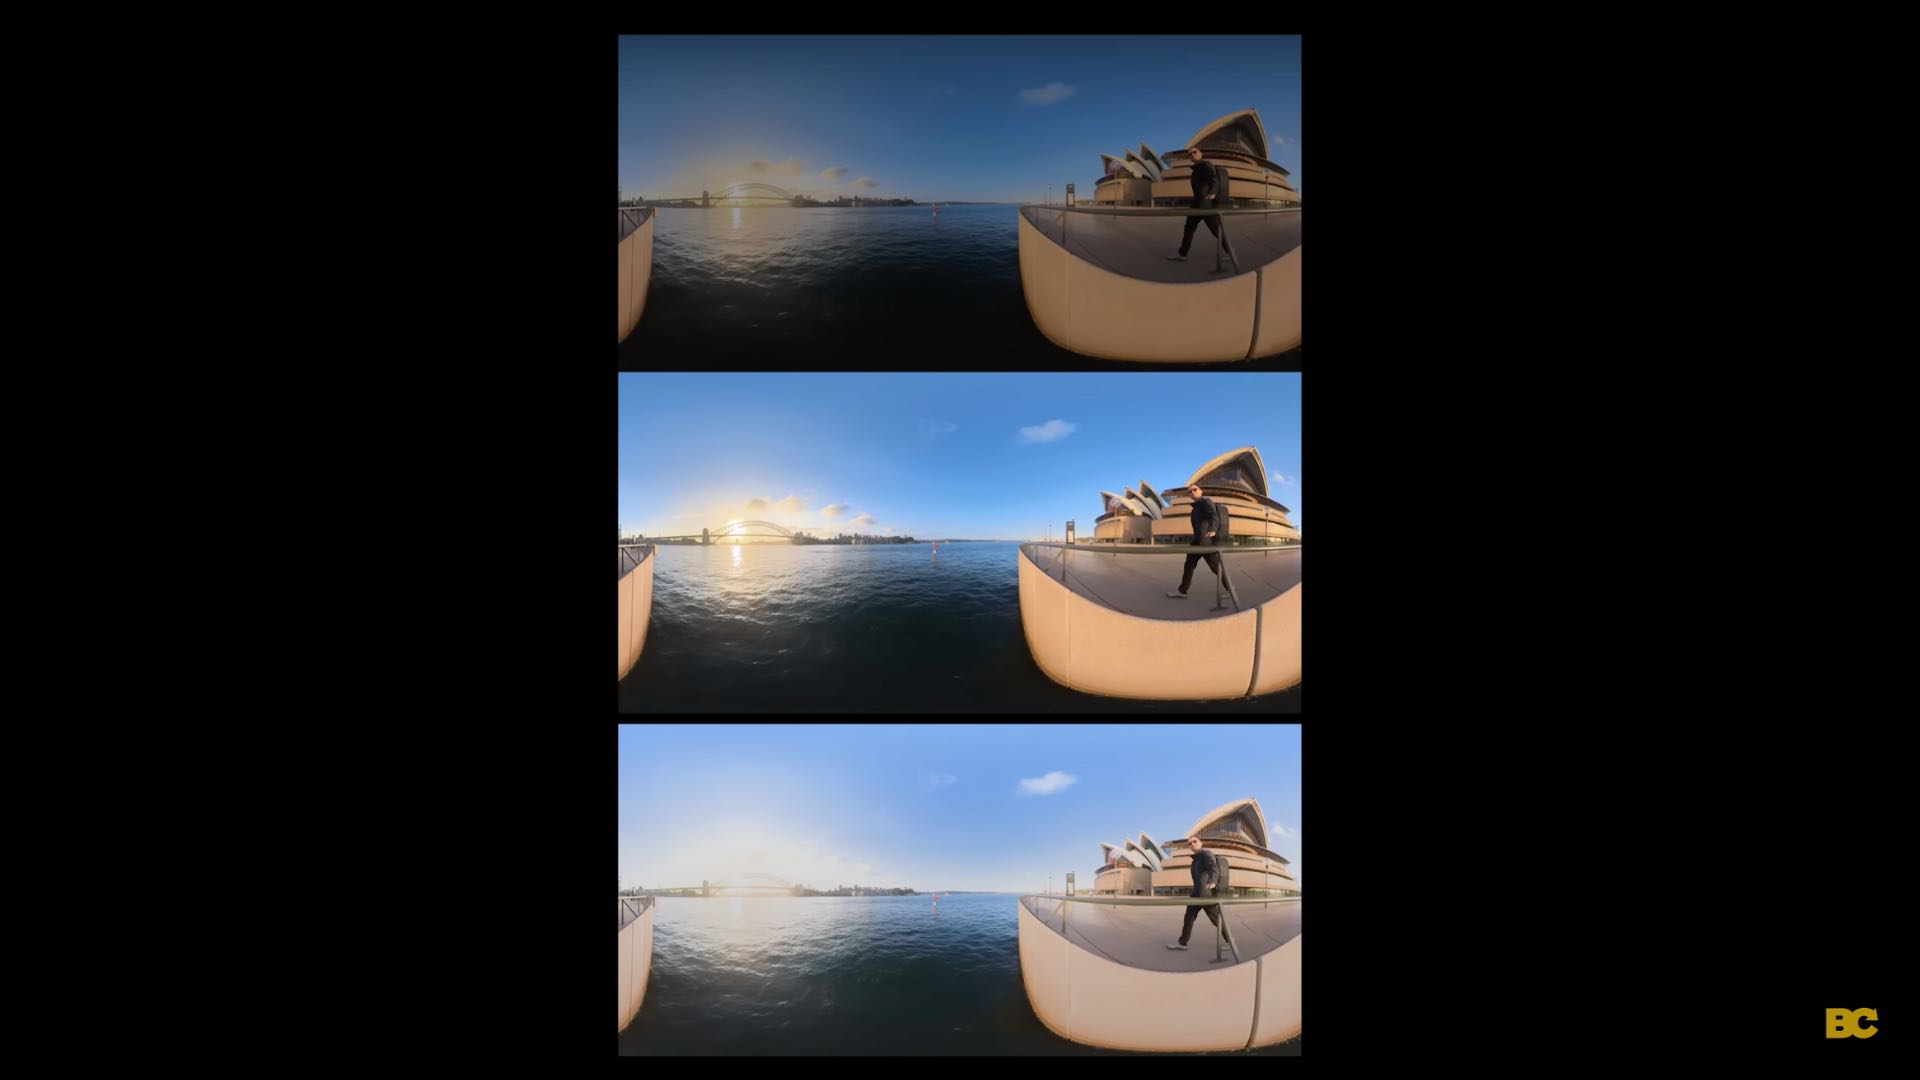
However, the issue here is that those multiple exposures are set in Auto exposure mode and sometimes sets the settings to have a high ISO and therefore more grain. So, when you have grain combined with grain and then mixed together, it's like a whole new world of graininess.
After using it in many different lighting scenes that did have high contrast, I realized that this is not a one-size-fits-all setting. There are still many different lighting conditions where setting the exposure manually will produce a much better result than HDR video, due to setting the ISO low and being able to customize the other exposure settings to better suit the scene you're shooting.
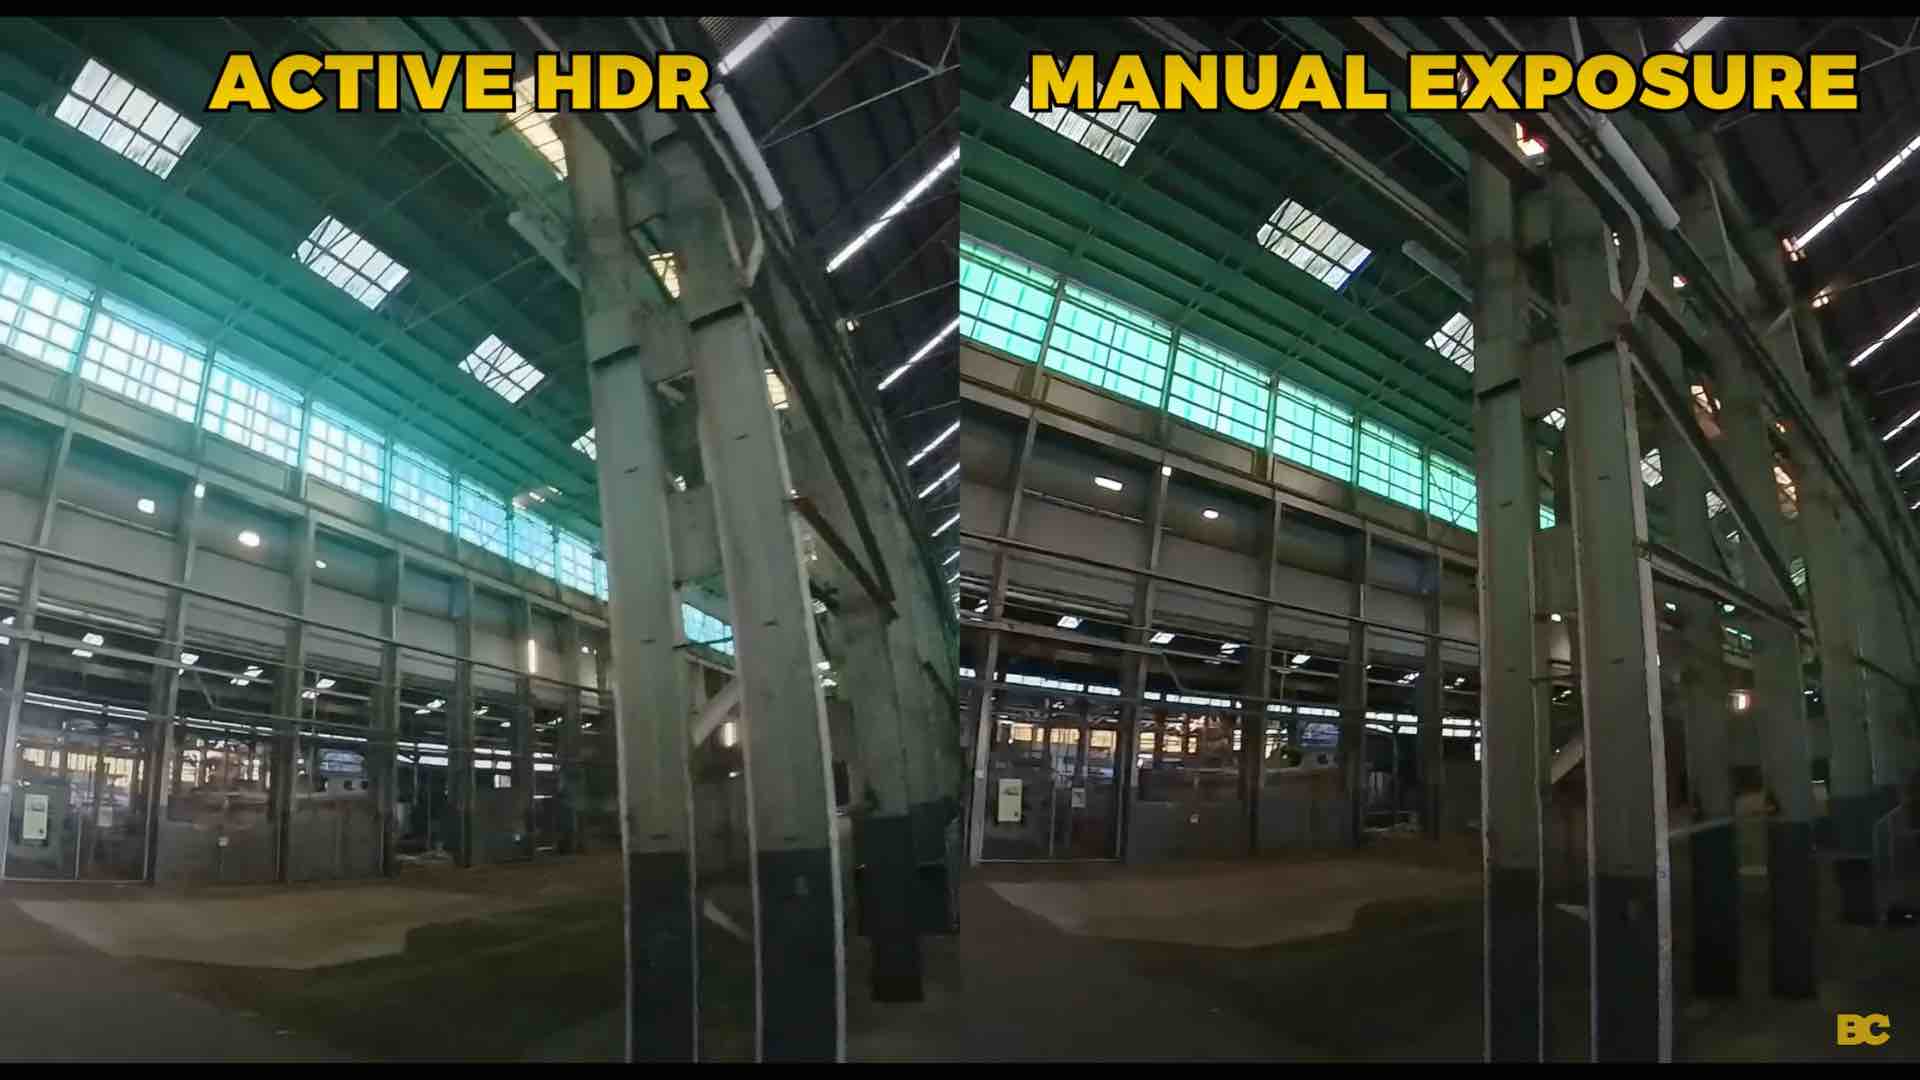
So, the lesson I learned is to only use active HDR in scenes like sunsets or if you have a really bright light source that is completely blowing out your shot.
Mistake #3: Parallax stitching errors ❌
Since 360 cameras are doing a really good job at stitching out the selfie stick to make it invisible, you would assume that no matter where you place the selfie stick or clamp it, it's not going to cause any stitching issues.
However, something I knew but I also forgot when I was shooting is that when you're placing your camera above any lines underneath things like railings, tile patterns, any kind of straight line directly underneath the camera, if your camera is angled diagonally or vertically across that line, it will produce a parallax stitching error.
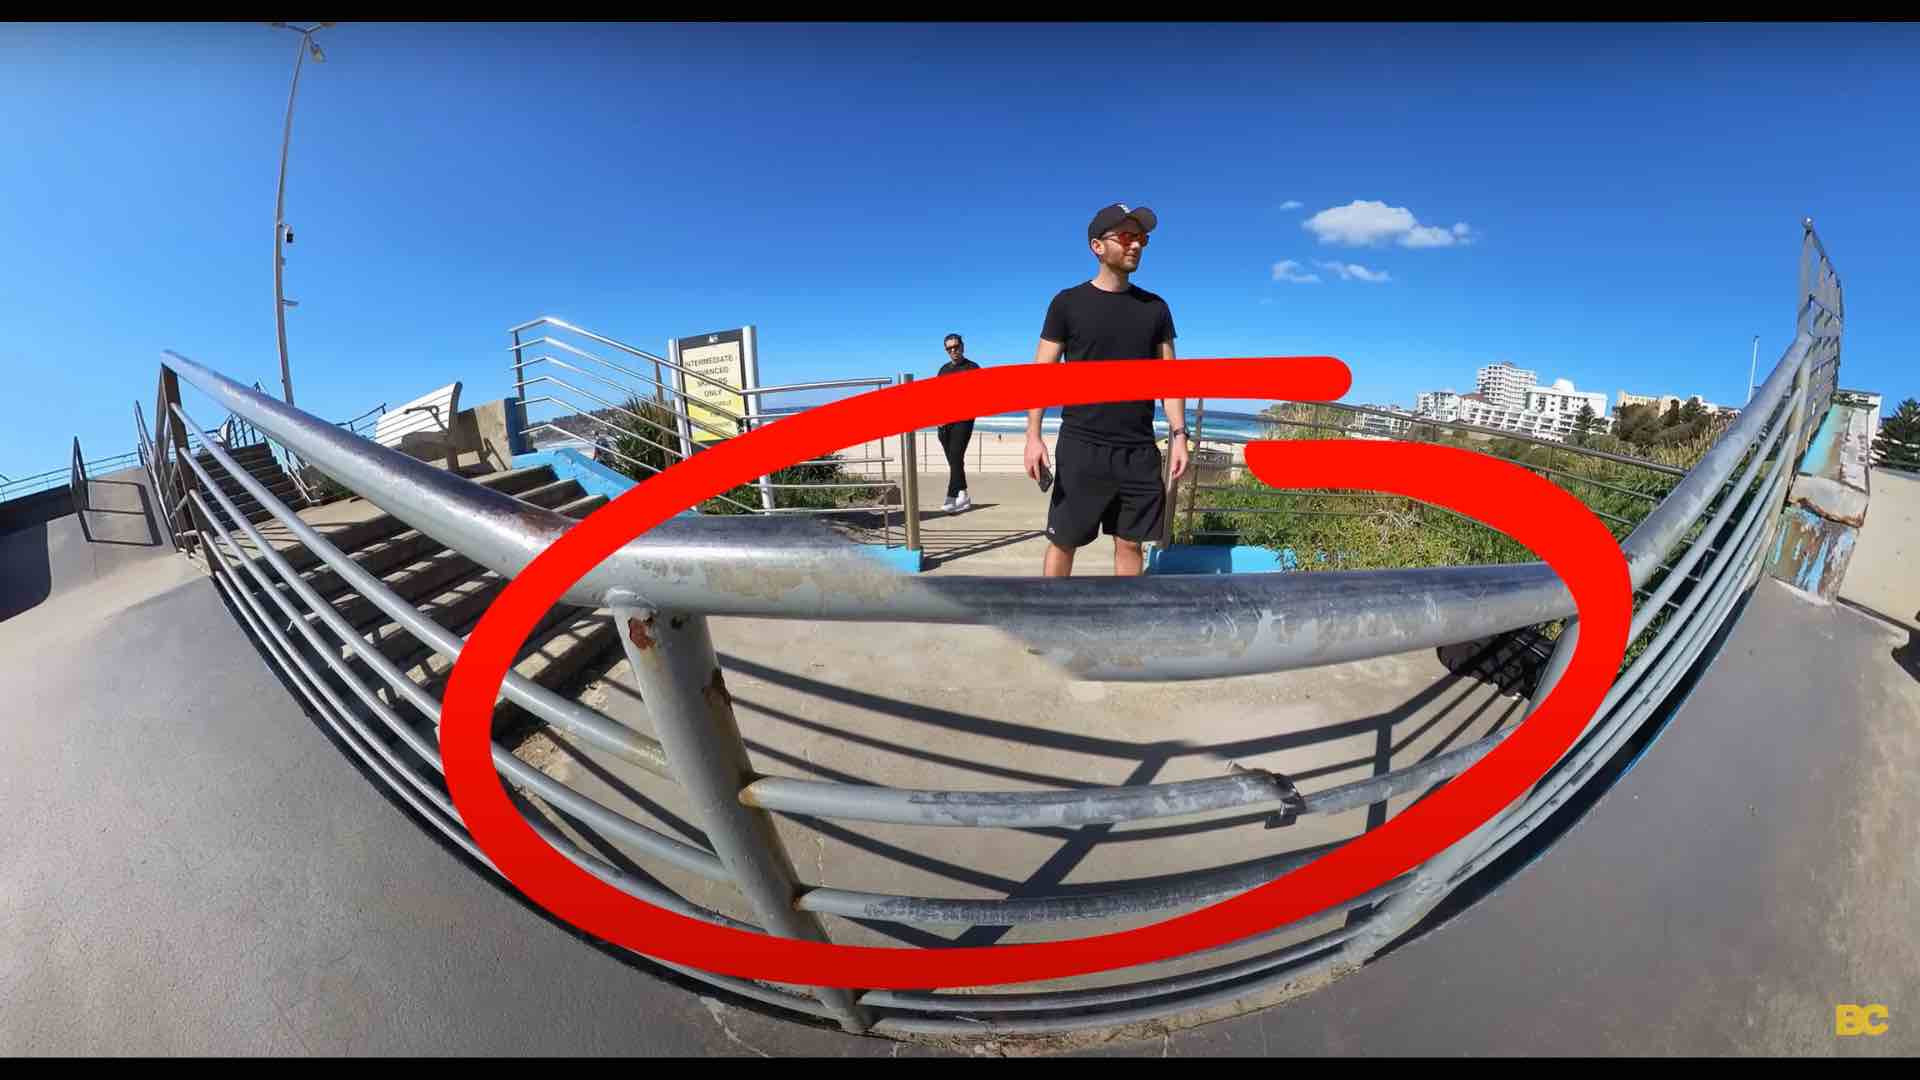
I had completely forgotten about this with some of my setups. Luckily, I did review the footage as I was filming, so I was able to go back and fix those. But still, that's one that you can tend to forget as a 360 video creator. You're not always thinking about what's directly underneath the camera or whether it's going to stitch properly; you just assume that it will.
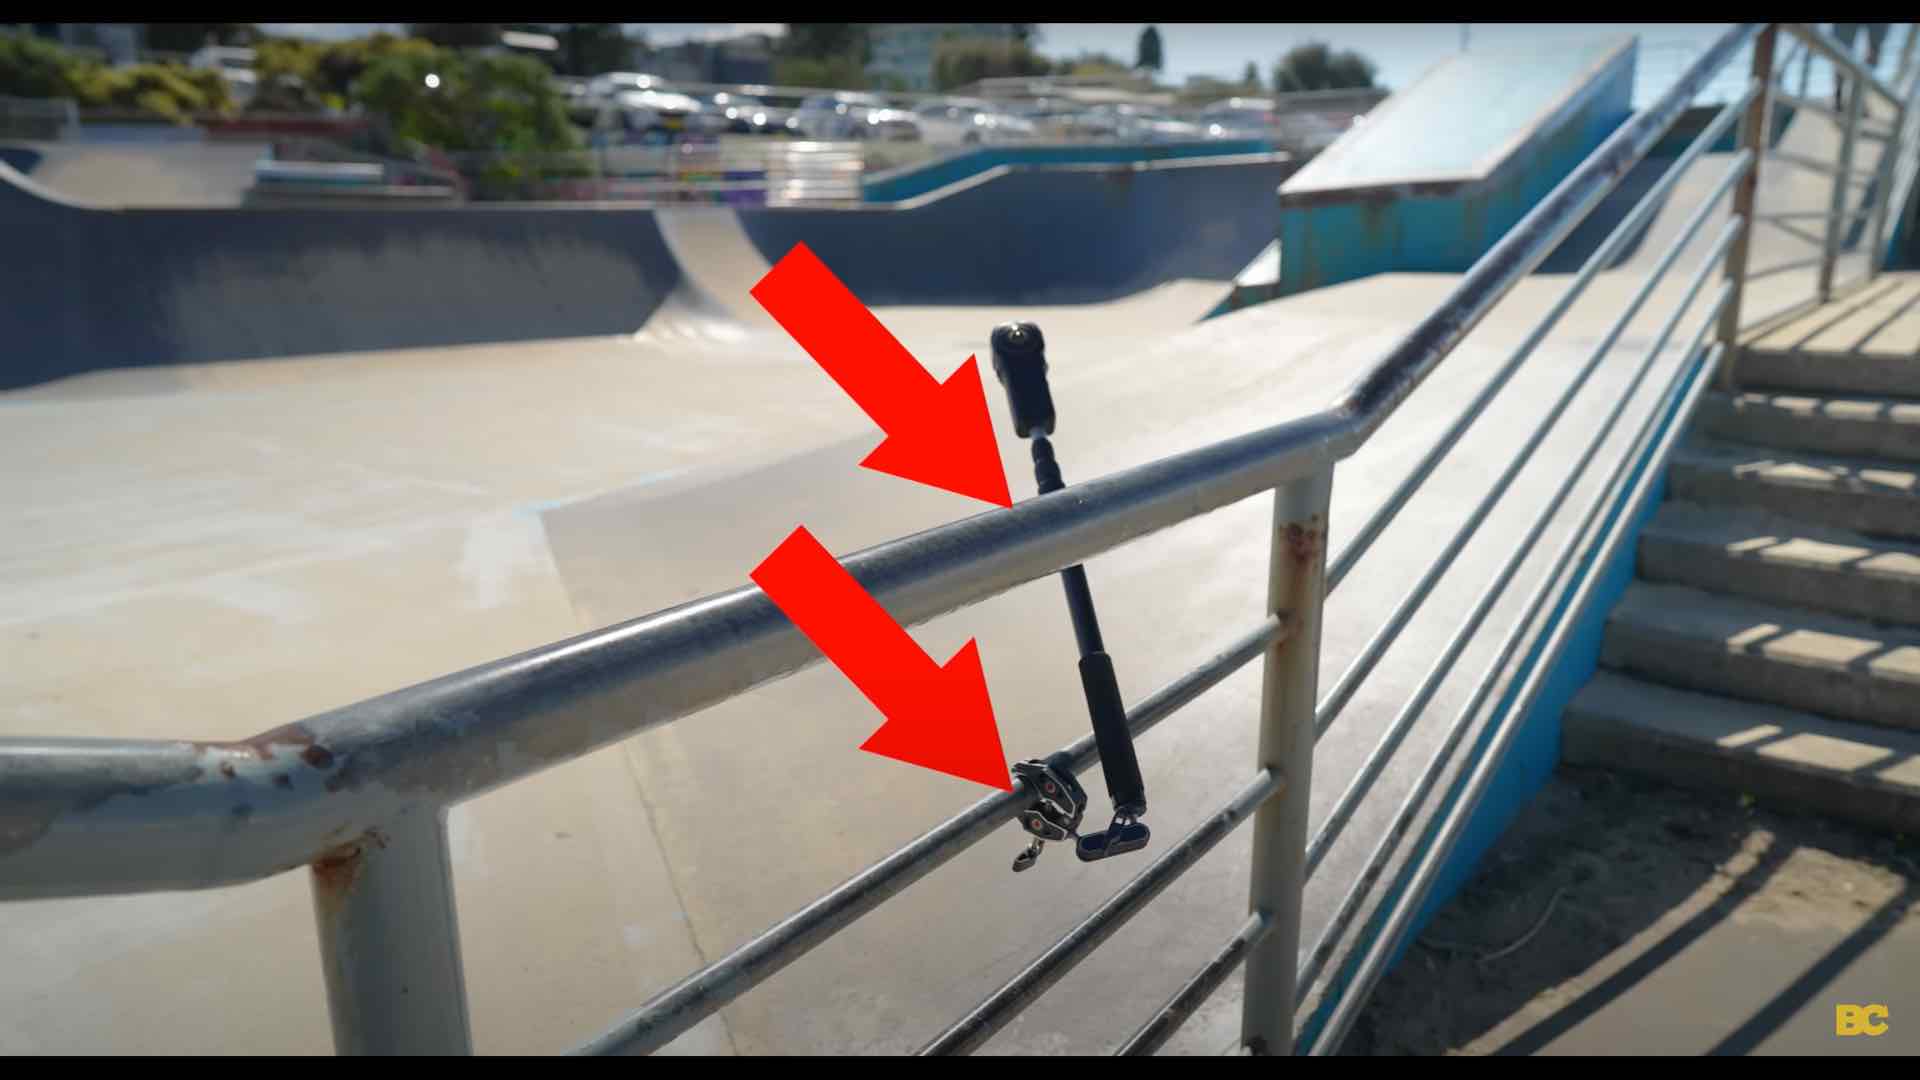
Mistake #4: Opting for cheaper accessories 📹
There are heaps of 360 video accessories out there, ranging from cheap to really expensive. And I genuinely believe that you don't need to spend a lot to get good 360 camera mounting setups. I even proved this in the course by finding some low-cost accessories on Amazon that worked great. However, with some really cheap accessories, they do also introduce a higher risk factor of falling apart or not being as reliable as the more expensive version would be. For example, this camera spacer was only a few dollars on Amazon, but I found sometimes this head would unscrew while I was filming, putting my camera at risk.
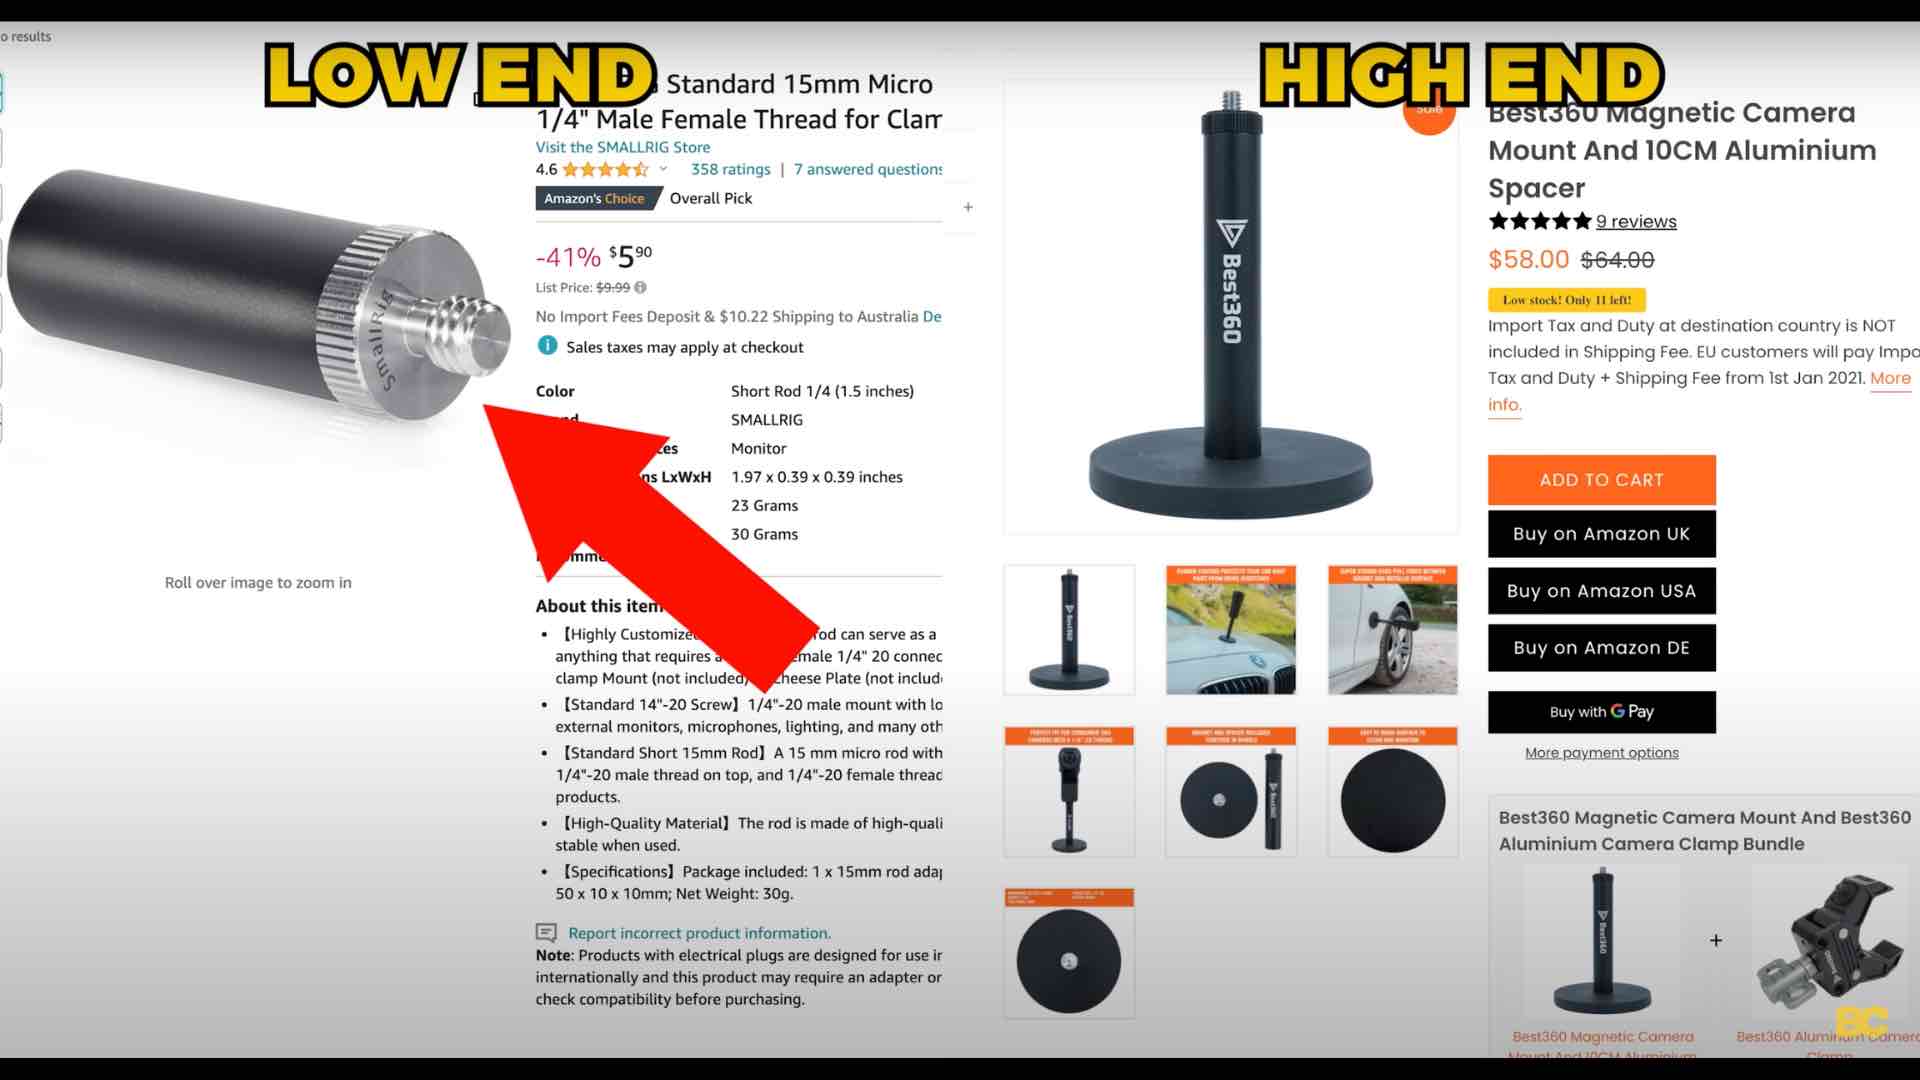
It really isn't worth the extra saving if it had ruined my camera completely and I had to replace it. It's going to be hundreds of dollars instead of just twenty dollars extra for a proper camera spacer.
So, I guess the lesson is to go for good quality stuff if you can afford it. And if you can't, at least go for something middle of the range that when you're filming, you feel confident putting your camera onto it, putting it at risk, feeling confident that your camera is going to be safe when shooting with them.
Mistake #5: Not anticipating flickering lights 💡
Whenever you're filming any kind of artificial lighting, the current of the light can cause a flickering effect if it conflicts with the shutter speed of your camera. And again, that's something I knew and I even teach it in the course. However, sometimes it also catches you off guard because you don't realize that there are lights in certain parts of your scene you didn't realize. Like one of my recent shots at Luna Park, I couldn't see these lights in broad daylight with the naked eye, but my camera could and it caused a flickering effect due to the mismatch of shutter speed with the current of the lights. I could have sworn that I did check these videos before I left, but clearly I didn't. And the end result caused a flickering that made these shots completely unusable.

Mistake #6: Using Insta360 Studio too much 🖥️
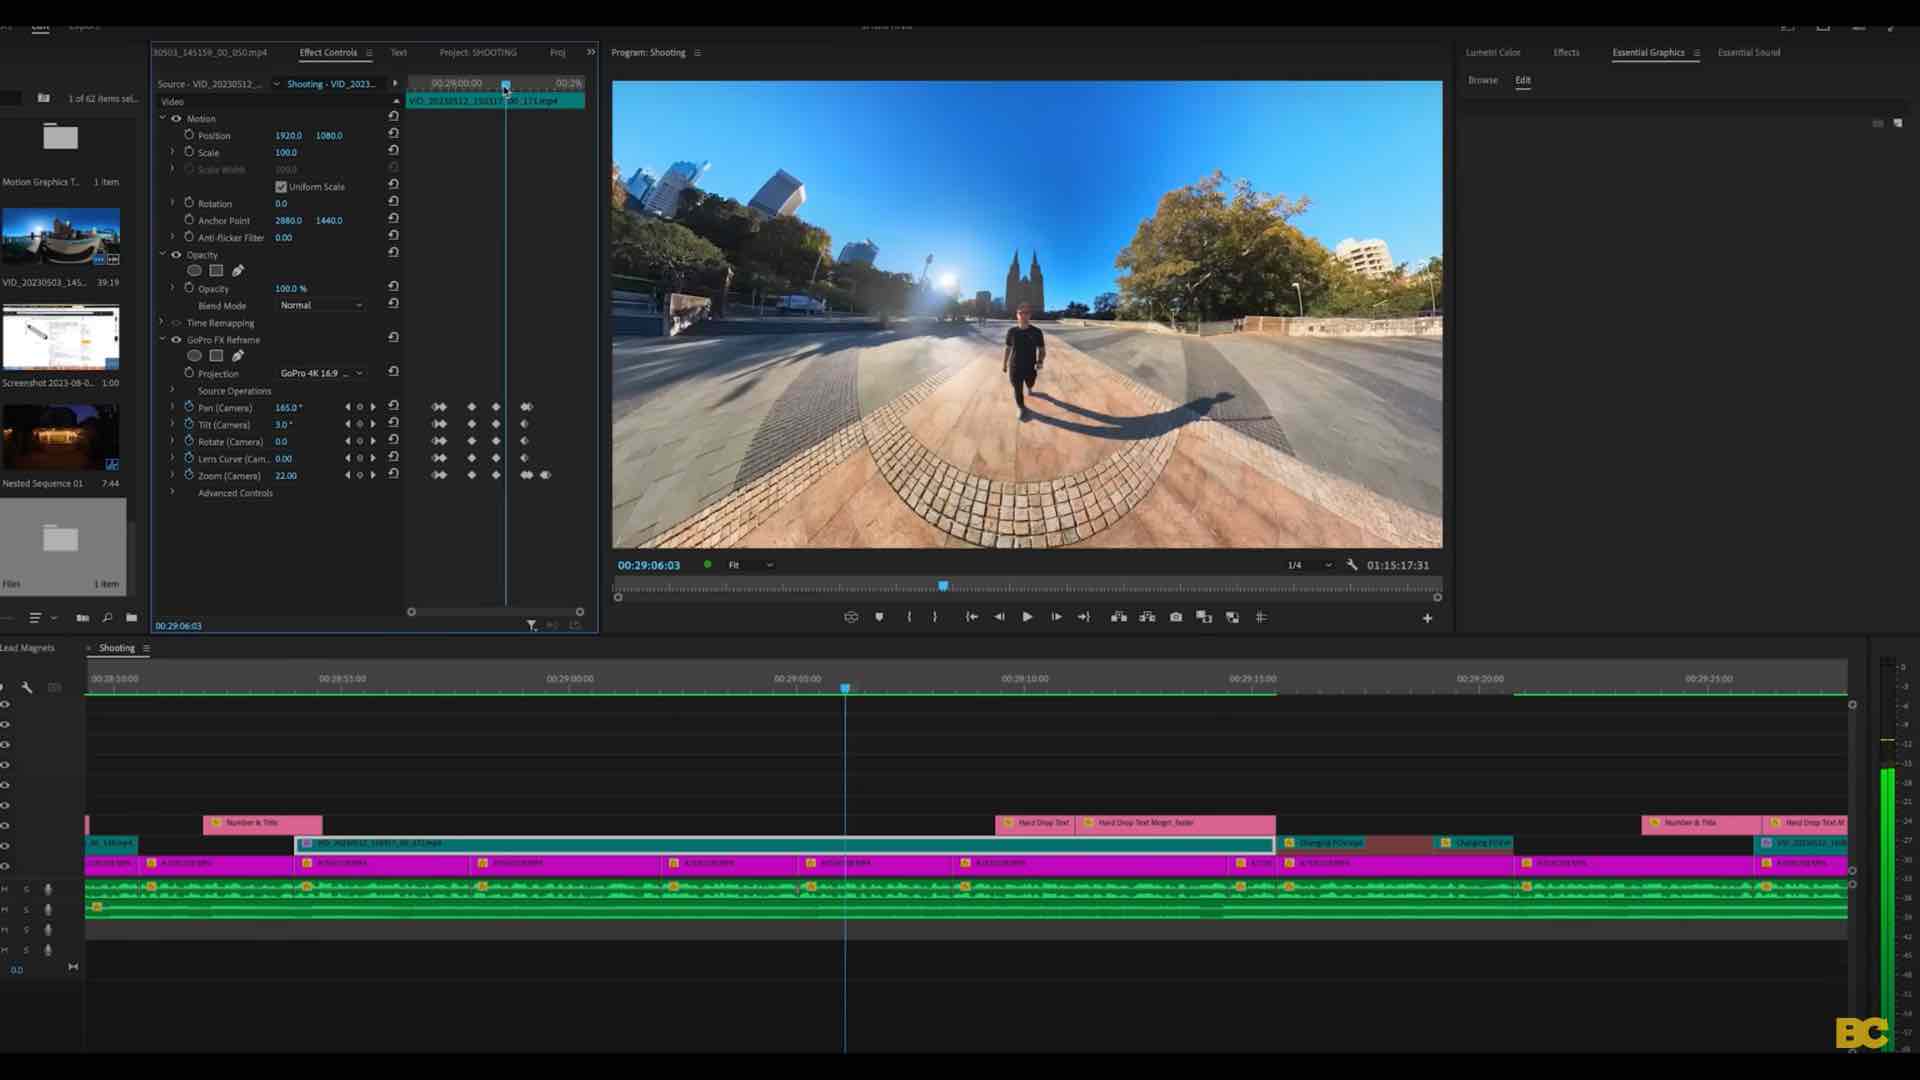
The final 360 video mistake I made that I would also encourage you to reflect on and think about is to do with post-production. When you're editing really big projects like I was here – I think I had around 40 videos in total – and you're working with a lot of 360 footage, you need to optimize your editing workflow to be as fast and streamlined as possible. A mistake I made, at least initially, was using Insta360 Studio too much for reframing.
Since I edited the course entirely in Premiere, most of the examples I was using didn't require motion blur or hyperlapse effects. Therefore, it was a better idea to do the reframing inside of Premiere Pro, since with big projects you're often making a lot of changes to the reframing like timing it with music or just making the keyframes work slightly better.
When you're having to continually export from Insta360 Studio and then import into your editing software, that adds a lot more time to your workflow that you don't need to be wasting. Which is why I'd recommend for any bigger projects where you're reframing lots of 360 videos, doing it natively inside your editing software, whether that's Premiere Pro, DaVinci Resolve, or Final Cut Pro. Use Insta360 Studio again for the motion blur and hyperlapse effects or for reframing a quick shot that you know you're not going to need to tweak later. But otherwise, you'll save a lot of time doing all of the reframing in your editing software. Luckily, I picked up on this about a third of the way through the project, so I was able to reframe in Premiere for the rest.
So there you go, those are the main 360 video mistakes I made while making a course about 360 videos. Surely this means I can't make any more mistakes, right? I doubt it.
I hope this article helps you avoid making these mistakes for yourself. And if you want to learn from the thousands of other mistakes I've made over the years when it comes to both shooting and editing 360 videos, you can find my past eight-plus years' worth of knowledge and insights inside my brand new 360 Video 101 Course. I made the course to save you literally years of time and failure, so you don't have to learn the hard way like I did.
Happy 360ing!
Ben Claremont
Blog Author