How To Colour Grade Insta360 Videos For Beginners (Fast & Easy!)
Jun 16, 2025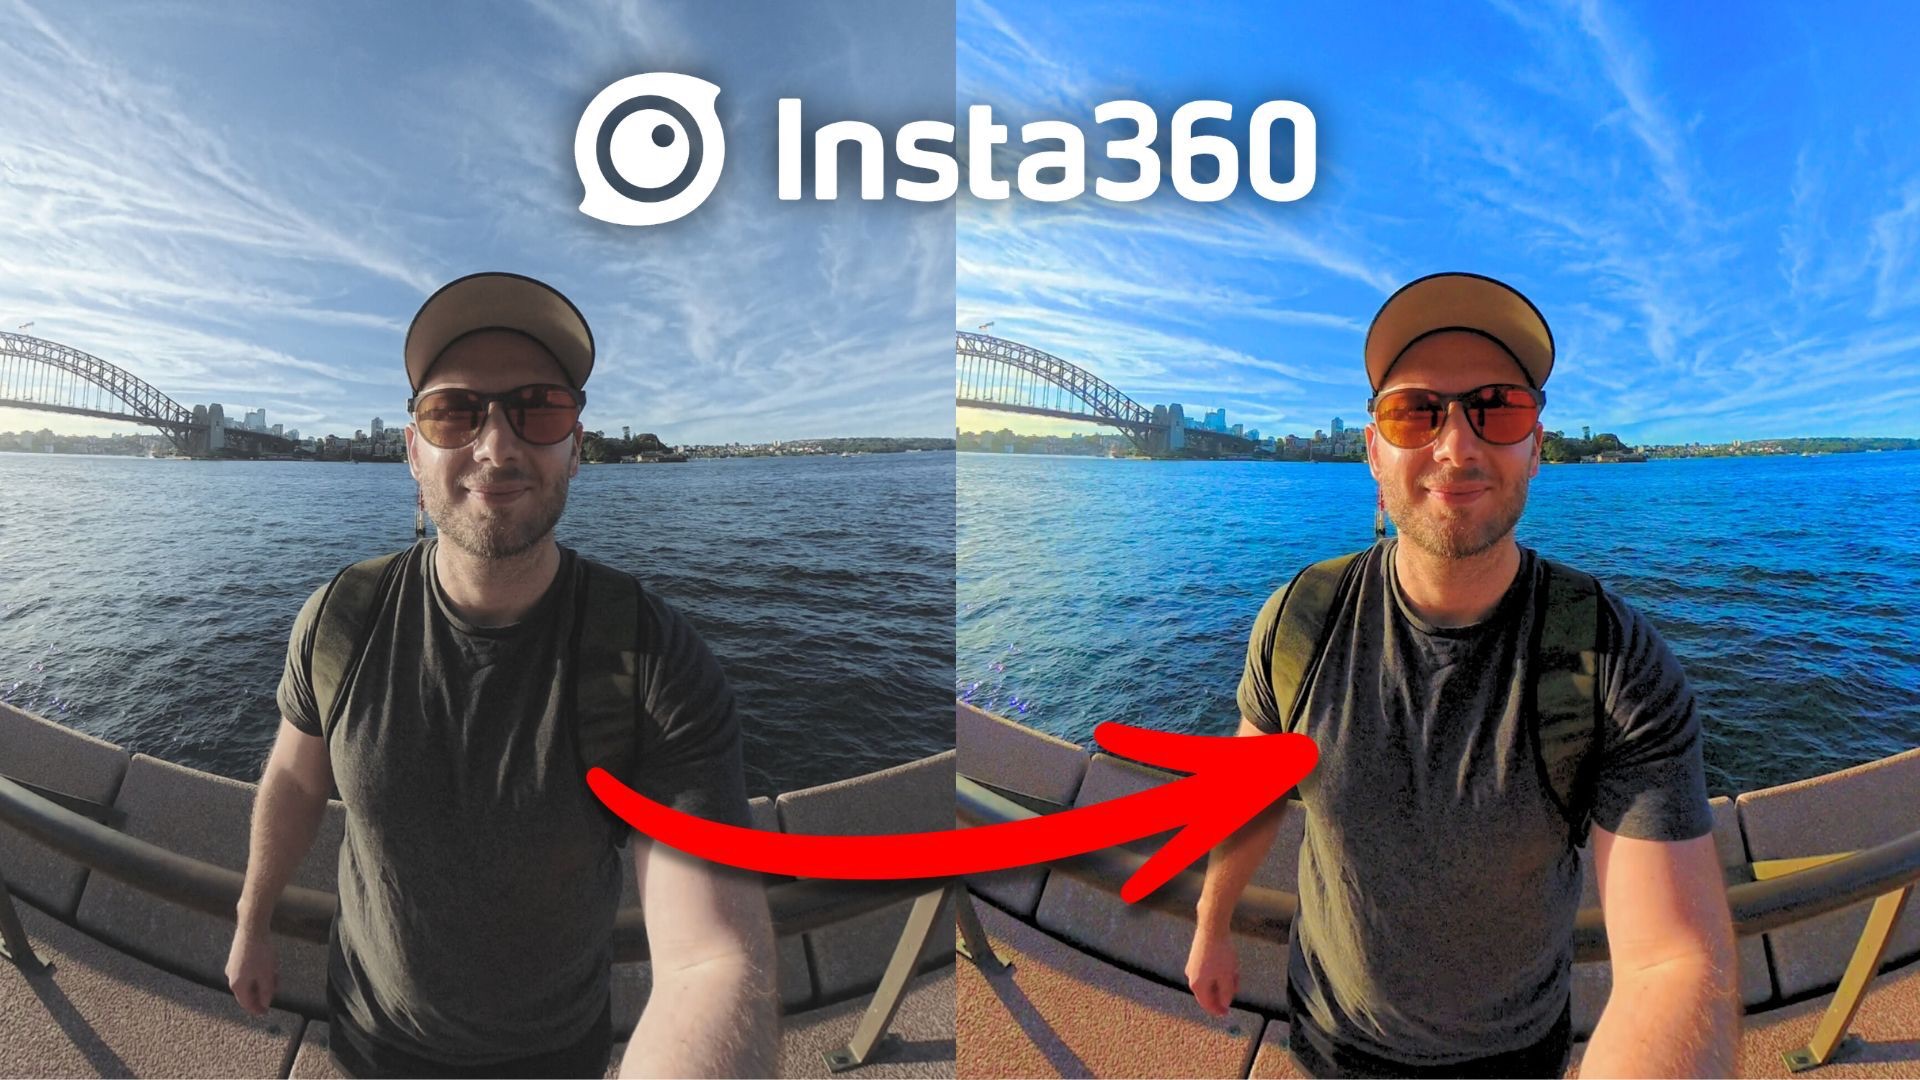
In this post, you're going to learn how to take your Insta360 videos from dull to cinematic using free features that only take a few seconds to use.
I've been colour grading for 20 years for every type of video project imaginable, so I can tell you exactly which settings matter when it comes to colour grading - and which ones you can completely forget.
Here I’ll walk you through three techniques for getting cinematic colours from your Insta360 shots, starting with the simplest and building up to the most advanced. Once you’ve seen all three methods, you can choose which one works best for you.
Does This Work With Any Insta360 Camera? ✅
Absolutely. It doesn't matter which Insta360 camera you're using—whether it's the latest X5 or another model—and it also doesn't matter which colour profile you shot with. Most Insta360 cameras offer Standard, Log, and Vivid options, which produce different looks straight out of the camera.
You can still achieve cinematic results no matter how you filmed. I’ll cover specific settings in more detail in an upcoming video.
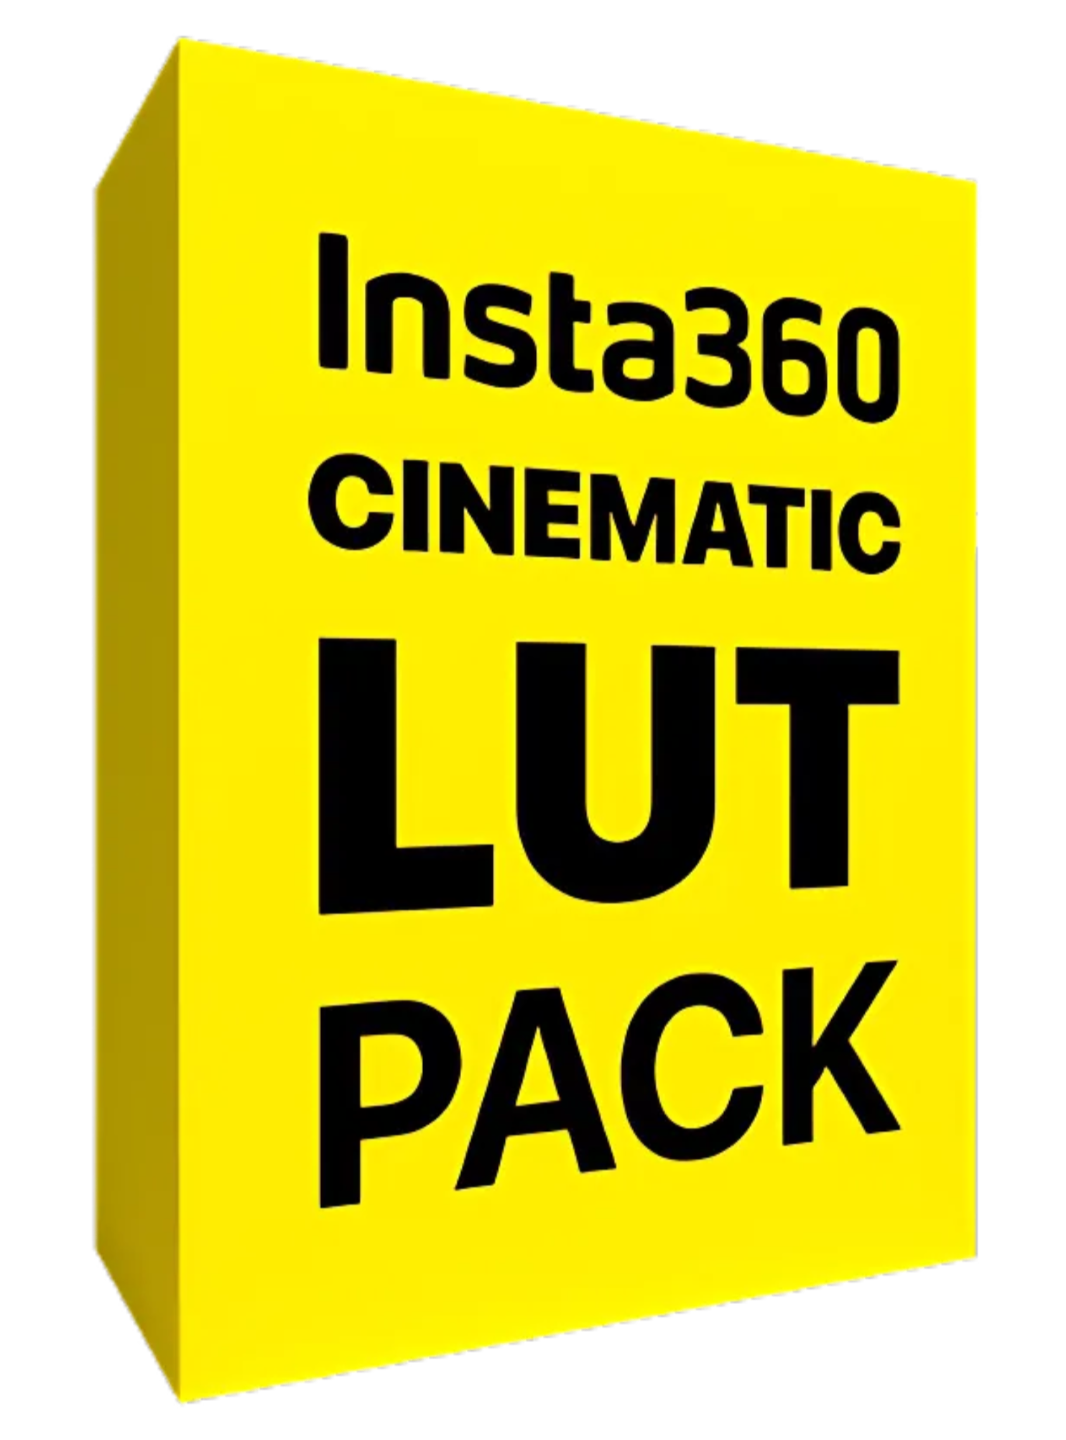
Method 1: Use My Free Insta360 Cinematic LUT Pack 🎬
If you're a beginner, this is by far the easiest method.
A LUT (Look-Up Table) is basically a drag-and-drop color preset. It instantly applies a cinematic look to your footage without the need to touch any complicated colour settings.
Inside my free LUT pack, I’ve included five unique LUTs:
- Hyperlapse LUT: Perfect for dynamic, fast-moving shots
- Exterior LUT: Great for faces, bright skies, and bringing out shadows
- Interior LUT: Brightens up indoor shots without overblown highlights
- Night LUT: Boosts shadows while keeping shots natural and grain-free
- HDR LUT: Brings back contrast and boosts colour for Active HDR footage
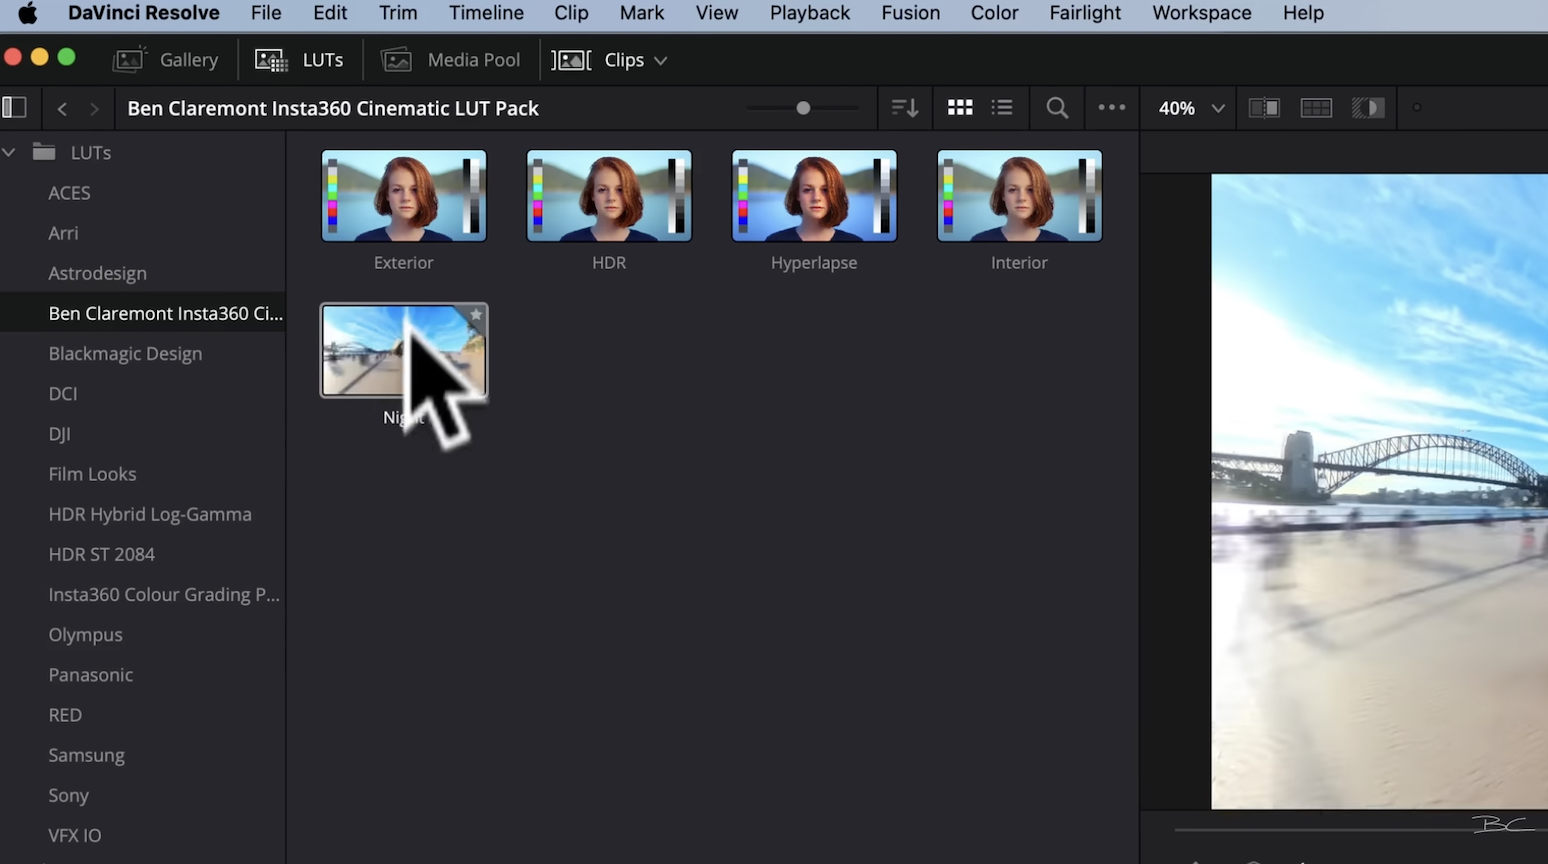
Again, this pack is 100% free. Just follow the link to grab it.
How to Install the LUT Pack in DaVinci Resolve 💻
DaVinci Resolve is my editor of choice. It’s completely free and incredibly powerful.
To install:
1. Open DaVinci and click the settings wheel (bottom right).
2. Navigate to Color Management > Lookup Tables.
3. Click “Open LUT Folder.”
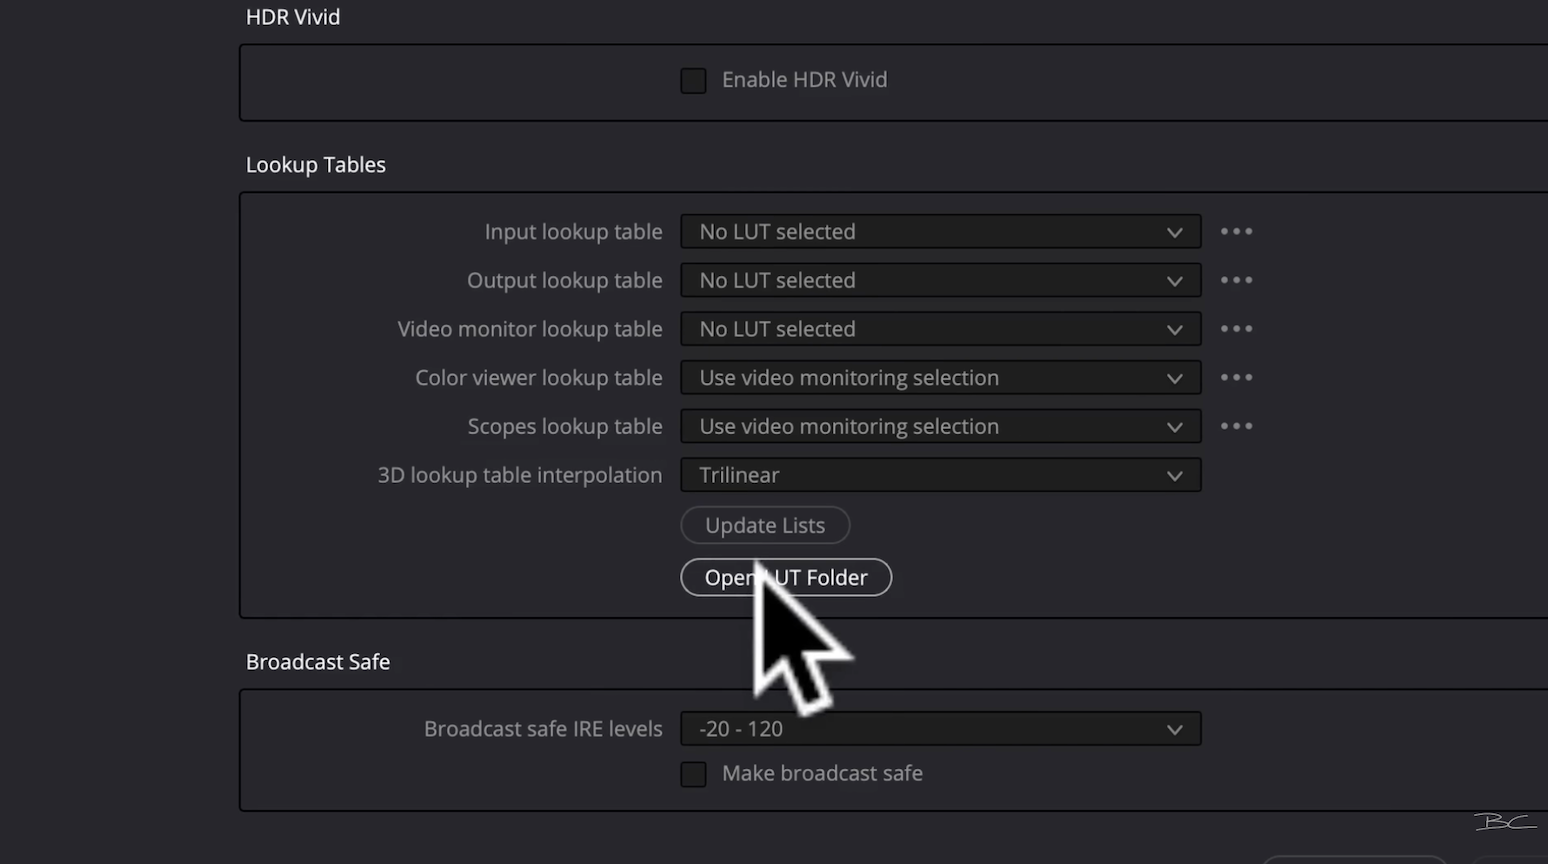
4. Copy and paste the LUT files into this folder.
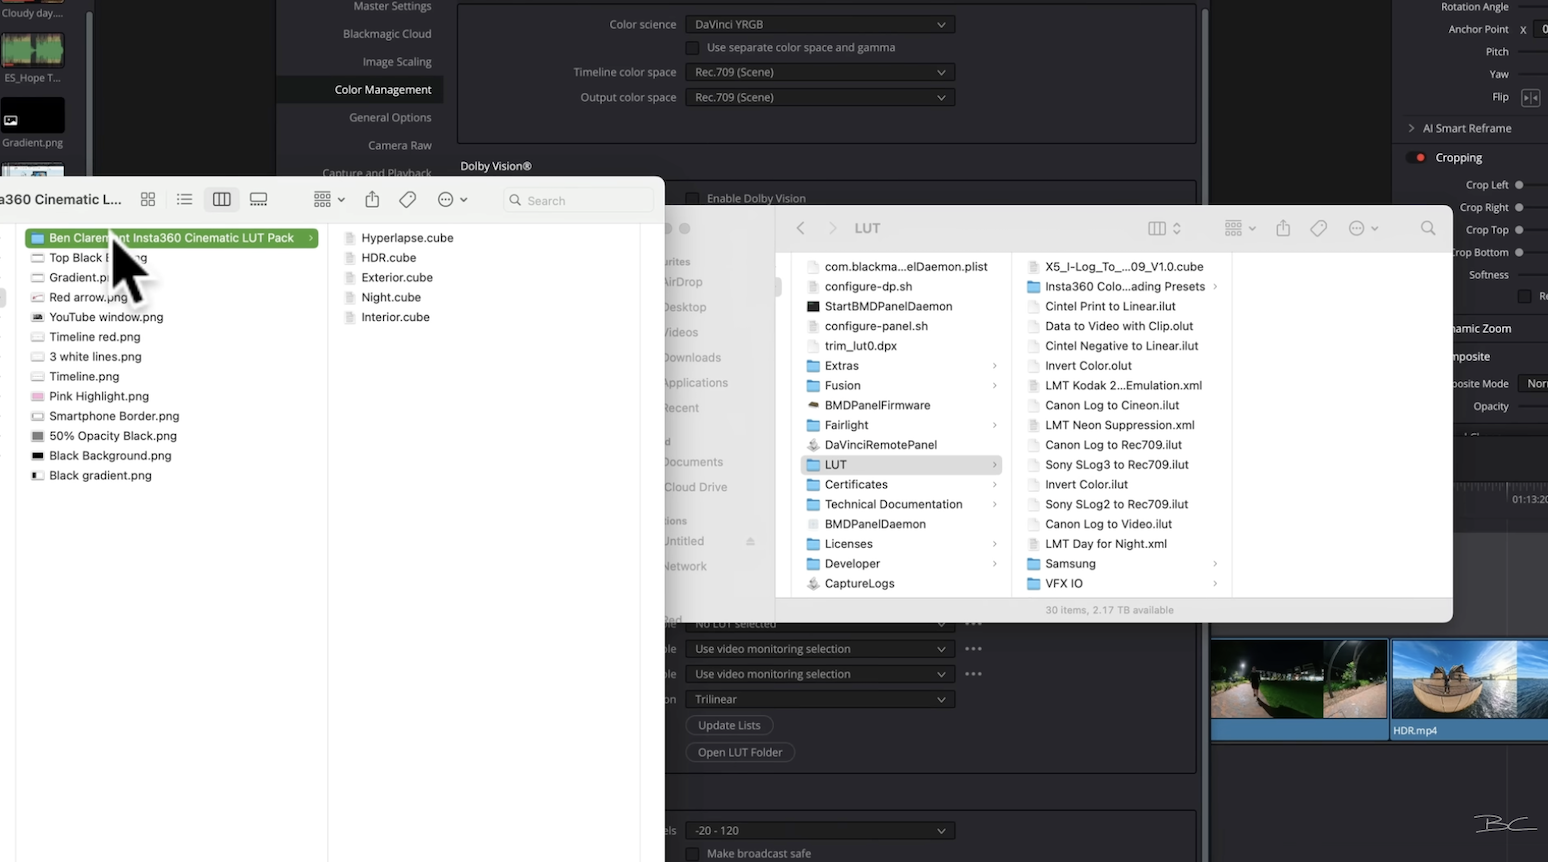
5. Click “Update Lists” and save.
To apply:
-
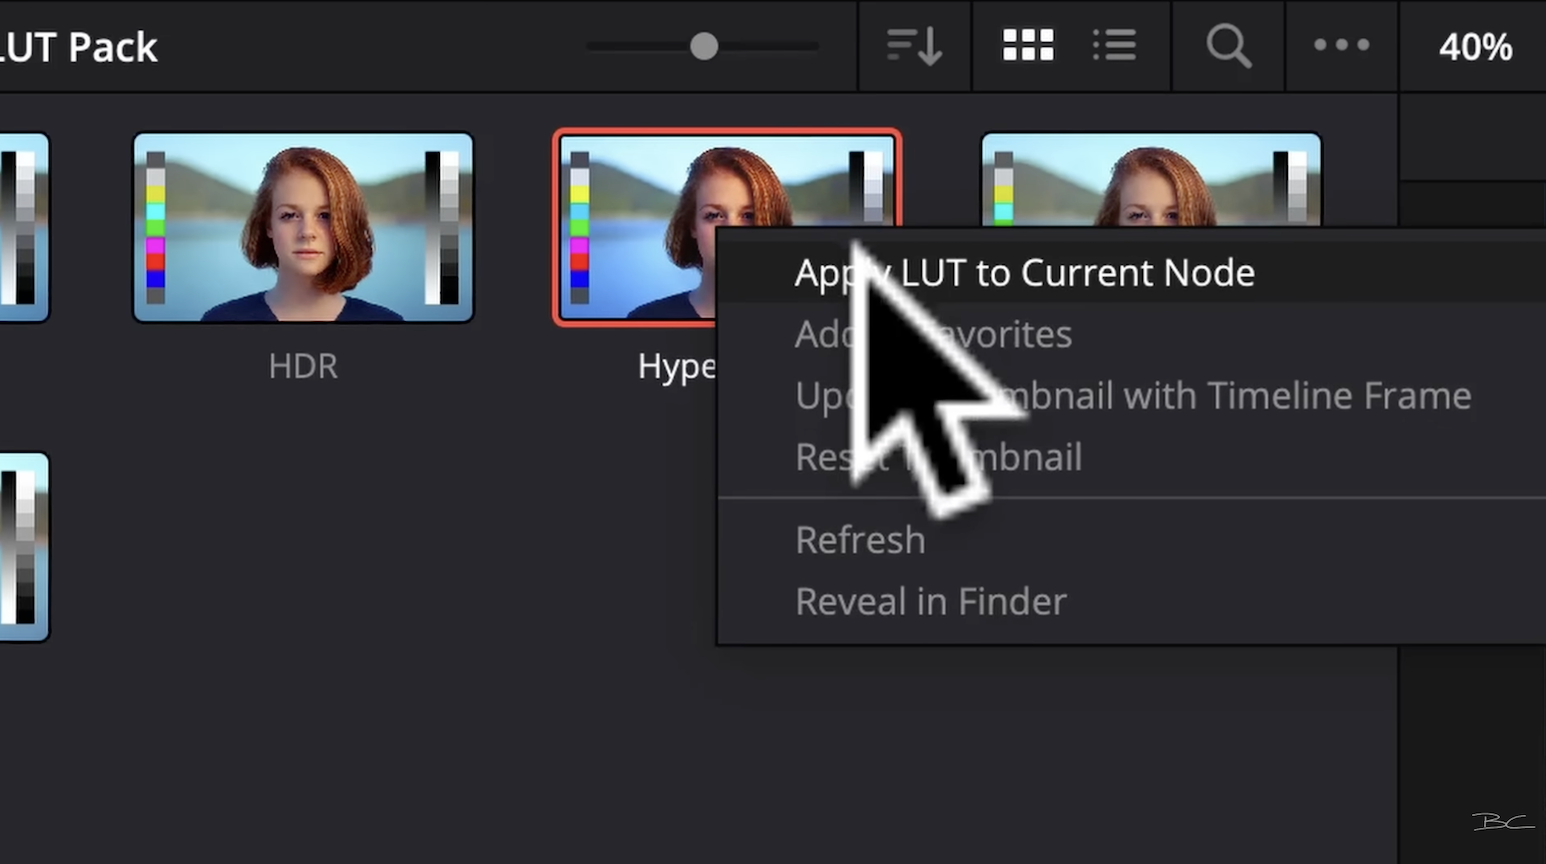
Go to the Color tab.
-
Find “Ben Claremont Insta360 Cinematic LUT Pack” under LUTs.
-
Right-click your chosen LUT and select “Apply LUT to Current Node.”
That’s it - done once, and ready to use forever.
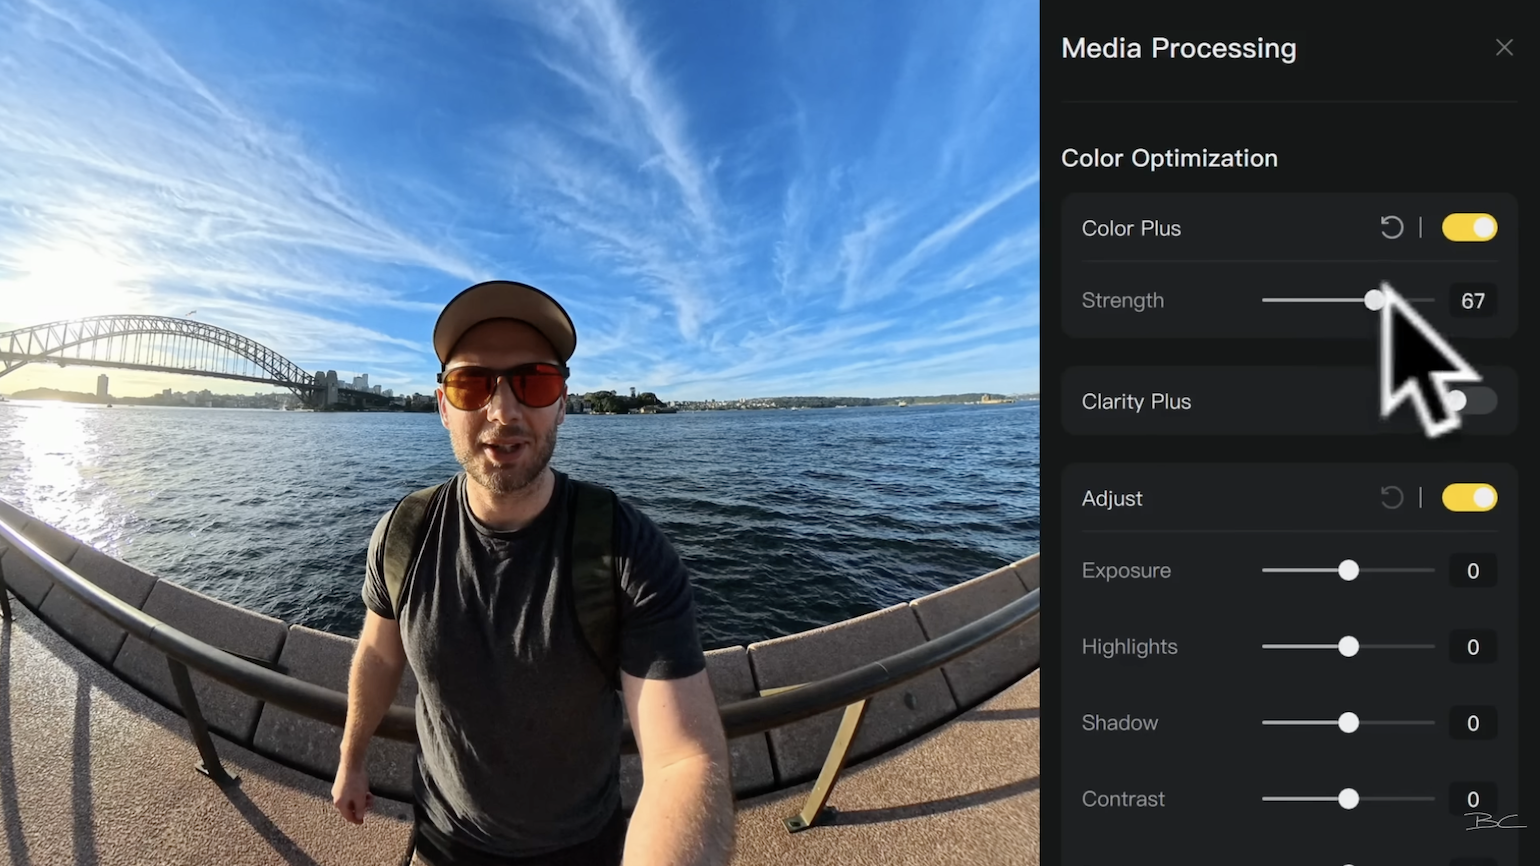
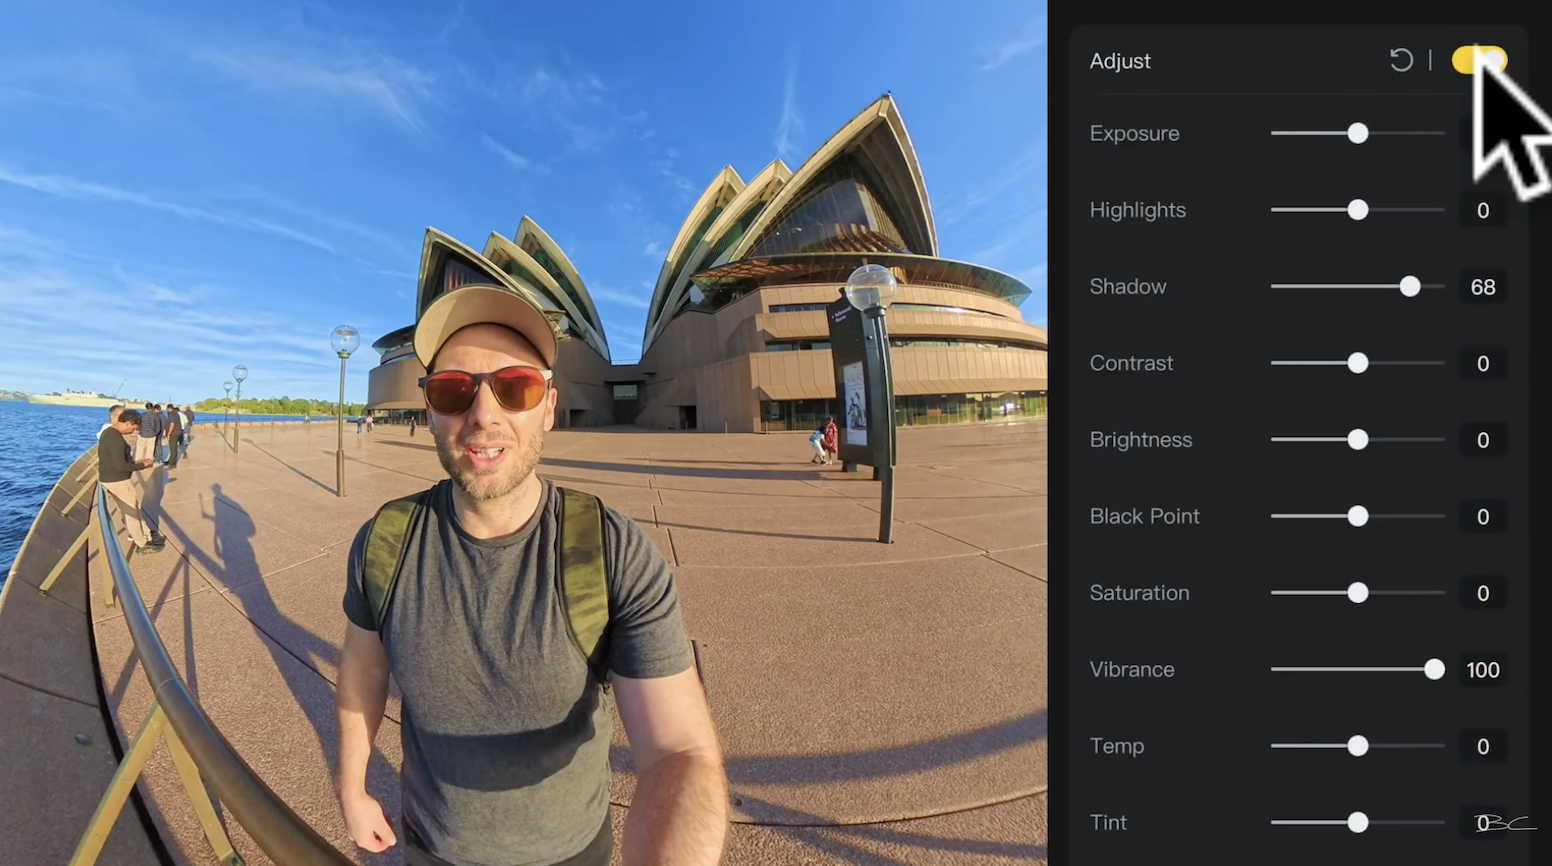
Method 2: Colour Correct in Insta360 Studio 🎨
The Insta360 Studio desktop app is another excellent option—especially if you want to skip full video editing software and just make quick adjustments.
Here’s how:
- Import your footage.
- Under Media Processing, enable Color Plus—Insta360’s auto-correction.
- Adjust the slider to your taste.
For better results though, it's best to do it manually:
Use the “Adjust” panel to fine-tune to your personal taste:
- Saturation: Boosts all colours equally (however, this can look unnatural).
- Vibrance: Boosts only undersaturated colours (more natural result).
- Temperature: Adjusts warm vs. cool tones.
- Tint: Adjusts green–magenta balance (useful for indoor lighting).
- Shadows & Highlights: Reveal hidden detail or reduce glare.
- Exposure: Only tweak if needed (camera auto usually does a great job).
- Definition: Sharpens the image slightly—use sparingly.
You can toggle the on-off button next to the Adjust panel to compare your before and after shots, just to see if your colour grading made a difference or not.
You'll want to avoid copying my slider values exactly as your shot might look completely different to mine. Lighting conditions vary between shots, locations, and countries (sorry to my friends in England 😅)
Method 3: Manual Color Grading in DaVinci Resolve 🎛
Let’s say you’ve already downloaded my Cinematic LUT Pack and tried a few out, but you’ve got a shot where the lighting is quite different, or you’re going for a slightly different look. This is where manual colour correction comes in.
On the Colour page in DaVinci Resolve, you’ll find a huge number of options but try not to get overwhelmed. I like to keep things simple.

If I were colour correcting this shot manually, I’d start by dragging up the shadows, bringing down the highlights slightly, boosting the colours, and tweaking the temperature a bit.
There’s a whole 10-hour video out there on color correcting in DaVinci Resolve (which I won’t bore you with now), but here’s what I will say: DaVinci Resolve is hands down the most powerful and advanced colour correction software available - and it’s completely free. You can edit your entire video inside of it. If you're curious, I’ve got a few videos on my channel that walk you through how to use it.
I usually only manually colour correct a shot if it really needs a different treatment. But for most Insta360 footage, the Cinematic LUT Pack should do the trick. Again, you can download it 100% for free using the link.
Blog Author