10 Hidden Features Of The New Insta360 App You Might’ve Missed
Jun 09, 2025
The new Insta360 app version 2 is great in some ways and confusing in others. In this post, I’ll walk you through 10 useful Insta360 mobile app features that are hidden in plain sight.
1. Framing Guides 🖼️
The Insta360 Studio desktop software includes a framing guide that helps you line up shots symmetrically, without the need for any guesswork.
But where is this feature in the mobile app?
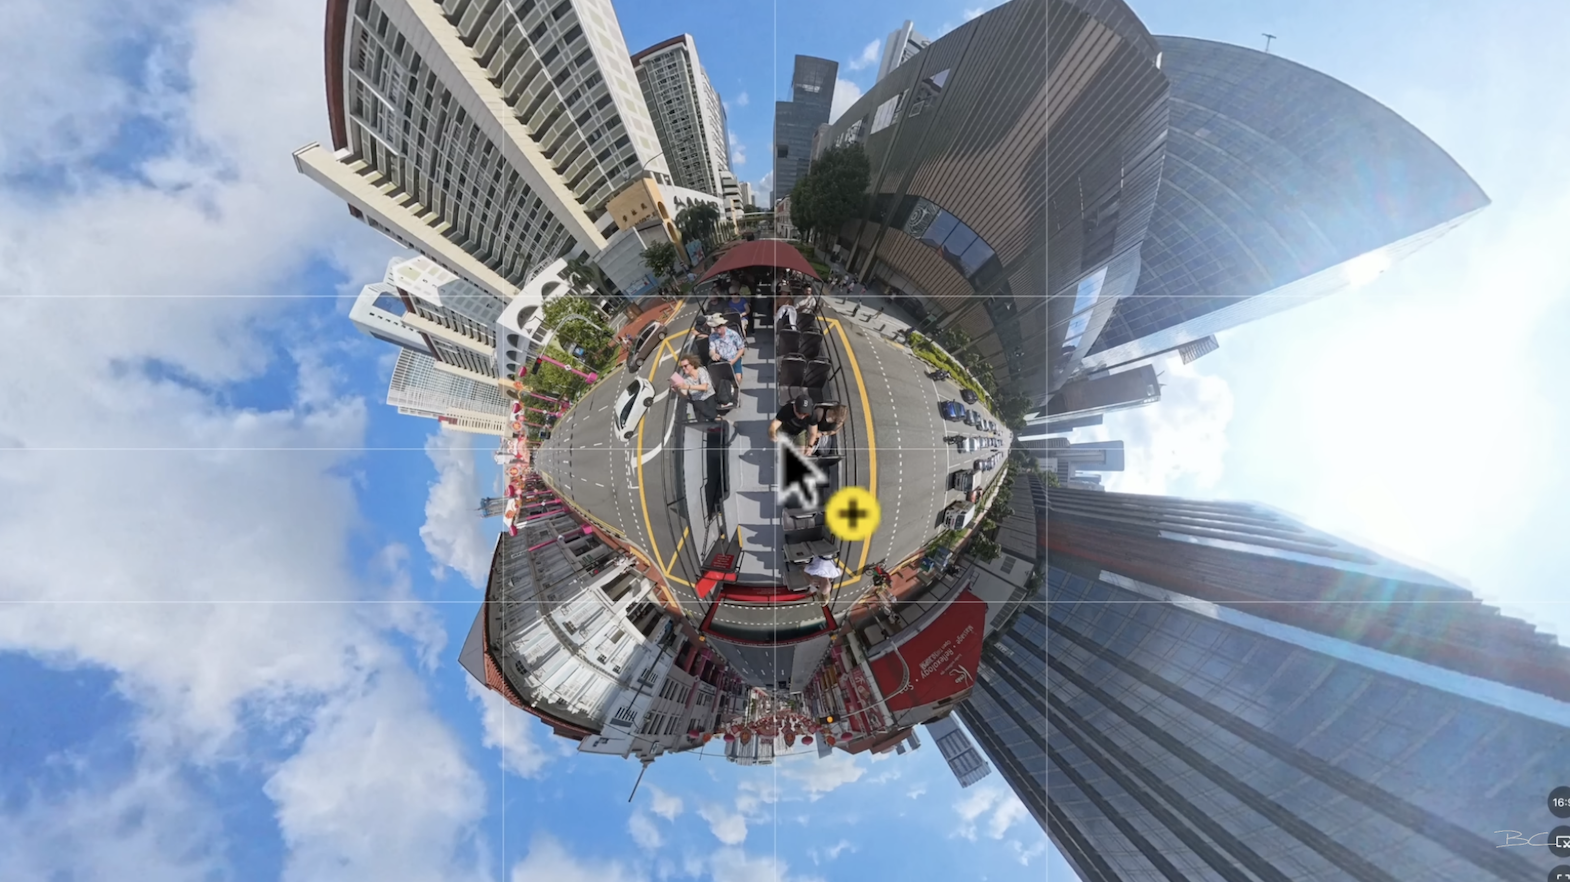
➡️ It is there - you just need to touch and swipe the screen.
When you tap and swipe your finger across the screen, the grid guides will appear. As soon as you lift your finger, the guides disappear. Personally, I think this is a smart design choice—it keeps your playback clean so you can view your shot without any overlays getting in the way.
2. Proxy Mode ⚡
Editing 8K video in the Insta360 mobile app can be problematic on less powerful devices, often causing lag or even freezing. That is, unless you’re using proxies.
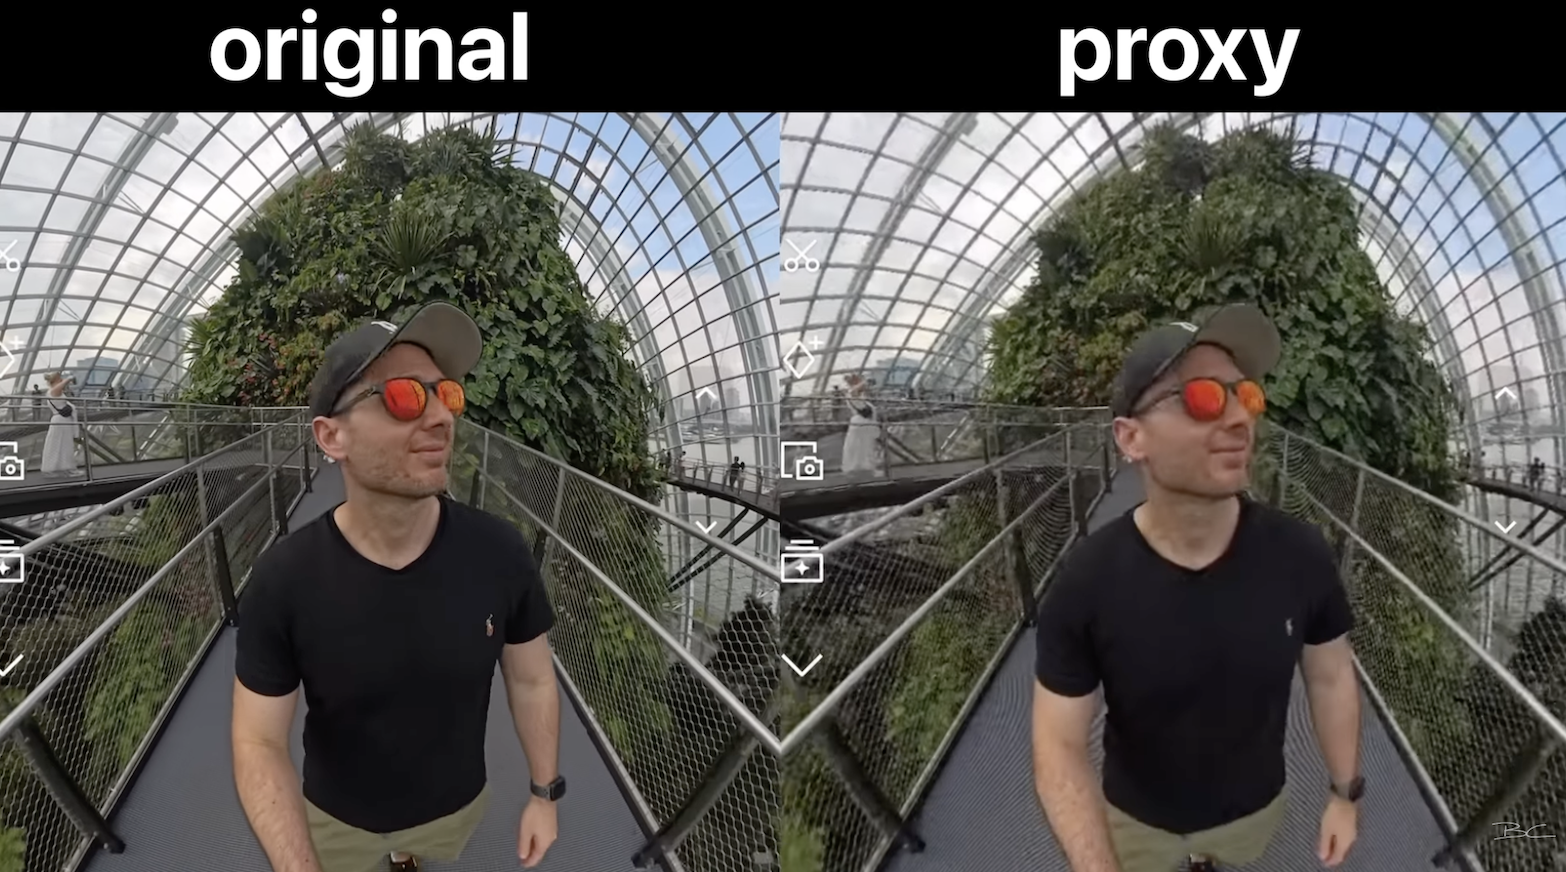
Proxies are lower-quality versions of your video clips that make editing much faster and smoother. Think of them like a blurry preview - the app uses this lighter version so it doesn’t lag while you edit. Then, when you’re ready to export, it automatically switches back to the full-quality video.
Proxy files are low-resolution previews that let you edit smoothly and quickly. The full-quality video is used only during export.
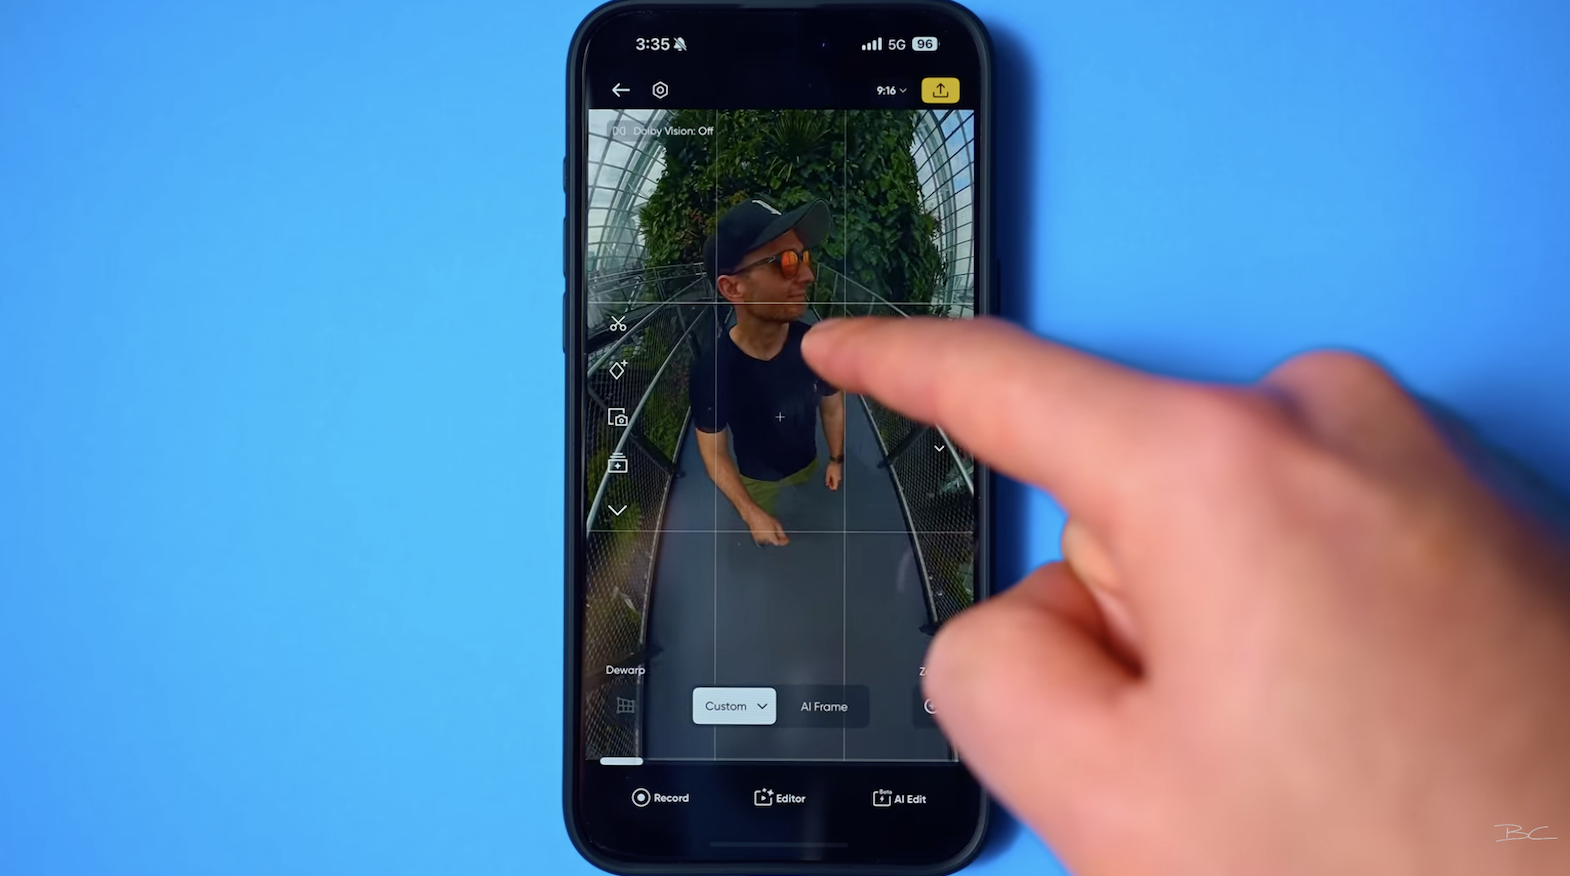
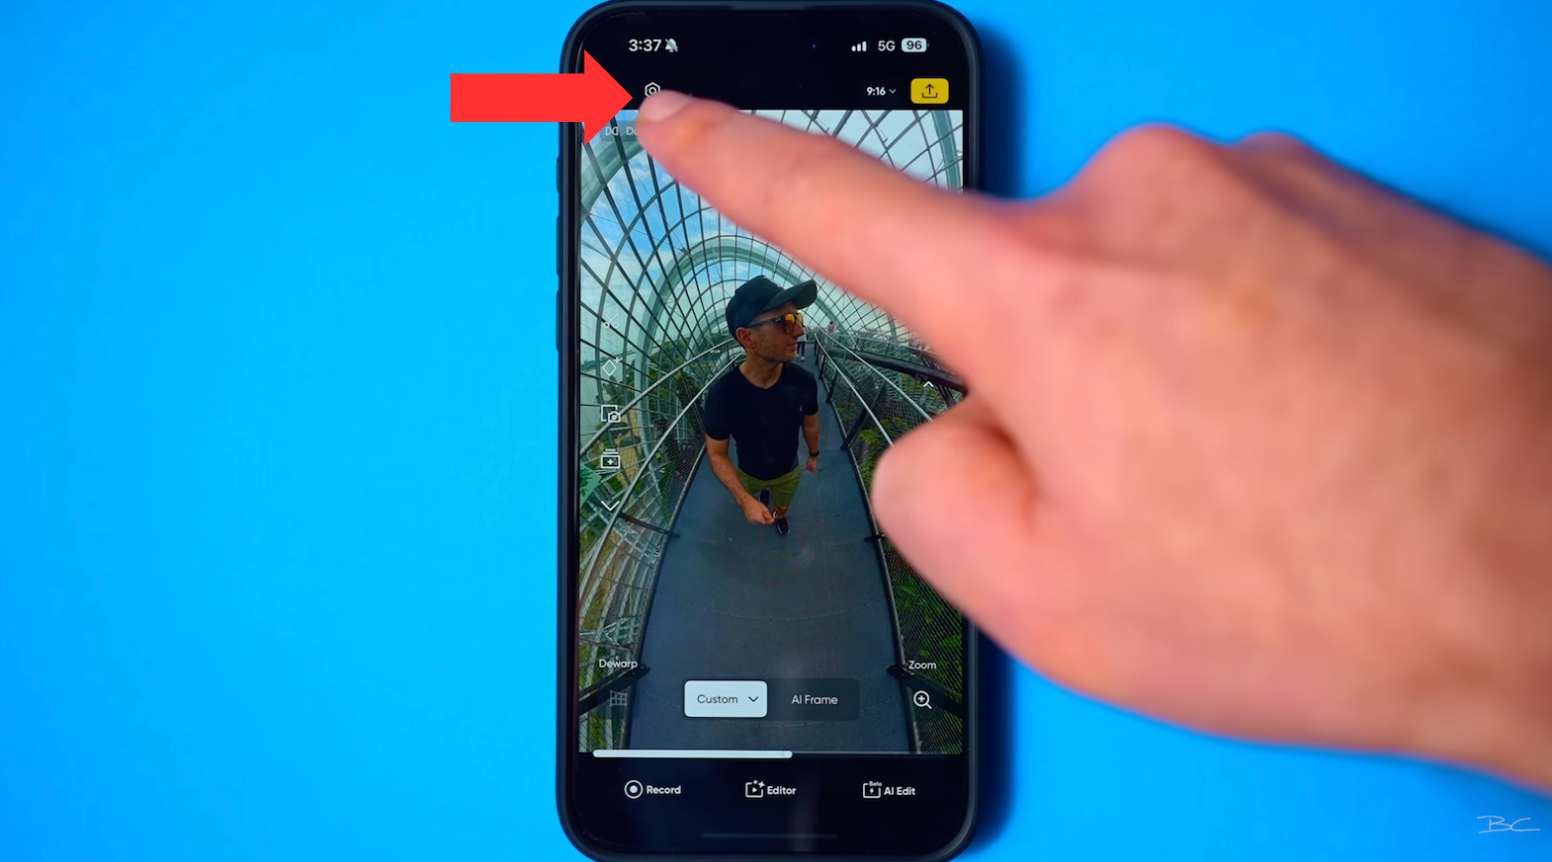
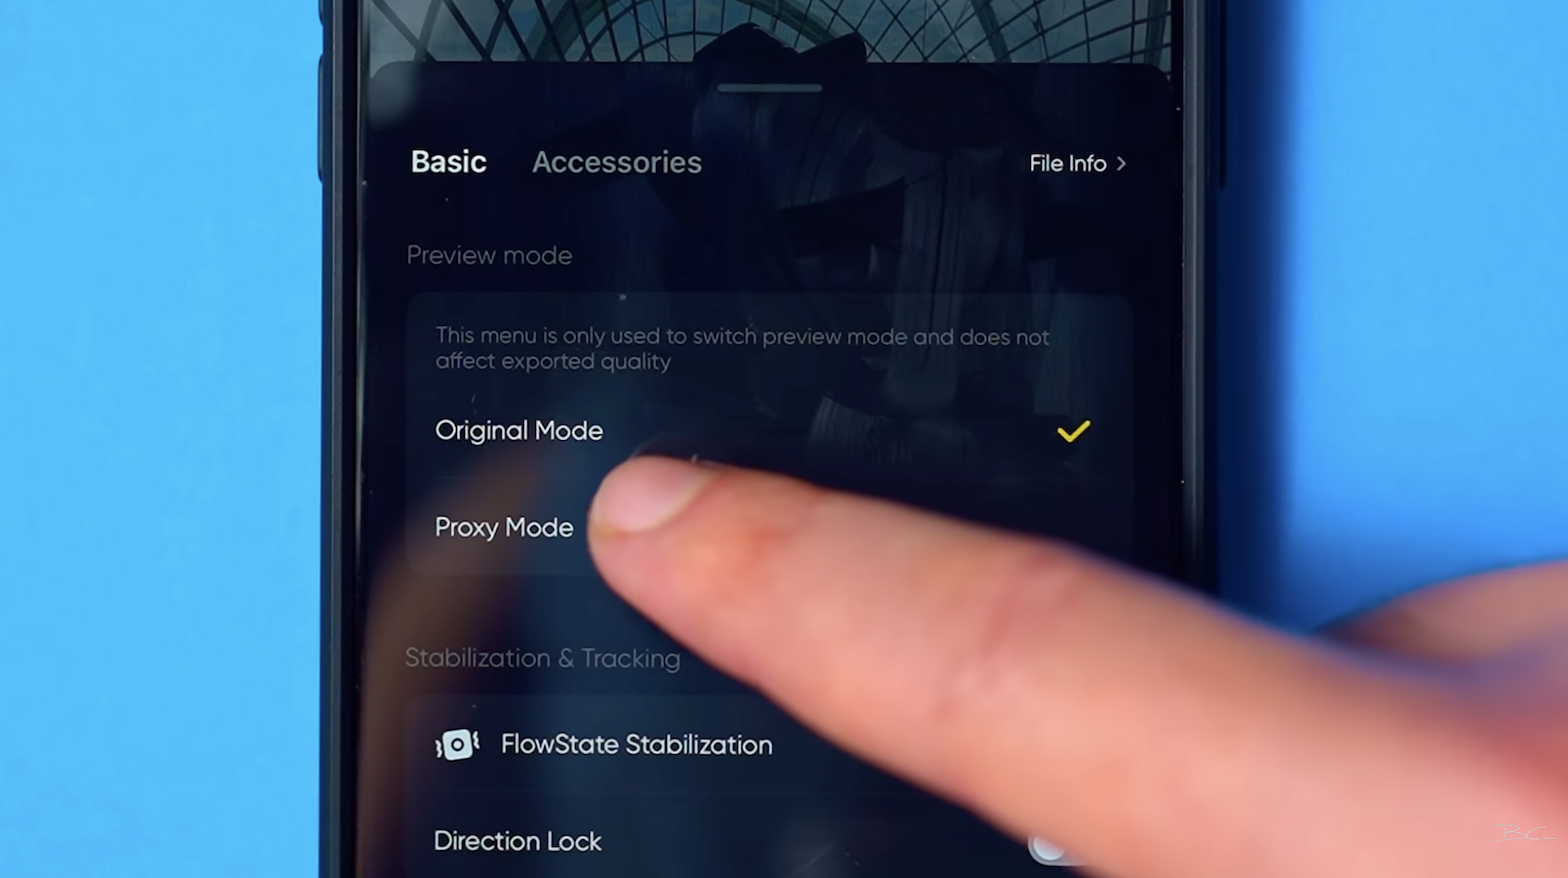
How to enable proxy mode:
- Tap the settings icon
- Under Basic, switch from Original Mode to Proxy Mode
 If you’re using a fast phone though, you'll want to keep it on original mode for top-quality playback when reframing.
3. Navigation Arrows ⏩
The next hidden feature—definitely hidden in plain sight—has to do with navigating between your clips.
Normally, after shooting a bunch of clips, you’d head to the Album tab and scroll through to find the one you want. Maybe you tap on one, realize it was a bad take, and then go back to the menu to choose a different one.
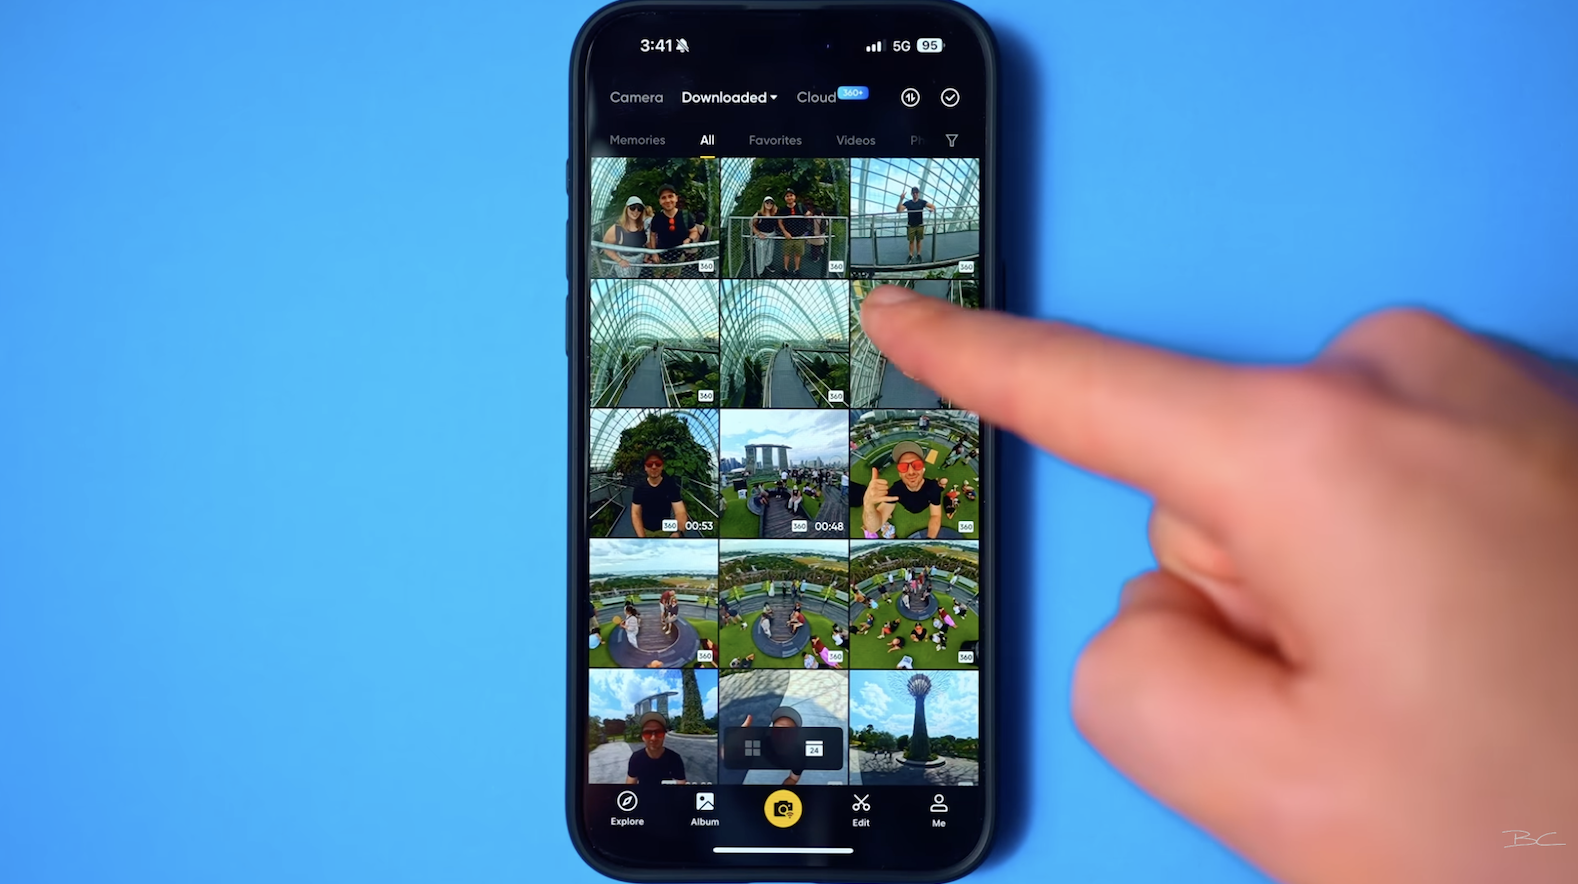
But there’s a much faster way to do this.
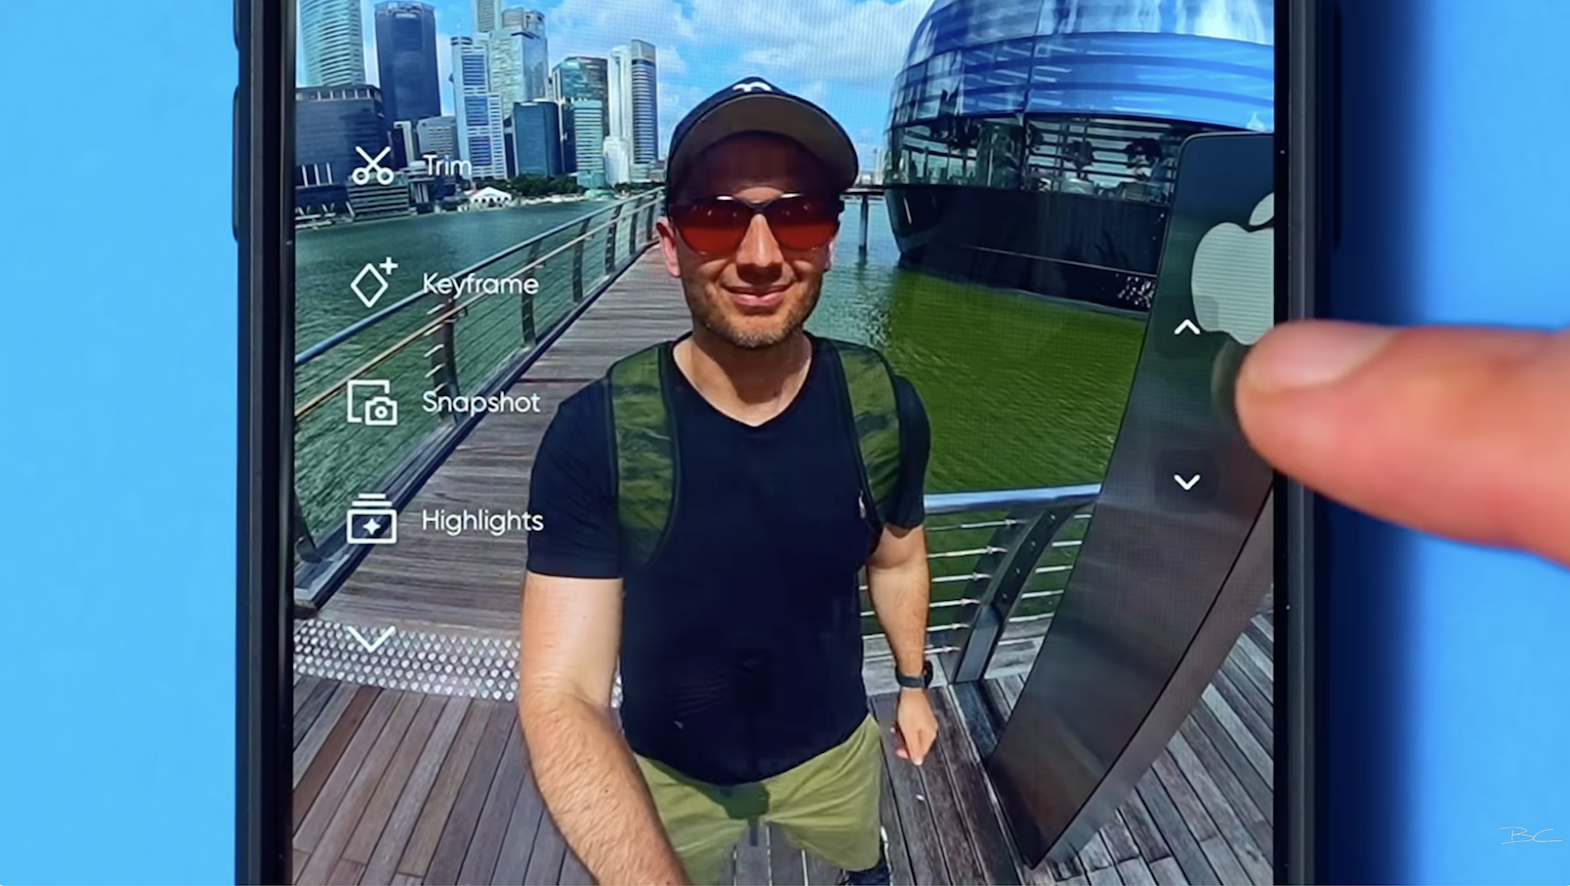
Just use the up/down navigation arrows here in the preview screen. Tap the arrow, and it’ll instantly take you to your previous or next shot—no need to backtrack through the album or menu each time.
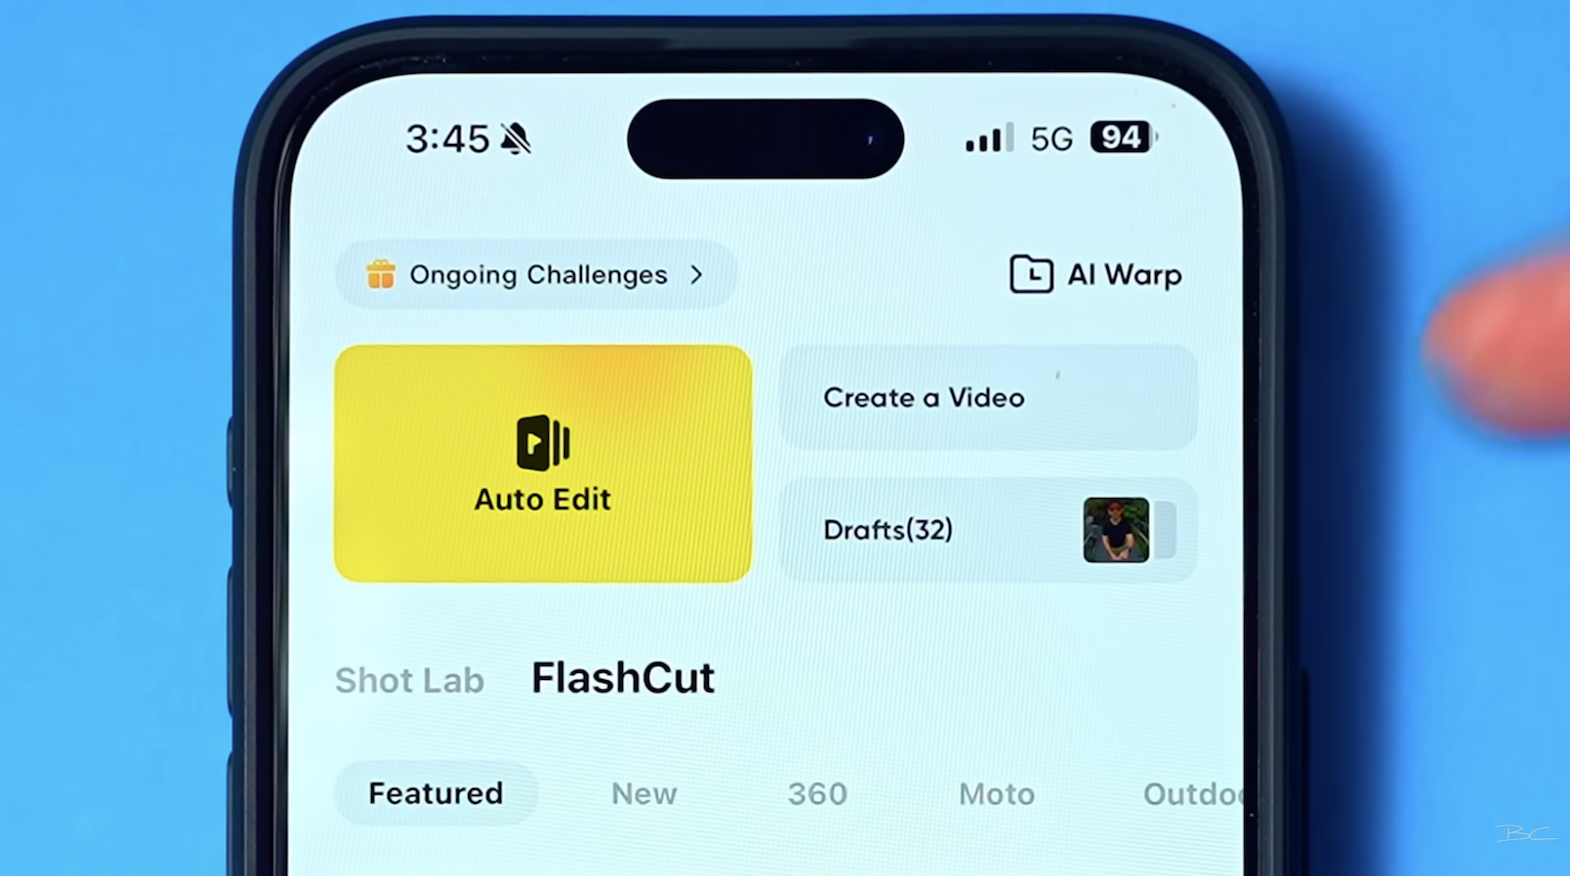
4. Drafts 🗂️
The next hidden feature is one that’s really not intuitive and kind of in the wrong place.
If you head over to the Edit tab in the Insta360 app, look up at the top right and you’ll see a section called Drafts. In here, you’ll find all of your previous edits automatically saved after reframing.
Where to find it:
- Go to the Edit tab
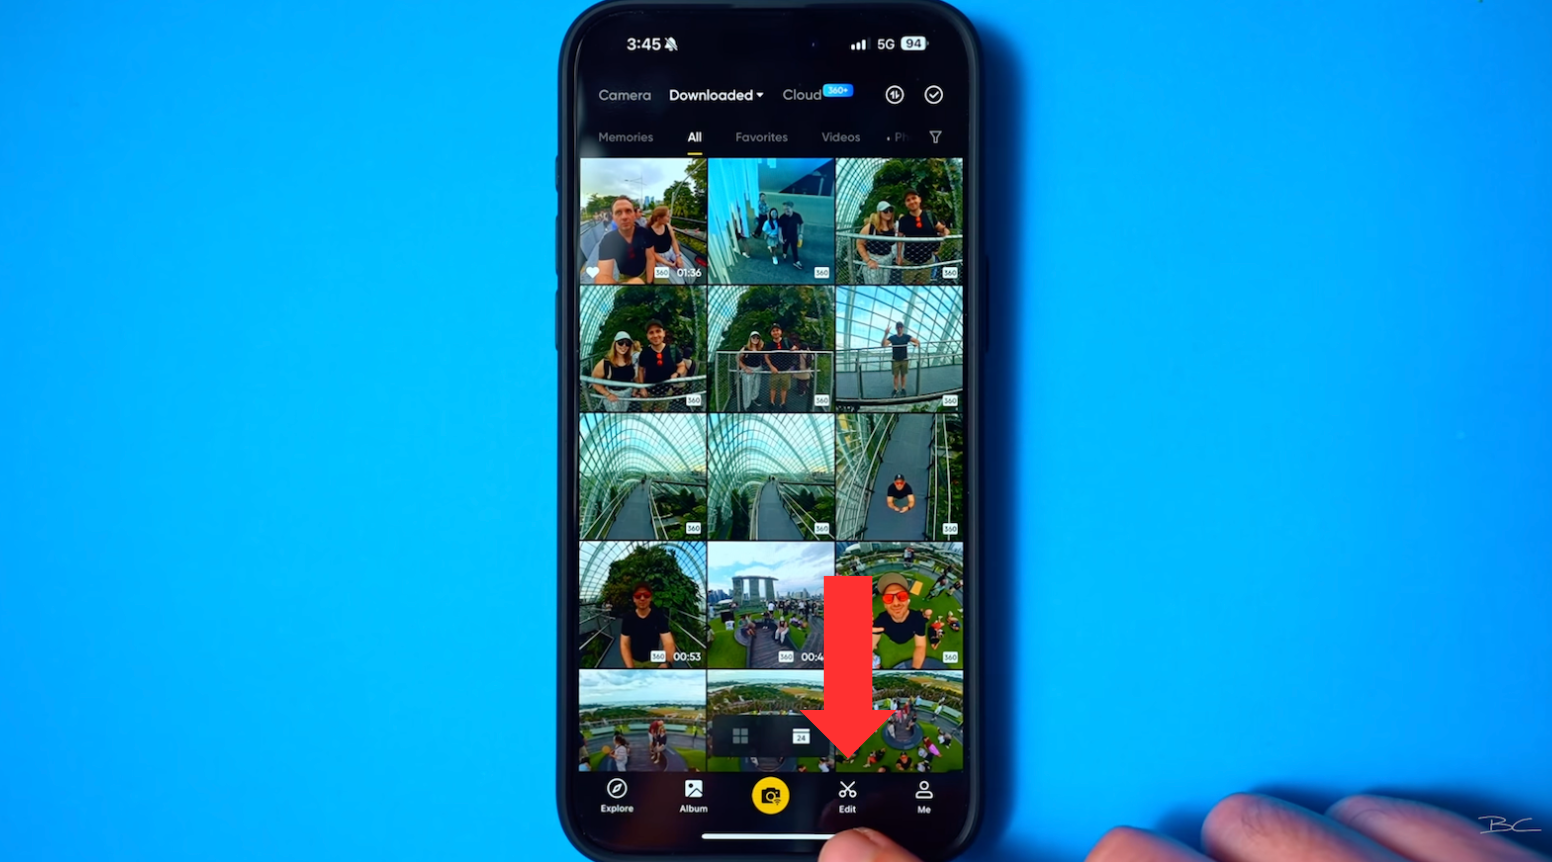
- Tap Drafts (top right corner)
 Let’s say you only wanted to reframe a single clip that you downloaded to your phone. You go ahead, finish the edit, export it, and then later decide you want to come back and tweak it slightly. Well, good news: the app has already saved a version of that edit in the Drafts folder.
So now, instead of starting from scratch, you can head back to the Edit tab → tap Drafts → and pick up right where you left off.
This feature is especially useful if you’ve done a complex edit with tracking, keyframes, or multiple reframes—and don’t want to redo all of that from the beginning.
5. Insta360+ ☁️
Insta360+ is a cloud subscription service that automatically backs up footage while shooting, which is ideal if you don’t want to manually backup files to your computer.
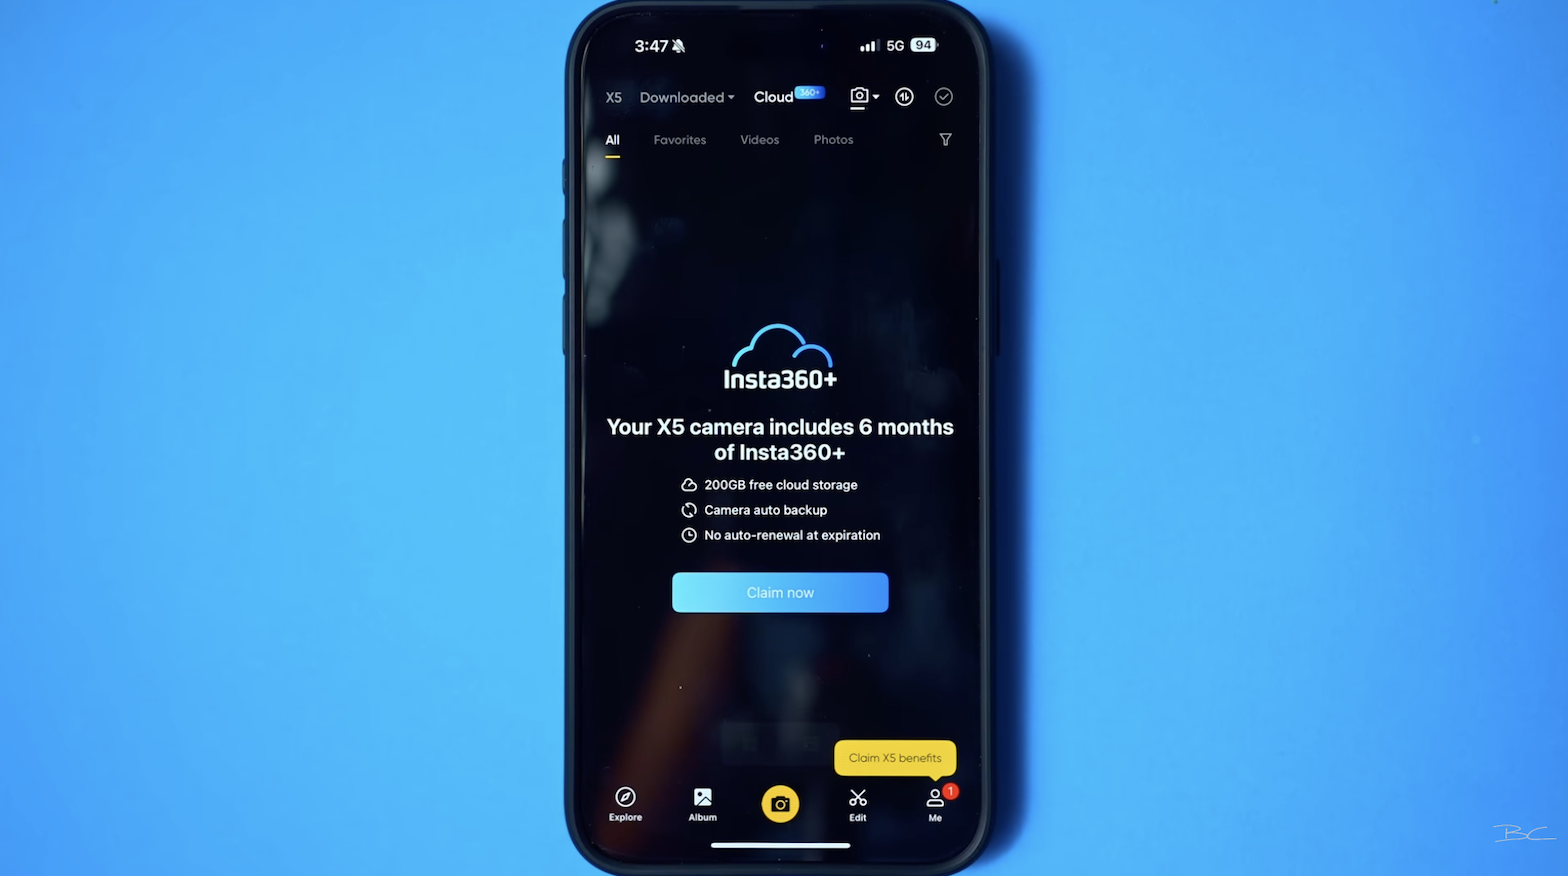 It also lets you:
- Share 360 videos natively via a browser link
- Streamline workflow for frequent shooters
It’s a niche use feature (probably for someone shooting crazy amounts of footage) so this one definitely won't be for everyone, especially with the subscription cost.
6. MultiView 🔍
MultiView (showing forward and backward perspectives like the shot below) is still in the app - just in a new spot.

To use it:
- Tap the keyframe icon (left side)
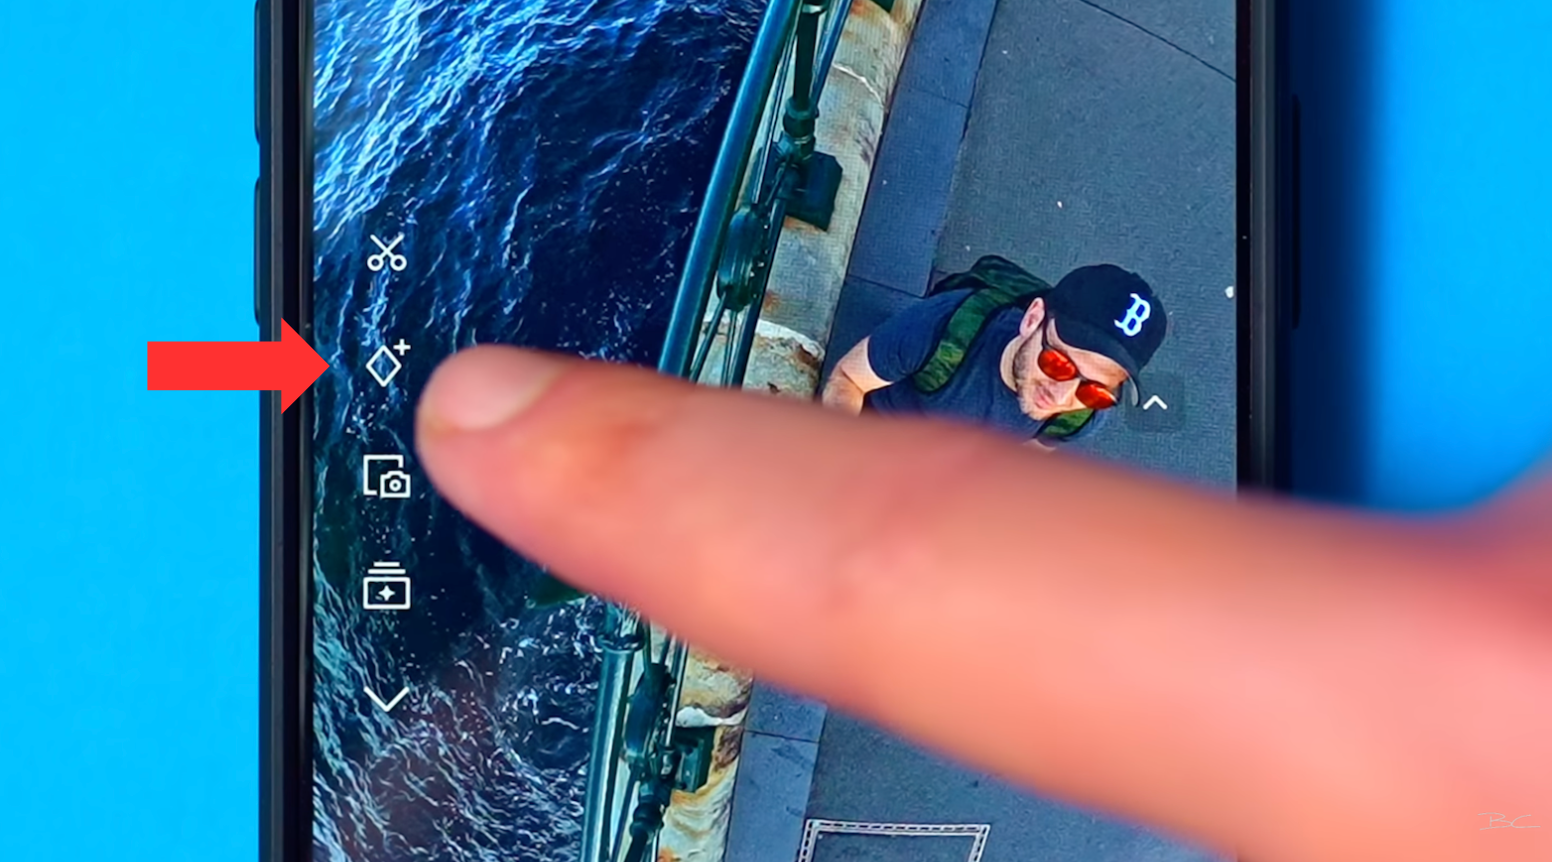
- Tap MultiView (bottom right)
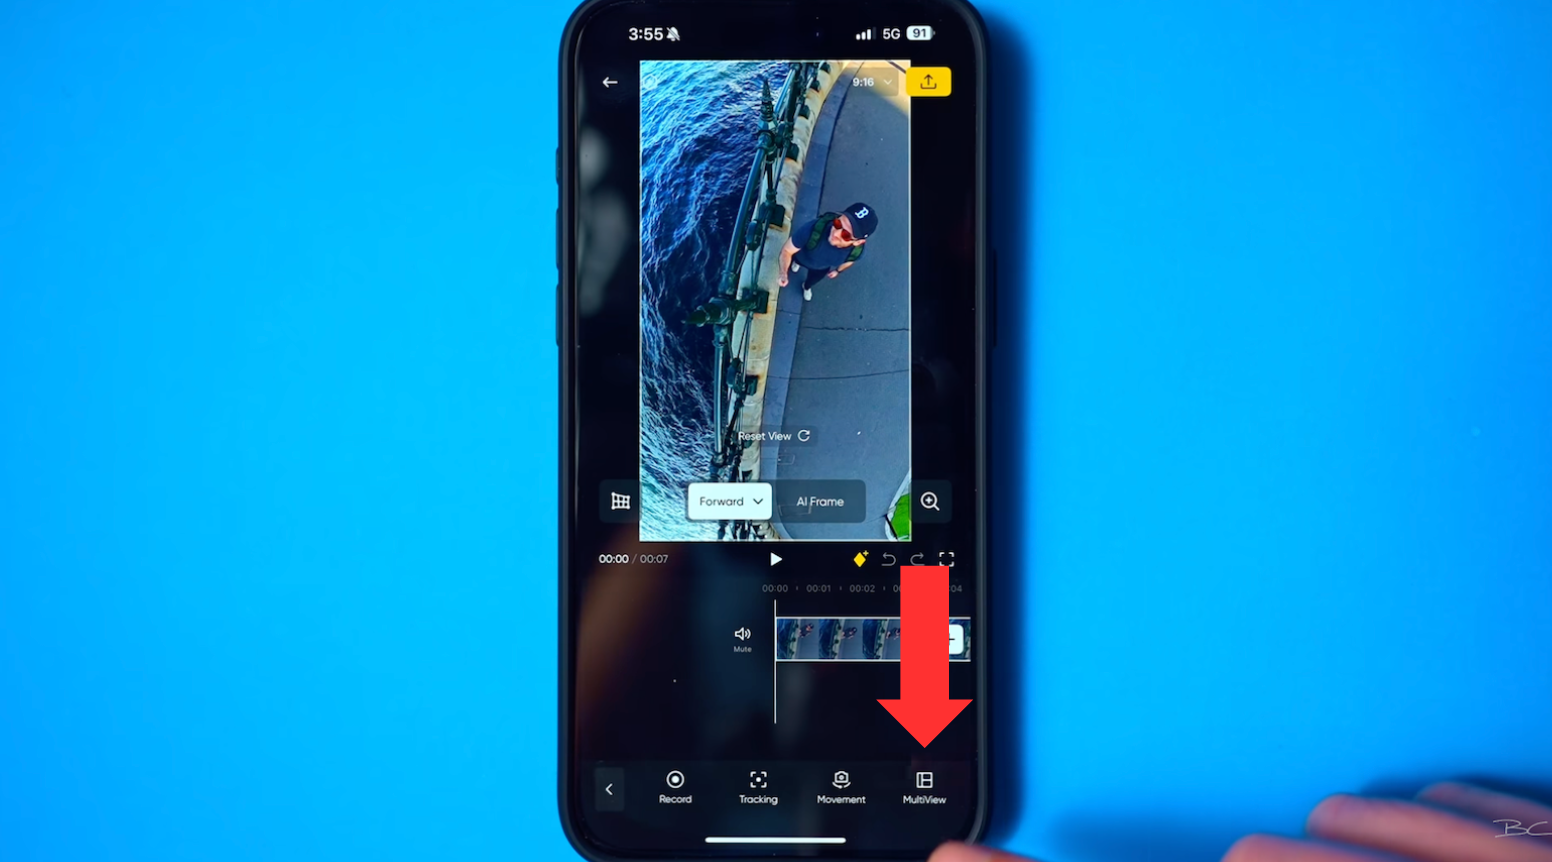
- Tap Add and choose your layout from a few different options (e.g., picture-in-picture, car/dashcam)

7. Animate 📽️
This next one is for those who like taking 360 photos. Did you know you can convert your 360 photo into a video?
- Tap on a photo in Album
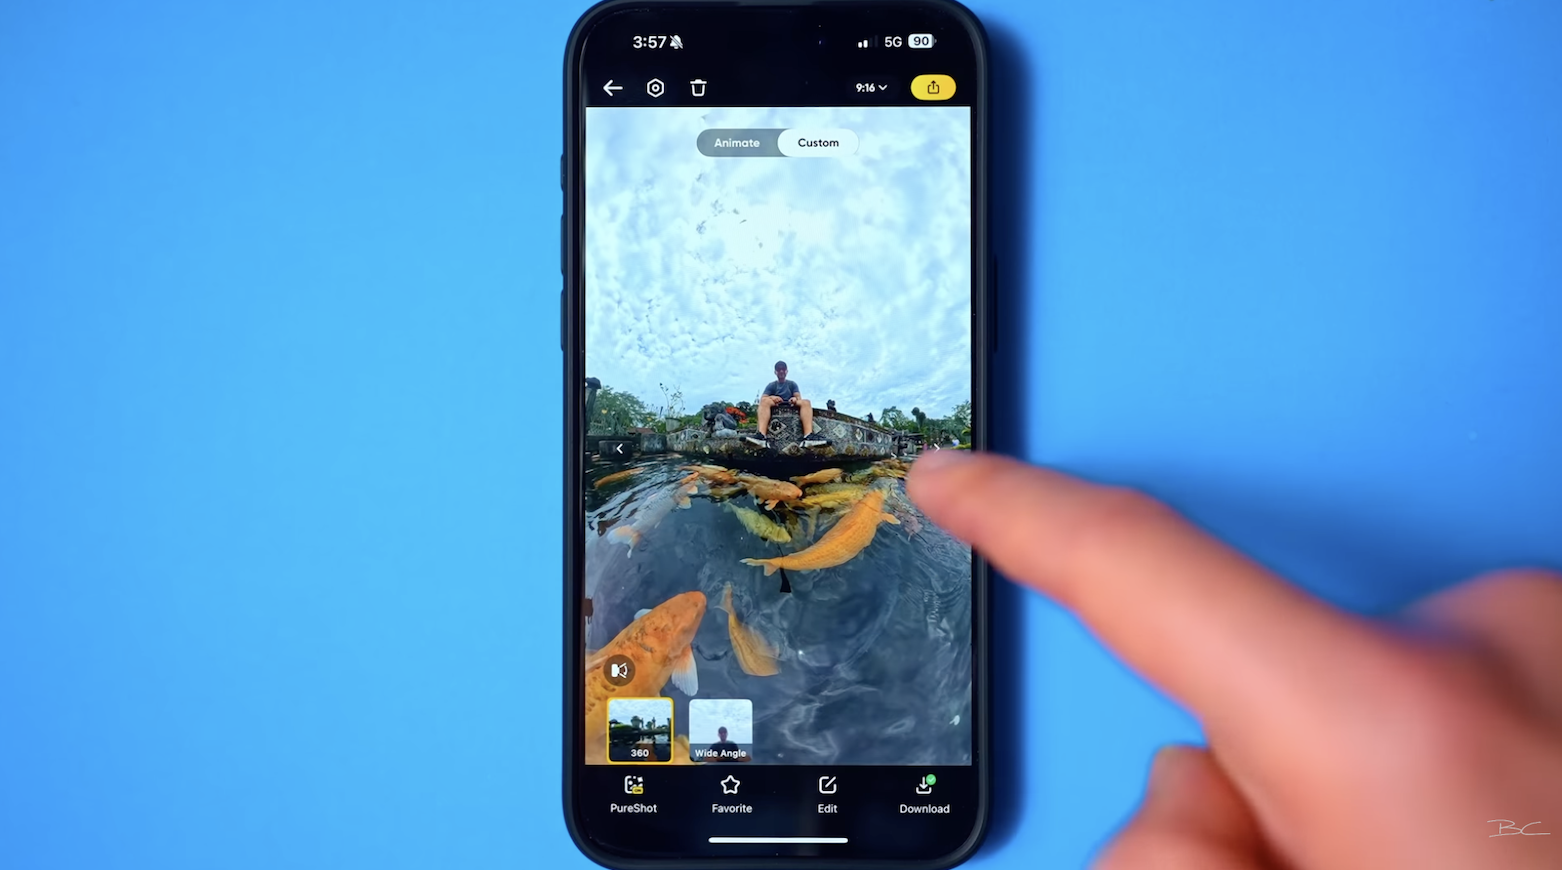
- Tap the screen > Select the Animate tab
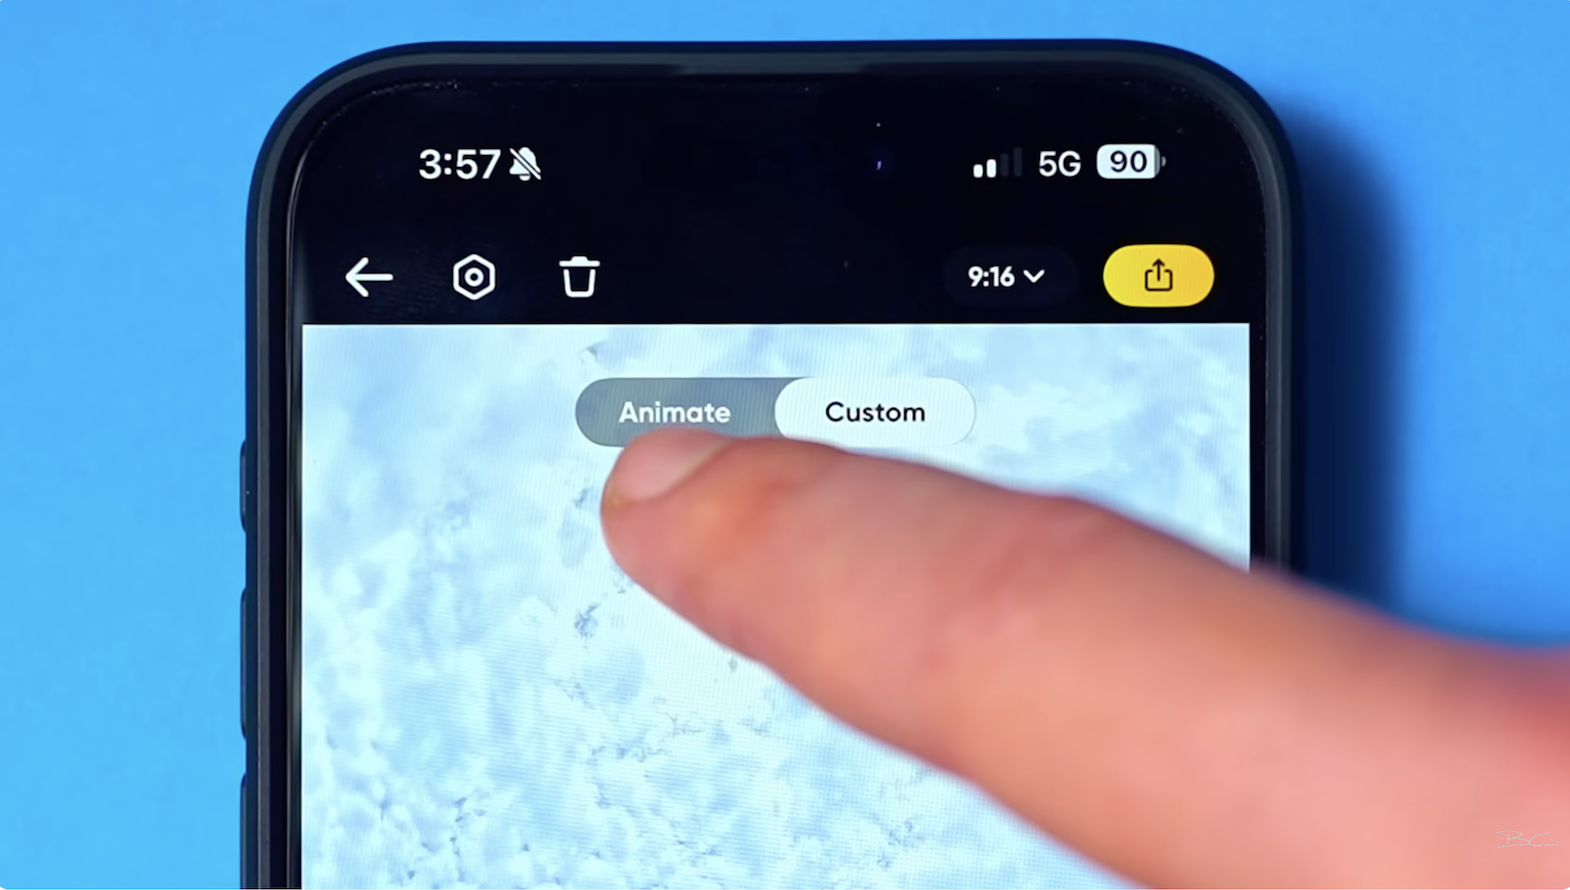
- Choose from preset camera motions to convert the image into a short video
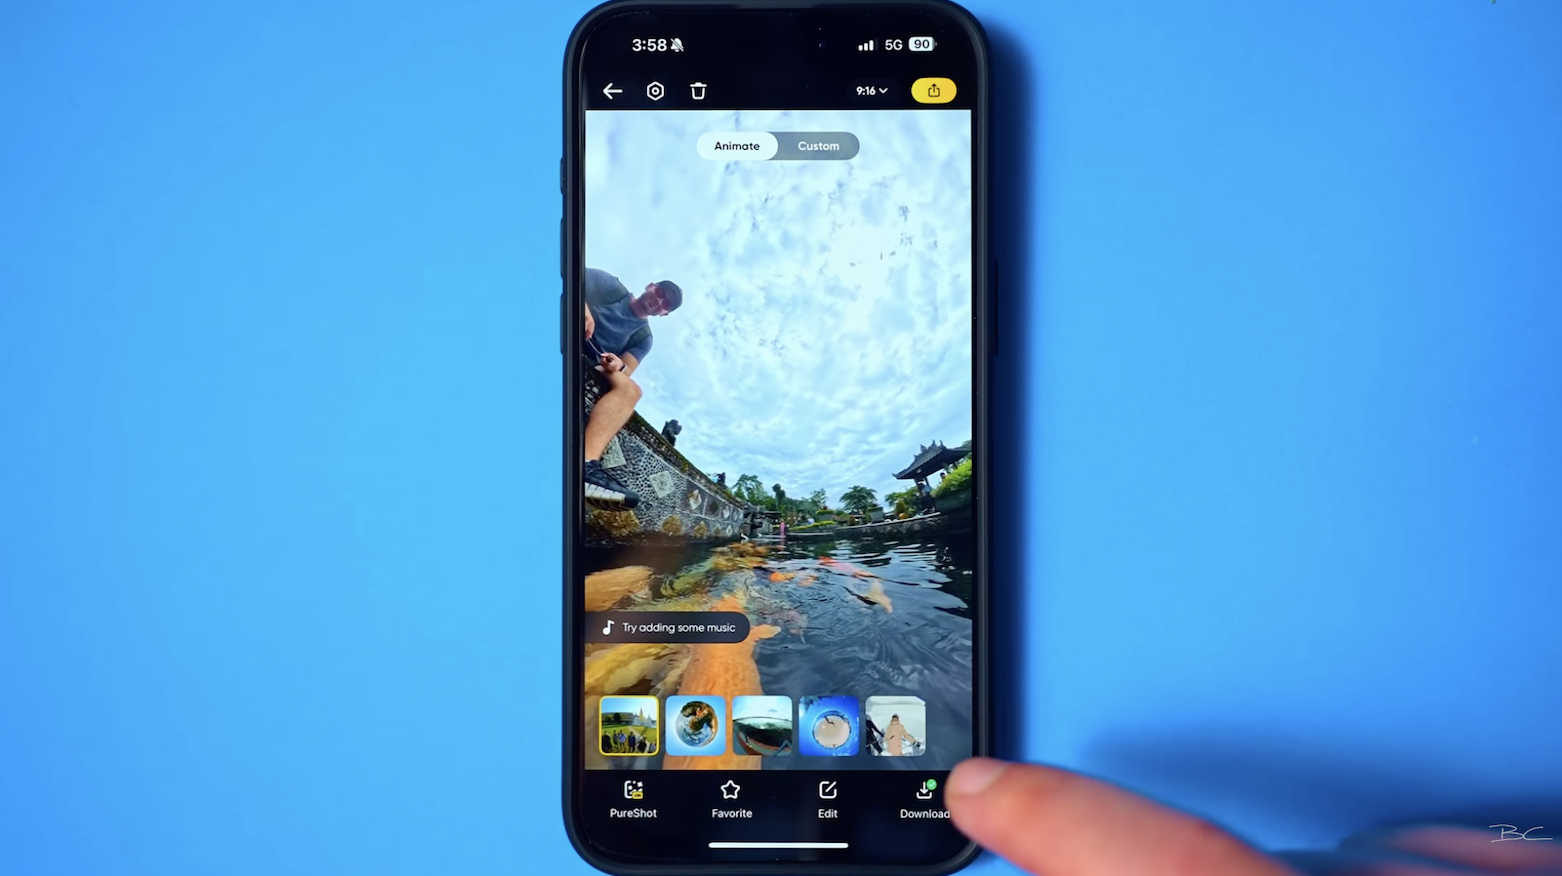 Now, don’t expect anything amazing from these - but some of them can be pretty cool if you just want to quickly convert a photo into a video to post on platforms like Instagram.
8. Colour Correcting (If Shot in PureShot Mode) 🎨
Speaking of 360 photos—did you know you can colour correct them directly in the Insta360 mobile app? It might seem obvious—like, of course, you just tap Edit and expect to find colour adjustment tools, but that’s not actually the case in all situations.
Here’s something I discovered the hard way: if you shoot your original 360 photo in HDR mode, you won’t be able to color correct it within the app. However, if you shoot in regular PureShot mode (you’ll see the PureShot icon on your image, like I did below), you’ll suddenly unlock a lot more editing options.
- Tap Edit
- Choose Color Plus or manual adjustments to tweak contrast, saturation, and clarity

✅ Look for the PureShot icon to confirm you can edit the image.
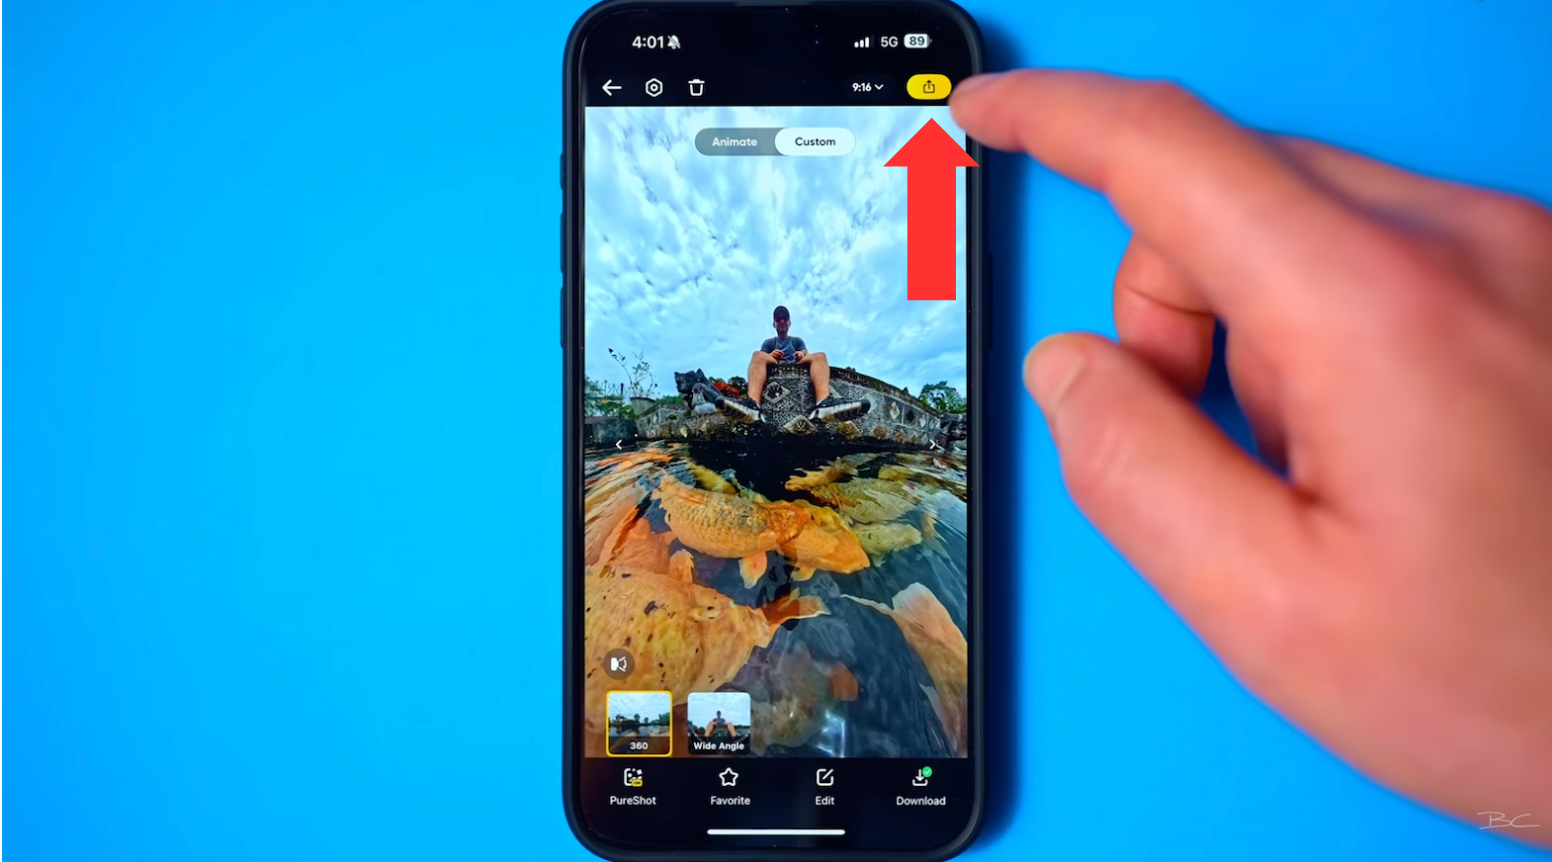
9. Export 📤
Now, while 360 cameras are mostly used for capturing immersive content and then reframing it into flat photos or videos, the Insta360 app does still let you export both photos and videos in full 360 format.
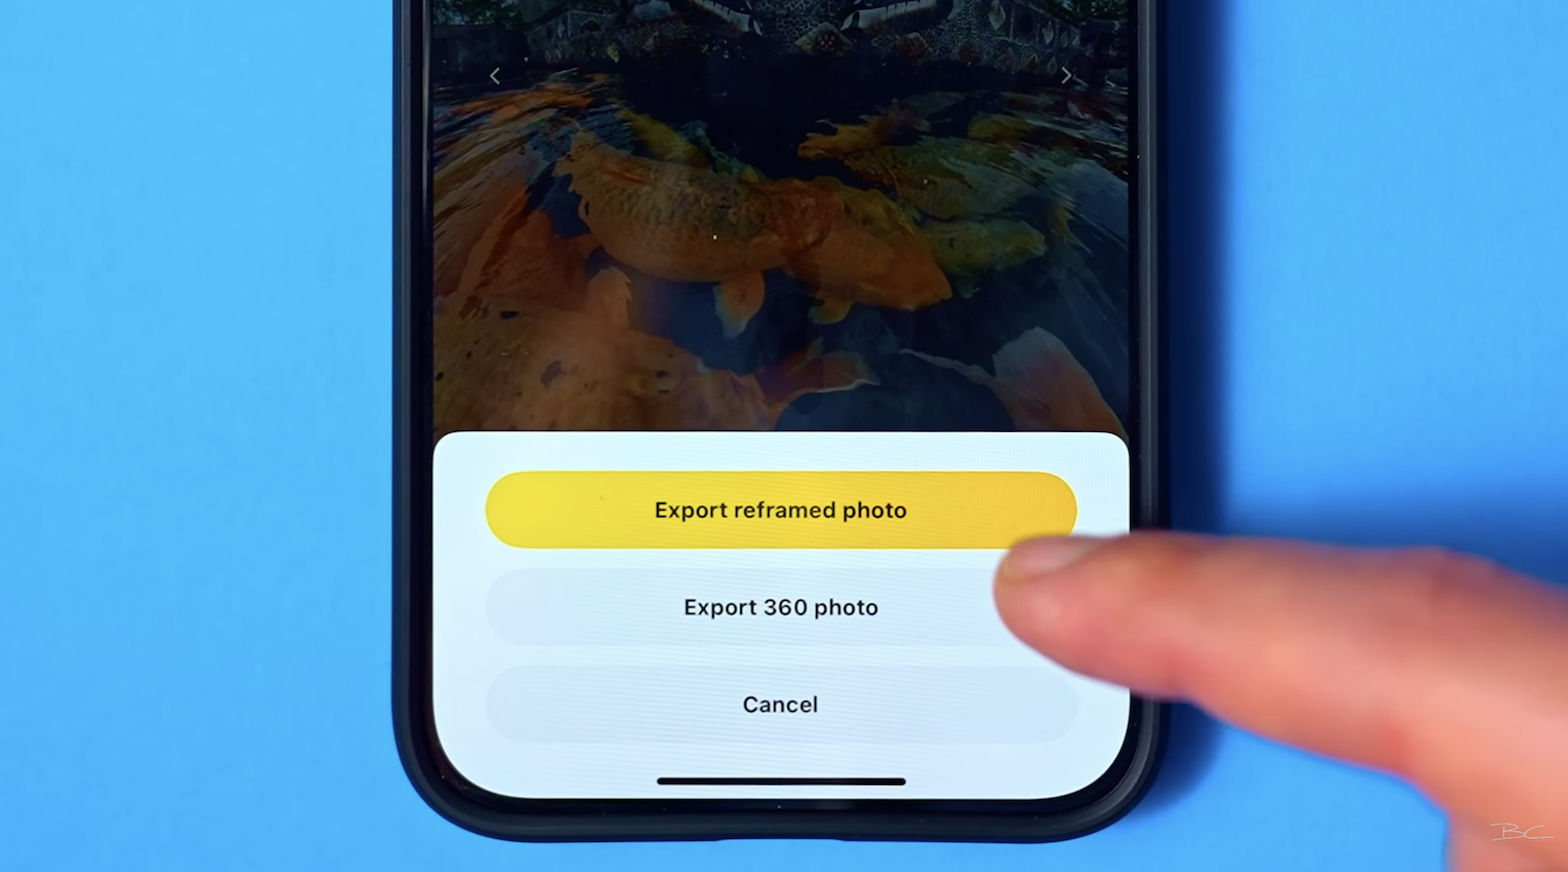
To do this, simply tap the Export button at the top right. You’ll then be given the option to choose between exporting a Reframe Photo or a 360 Photo. Tap Export 360 Photo, and voilà—you’ve got your spherical image ready to go.
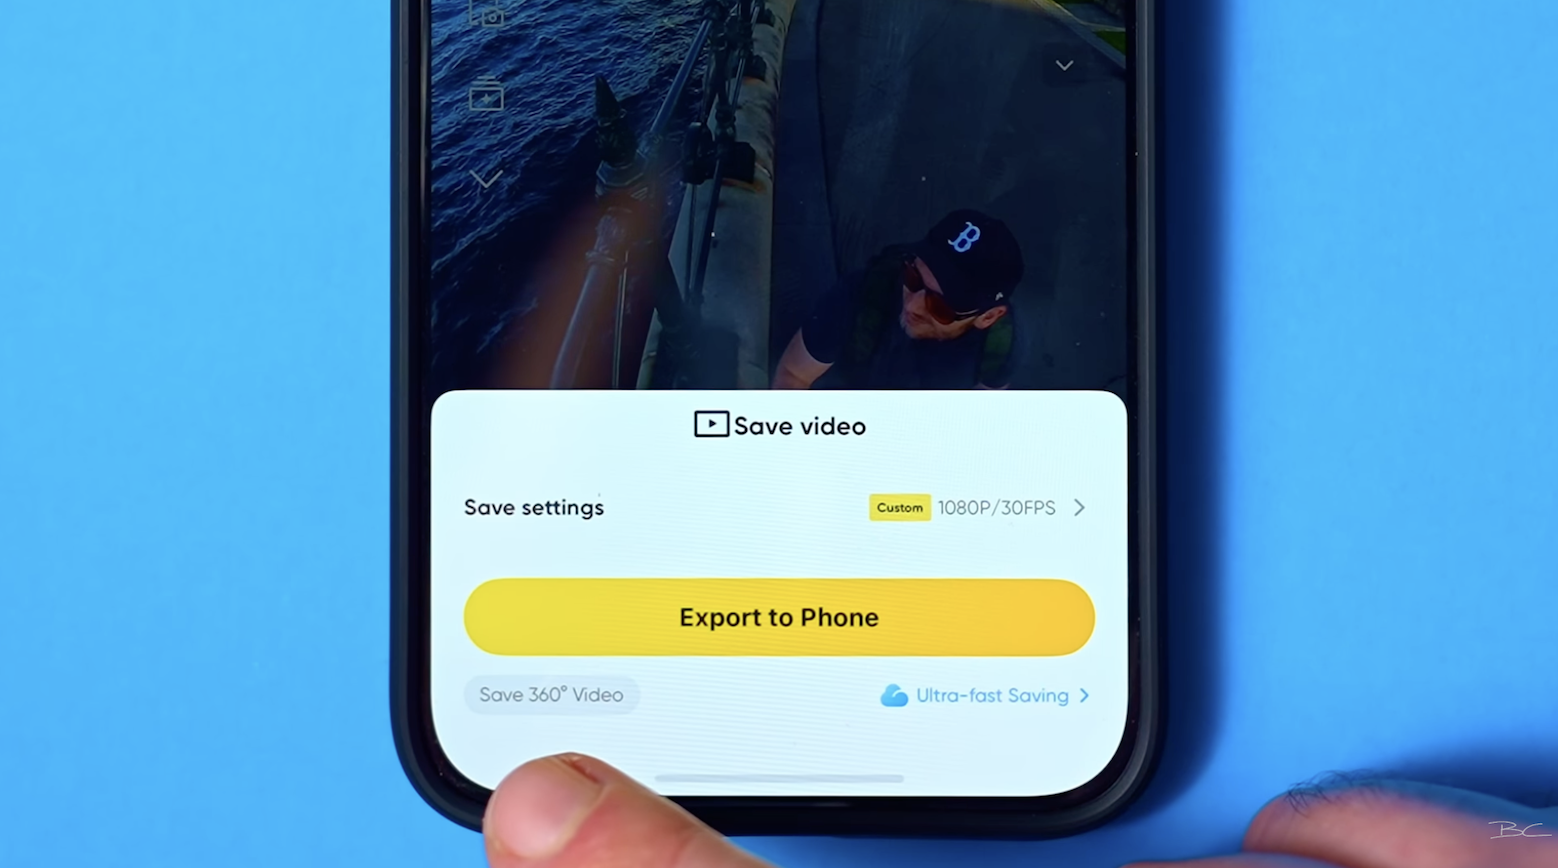
For 360 video:
- Tap Export
- Find the small “Save 360 Video” option (bottom left corner) If you tap that, the app will export the video in 360 format—up to 4K resolution.
That said, if you originally shot your video in 8K, it’s a bit of a shame to downgrade it to 4K just to export it from your phone. In that case, I’d recommend skipping the mobile export and doing it on your computer instead, especially if you plan to use the video for VR.
10. Custom Export Settings 📈
Now, speaking of export settings, one of the biggest and most important hidden features in the Insta360 mobile app lives inside the Export menu.
Let’s say you’ve just finished reframing a video and want to export it. Instead of simply tapping Export to Phone, head to the Export screen and look for the word Custom. It might not look like a button—but it is.

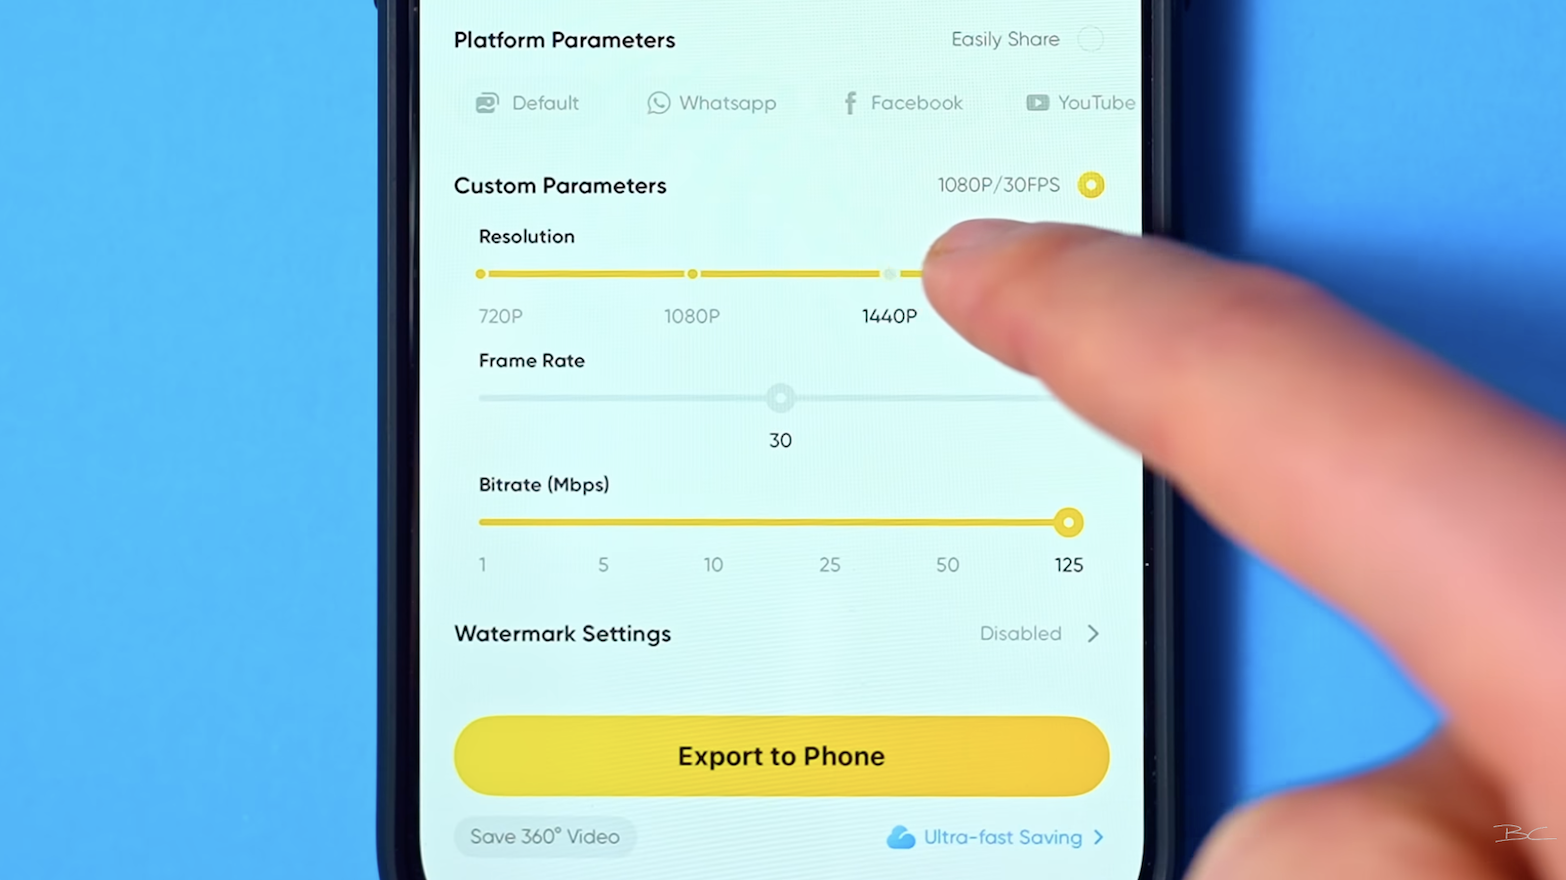
Tapping Custom reveals an entirely new menu where you can fully customize your export settings. The most important setting here is Resolution. Just drag the resolution slider all the way to the right, and your video will now export in 4K.
You typically won’t be able to change the frame rate, since it will default to whatever frame rate the original clip was shot in. But you can boost the bitrate—drag the slider from the default 50 Mbps up to 125 Mbps for maximum video quality, if your phone has enough storage space.
 While this isn’t necessary for every clip, I highly recommend using it for important shots, then simply delete the high-res export from your phone’s camera roll once it’s safely used in your final project.
By using these custom settings, you’ll ensure your exported clips are as sharp and high-quality as possible—even when working directly from your mobile device.
Bonus Tip: Revert to the Old Insta360 App Version 🔄
Now, I’m going to throw in a little bonus tip because I’m feeling generous.
Let’s say you’ve updated to the new Insta360 app, but you’re not loving it and want to go back to the previous version. Good news: you can downgrade, and you can do it right from within the app.
Here’s how:
1. Tap Me on the bottom-right of the screen.
2. Scroll down and tap About Insta360.
3. At the very bottom, you’ll see an option that says Switch to the Old Version.
4. Tap Confirm > Switch to Old Version. 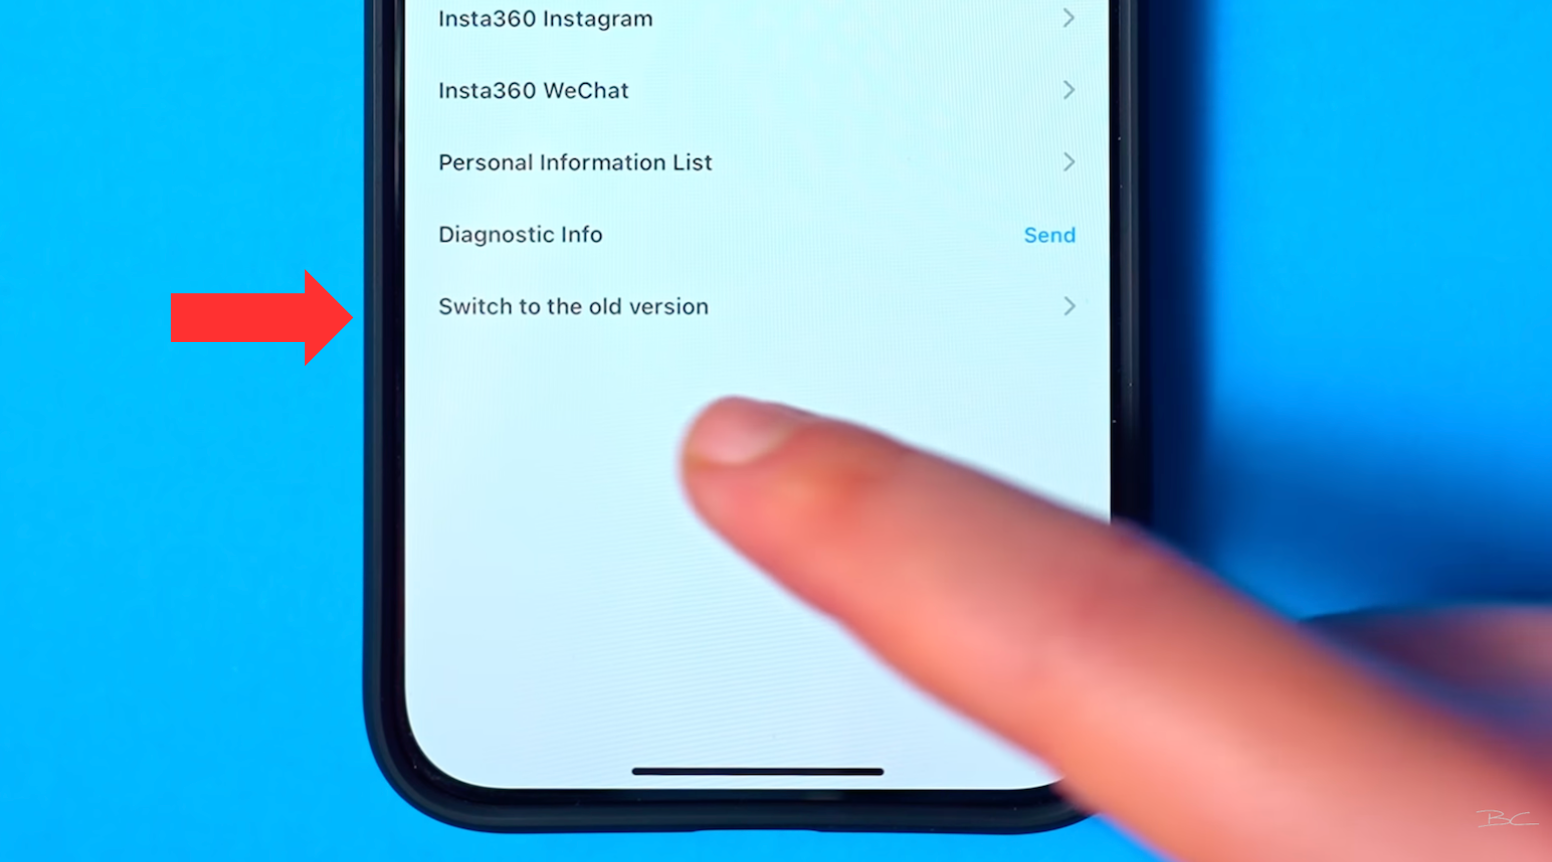
And that’s it—you’ll be downgraded to Version 1 of the app.
Of course, Insta360 doesn’t really want you to switch back (since the newer version has more features), but if you're more familiar with the old layout and not quite ready to adapt, this gives you the flexibility to stick with what you know—for now.
Final Thoughts 💭
Hope this walkthrough helped you uncover some hidden Insta360 app features you didn’t know about!
If you’re using a 360 camera to capture awesome travel shots, like some of the ones you see throughout the post, but you’re not sure where to position the camera or how to move it to create a stylish reframed video, my 360 Video 101 course has you covered.
Inside the course, I’ve included several modules dedicated to camera placement to help you unlock amazing shots you might not have even realized were possible when filming. These are all super simple to achieve and can be done using either the mobile app or desktop software.
Blog Author