Insta360 X5 Shooting Modes: Full Breakdown of All 17 Modes
May 29, 2025
The Insta360 X5 has 17 different shooting modes, and most people have no idea what half of them even do. So, in this post, I'm going to break down every single one: what it is and when to use it. And by the end, you'll know exactly which modes are worth using and which ones you can completely ignore.
If you're interested in buying the Insta360 X5, follow my affiliate link and get a free lens replacement kit with your purchase.
1. Standard 360 Video Mode 🎬
The main mode you'll be using for capturing 360 video is the standard video mode under the 360 menu.
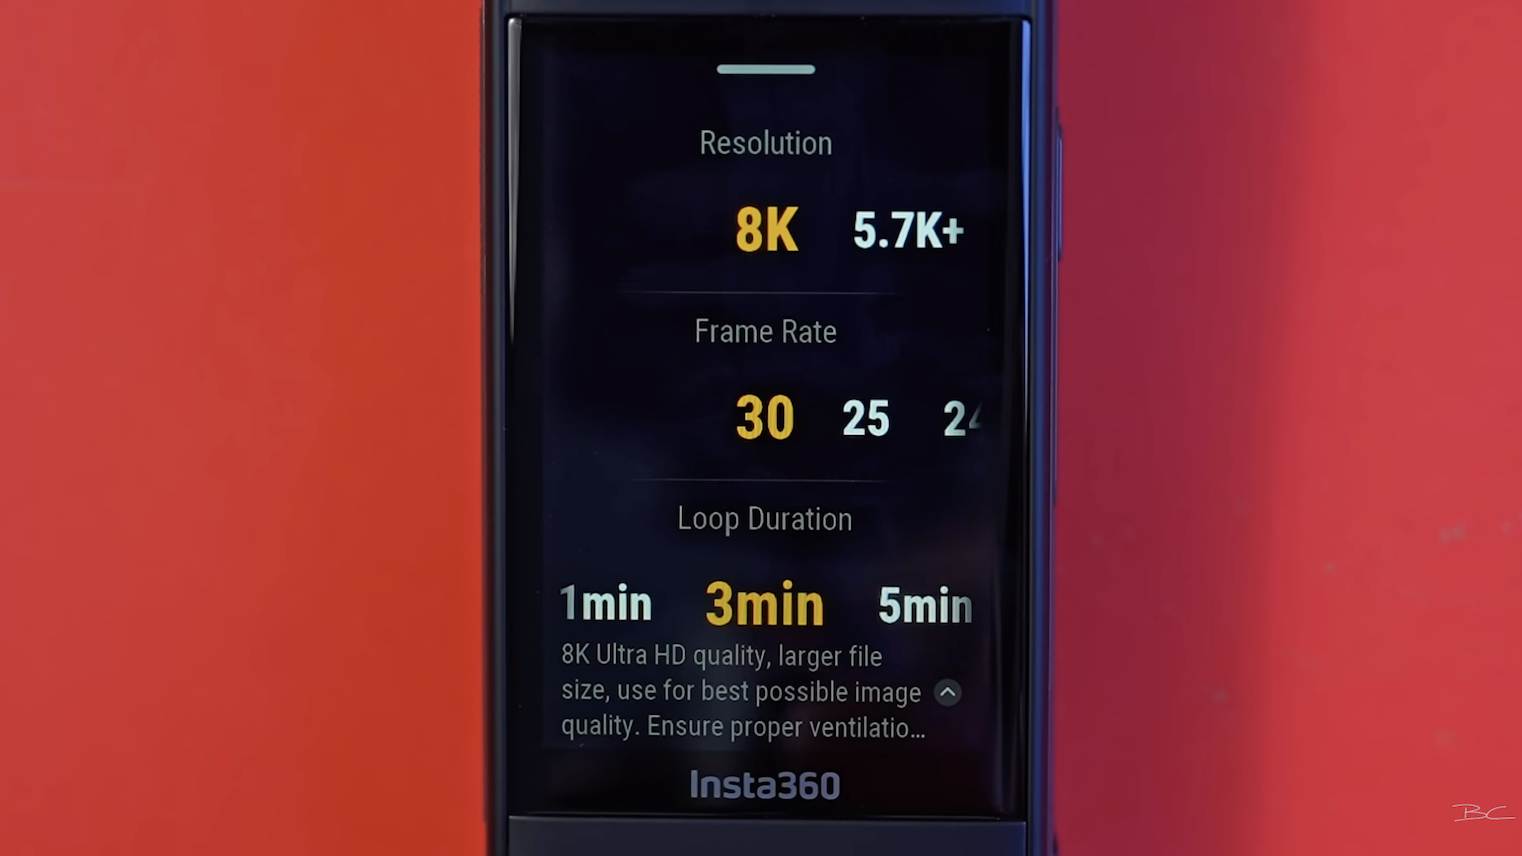
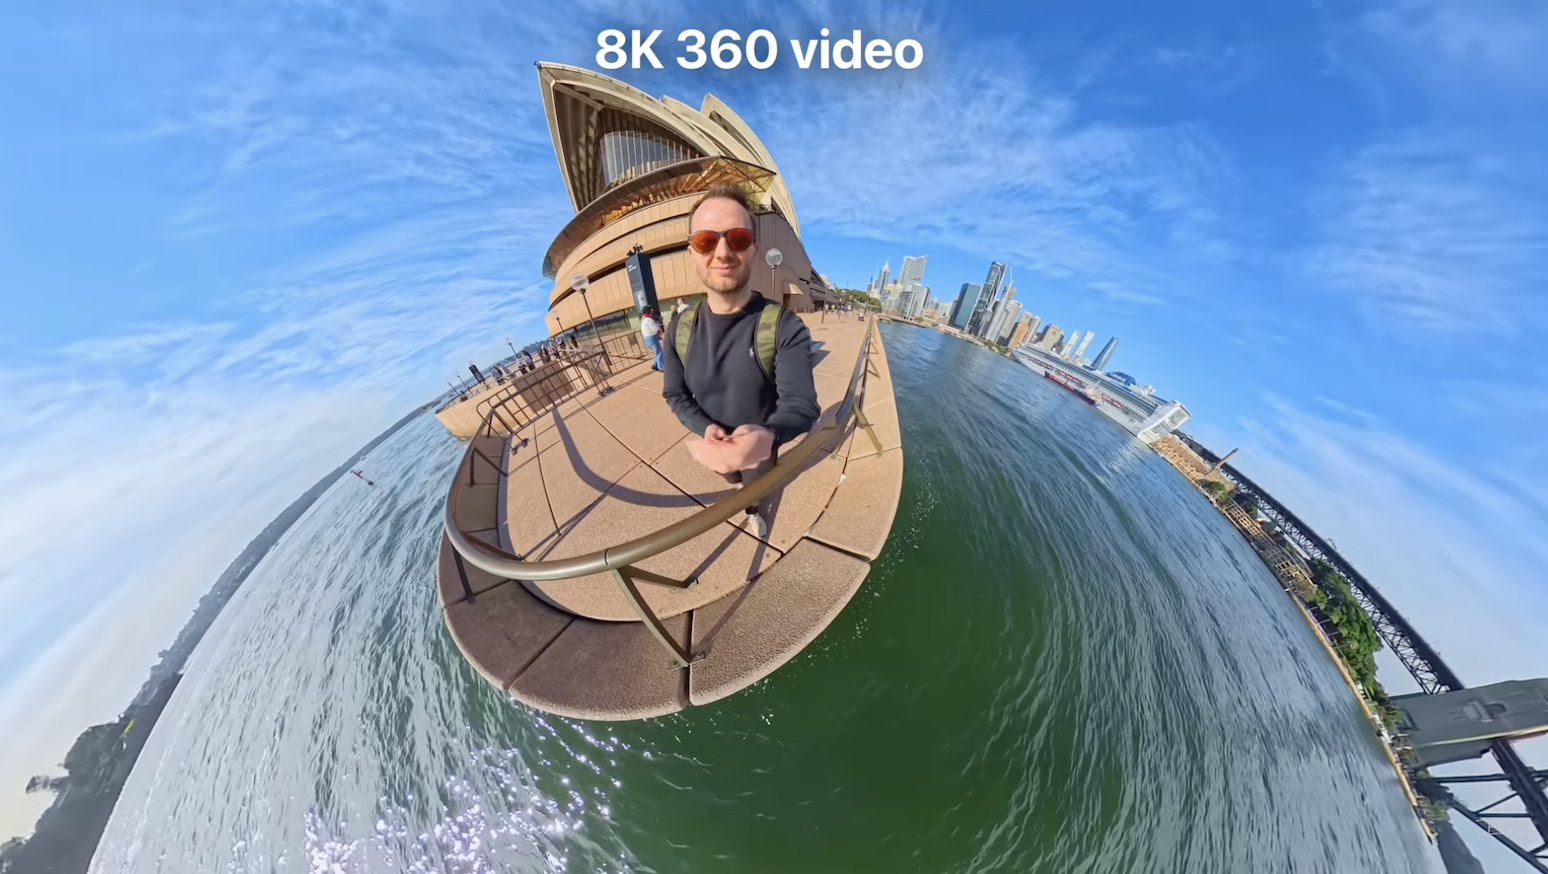
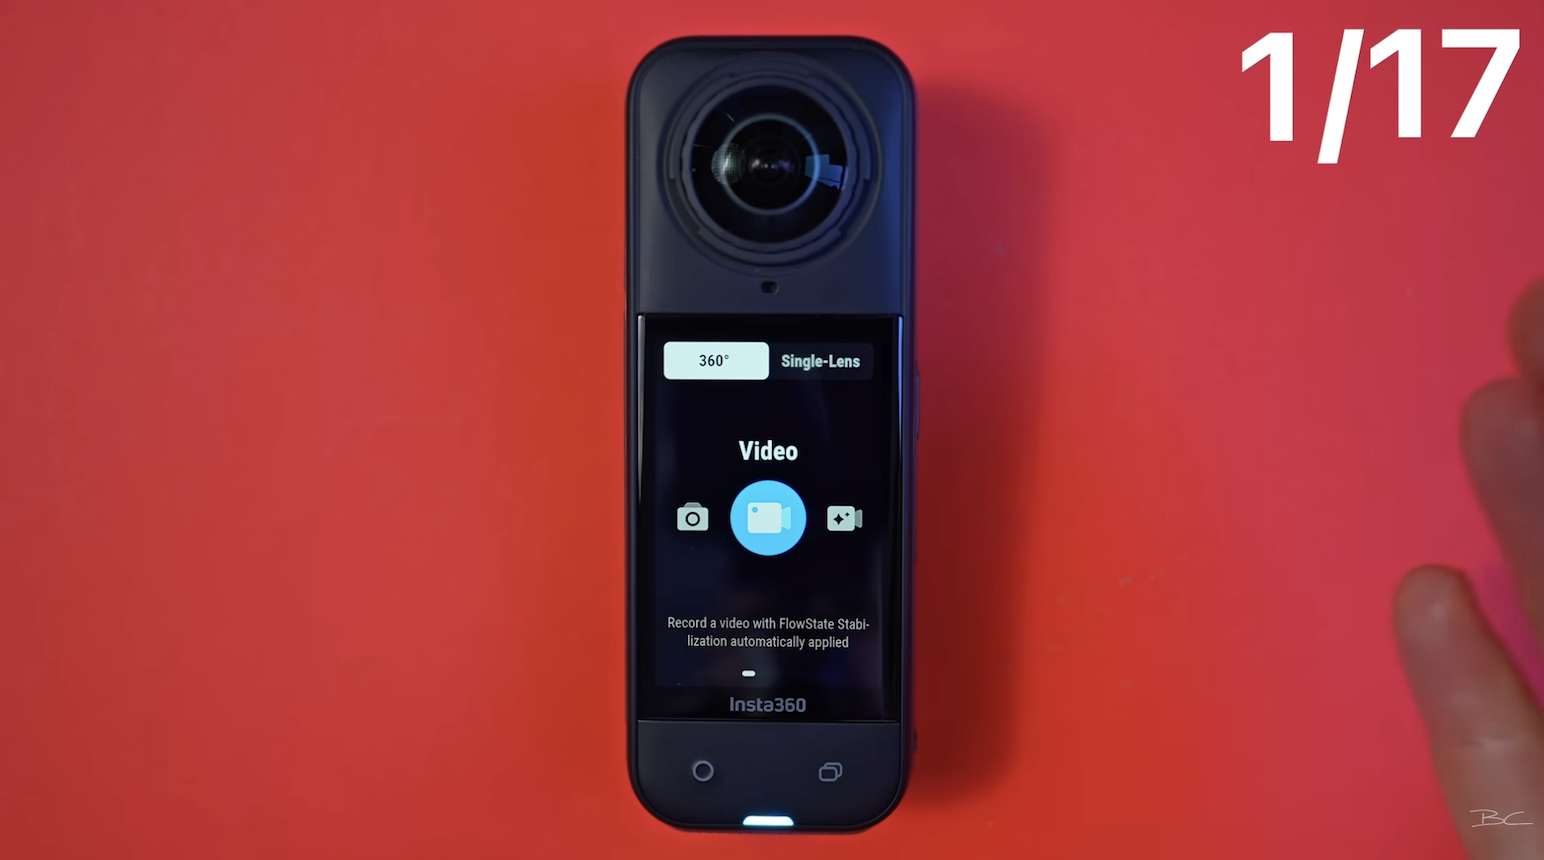 Choose from multiple resolutions: 4K up to 120fps, or 8K 30fps (ideal for the vast majority of situations)
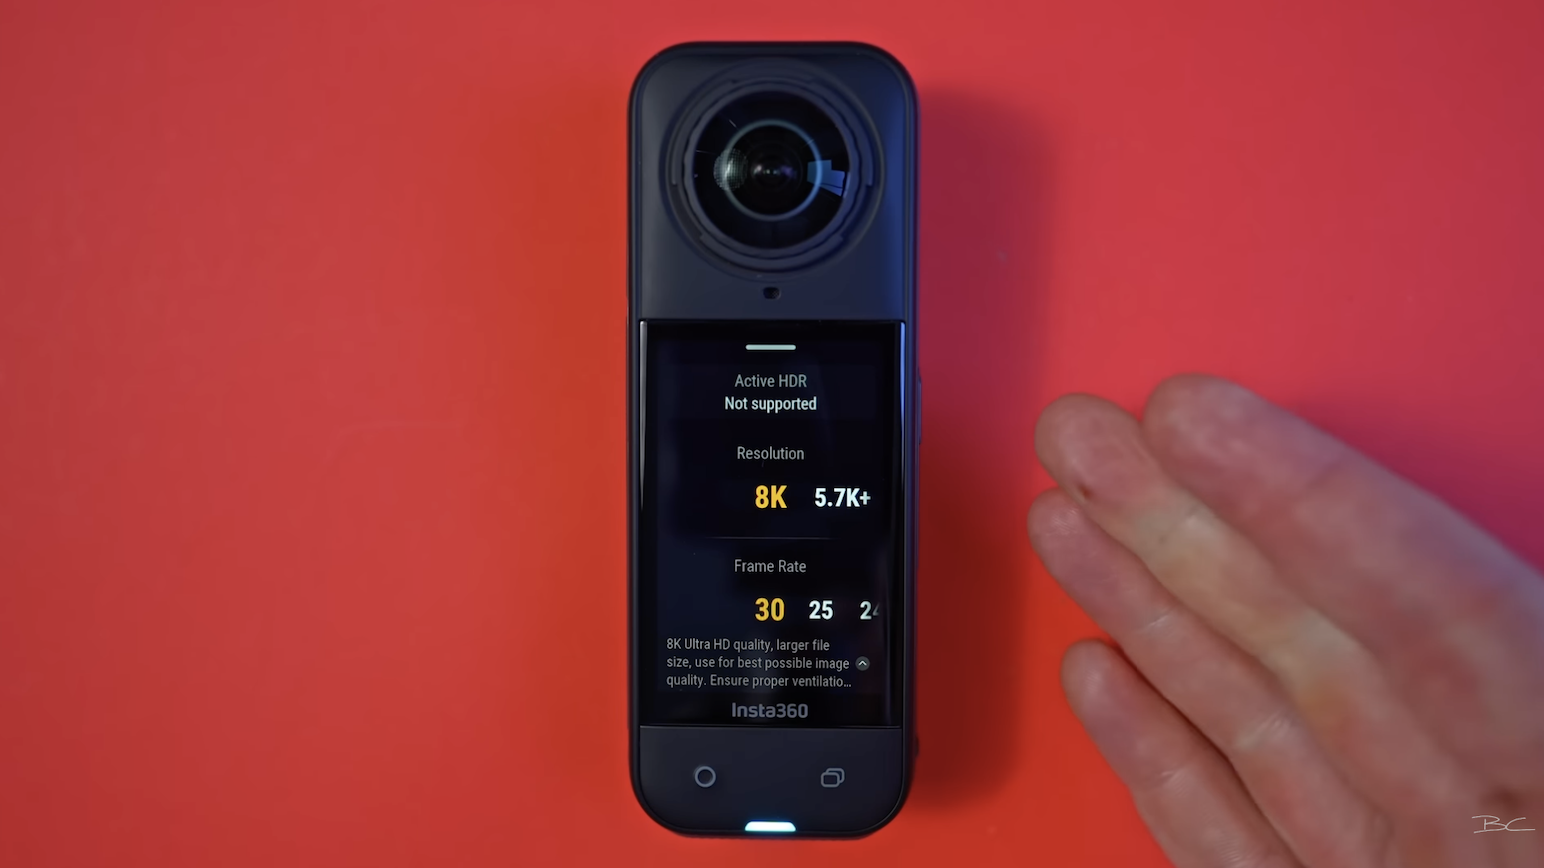
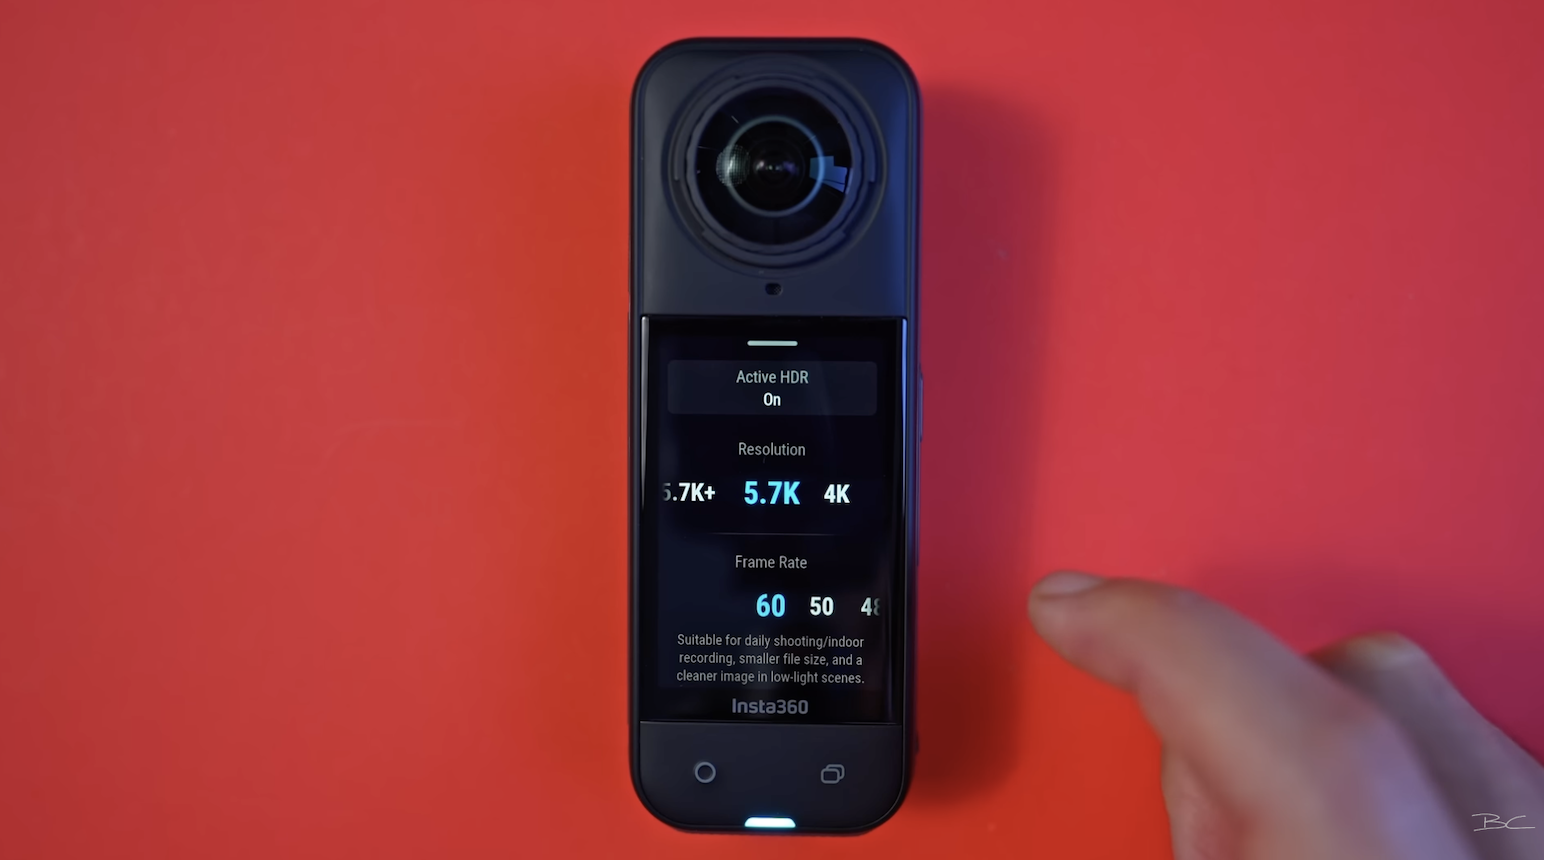
5.7K Plus is similar to 8K, but offers slightly reduced quality with smaller file sizes.
5.7K supports up to 60fps, including using Active HDR, which is great for bright sunlight, helping to recover shadows and highlights (like in the shot below).
2. PureVideo Mode (For Low Light & Night) 🌙
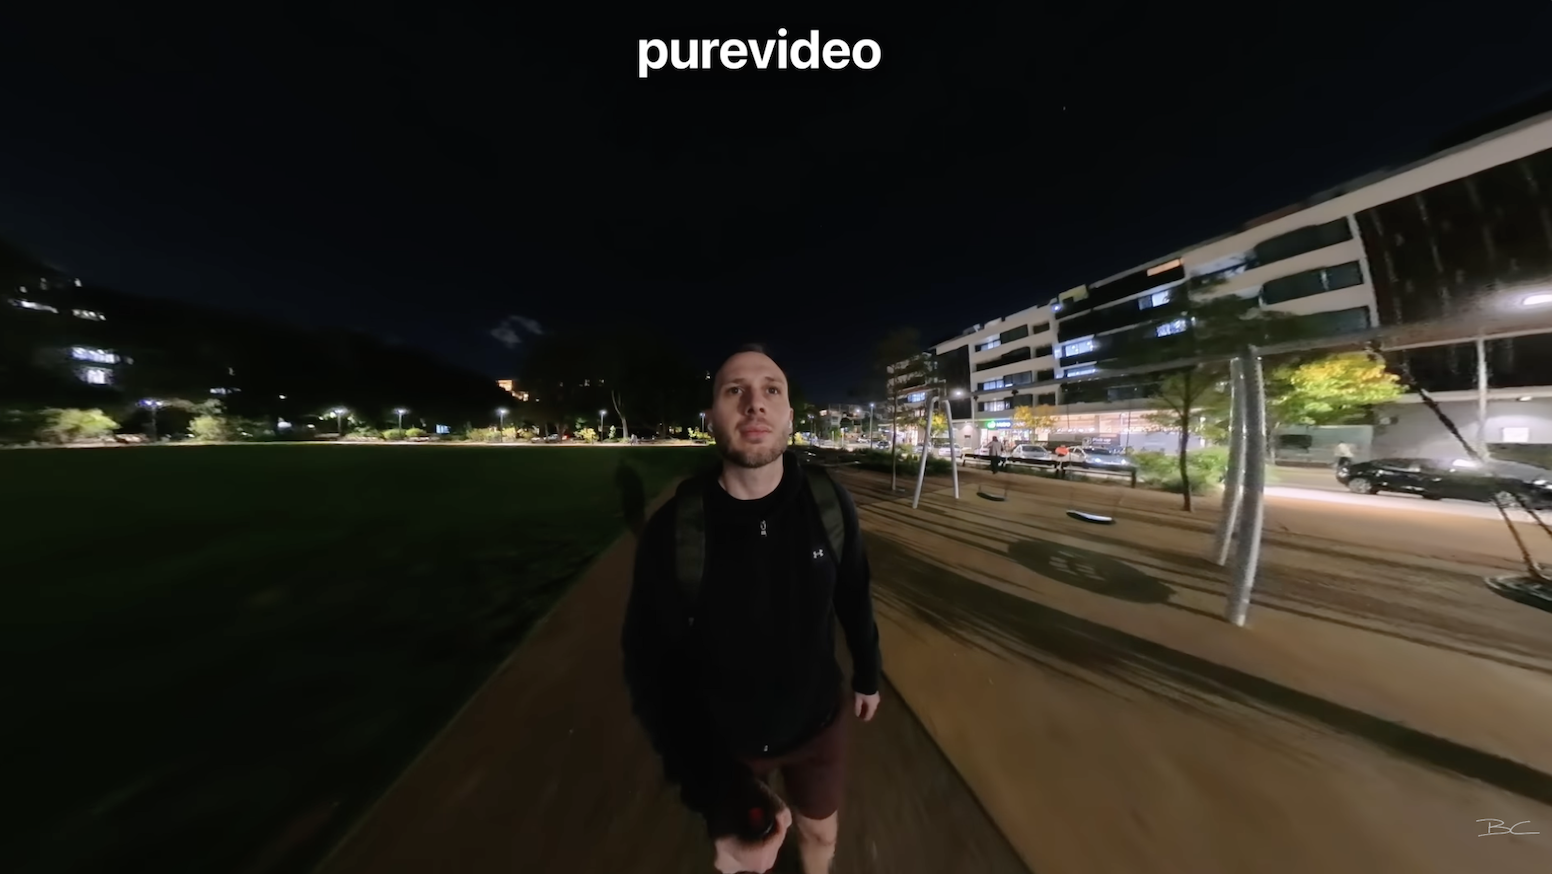
A new mode with the X5, PureVideo is perfect for nighttime or low-light shooting.
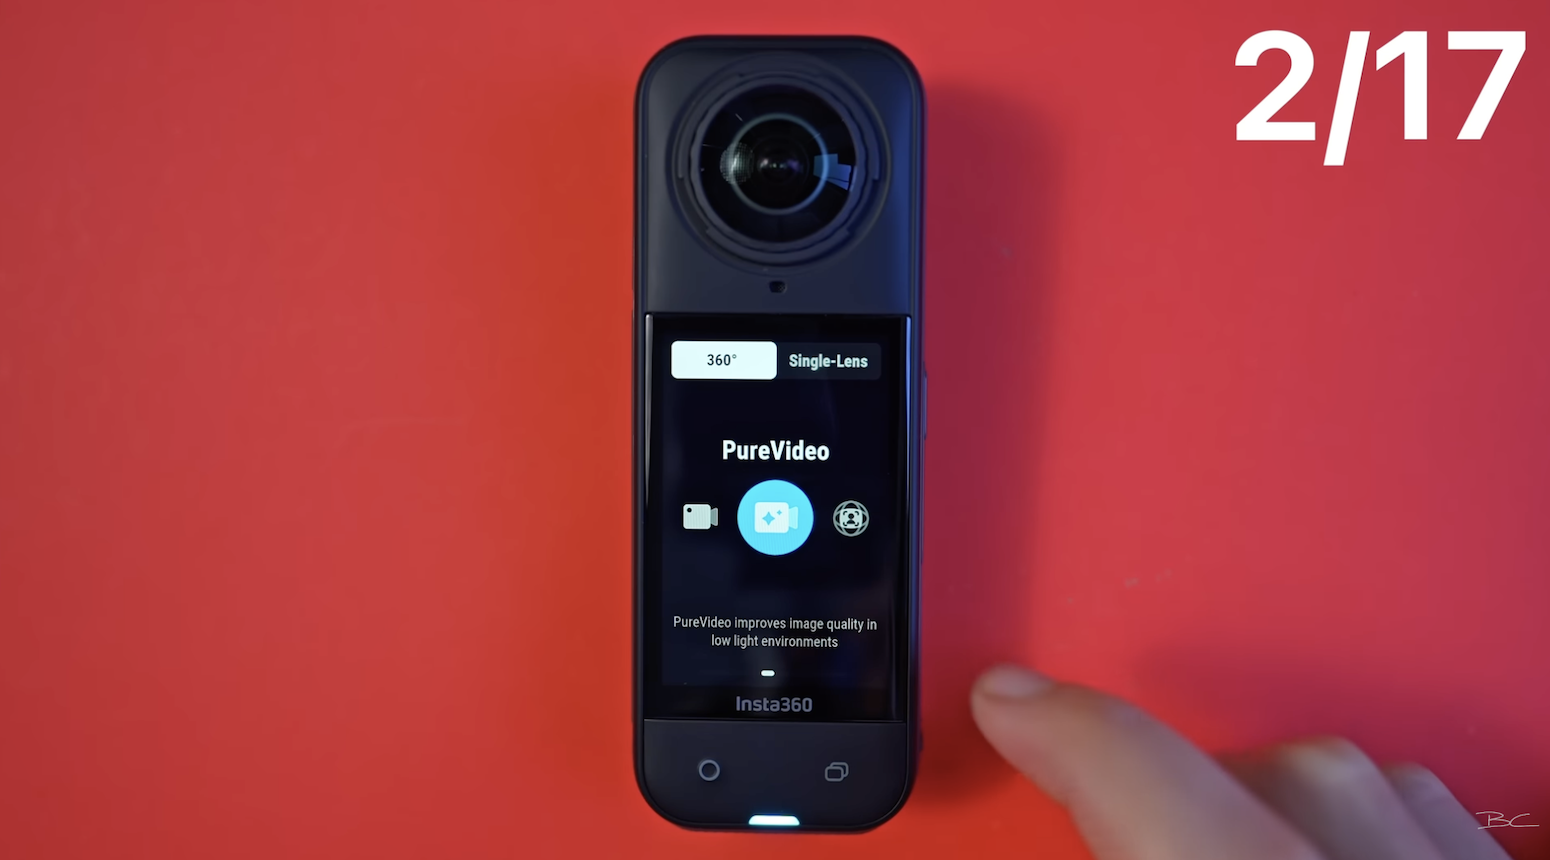
PureVideo mode adjusts internal settings for sharper, less noisy video (as you can see from these side by side example shots below, the one on the right has better exposure and less noise)
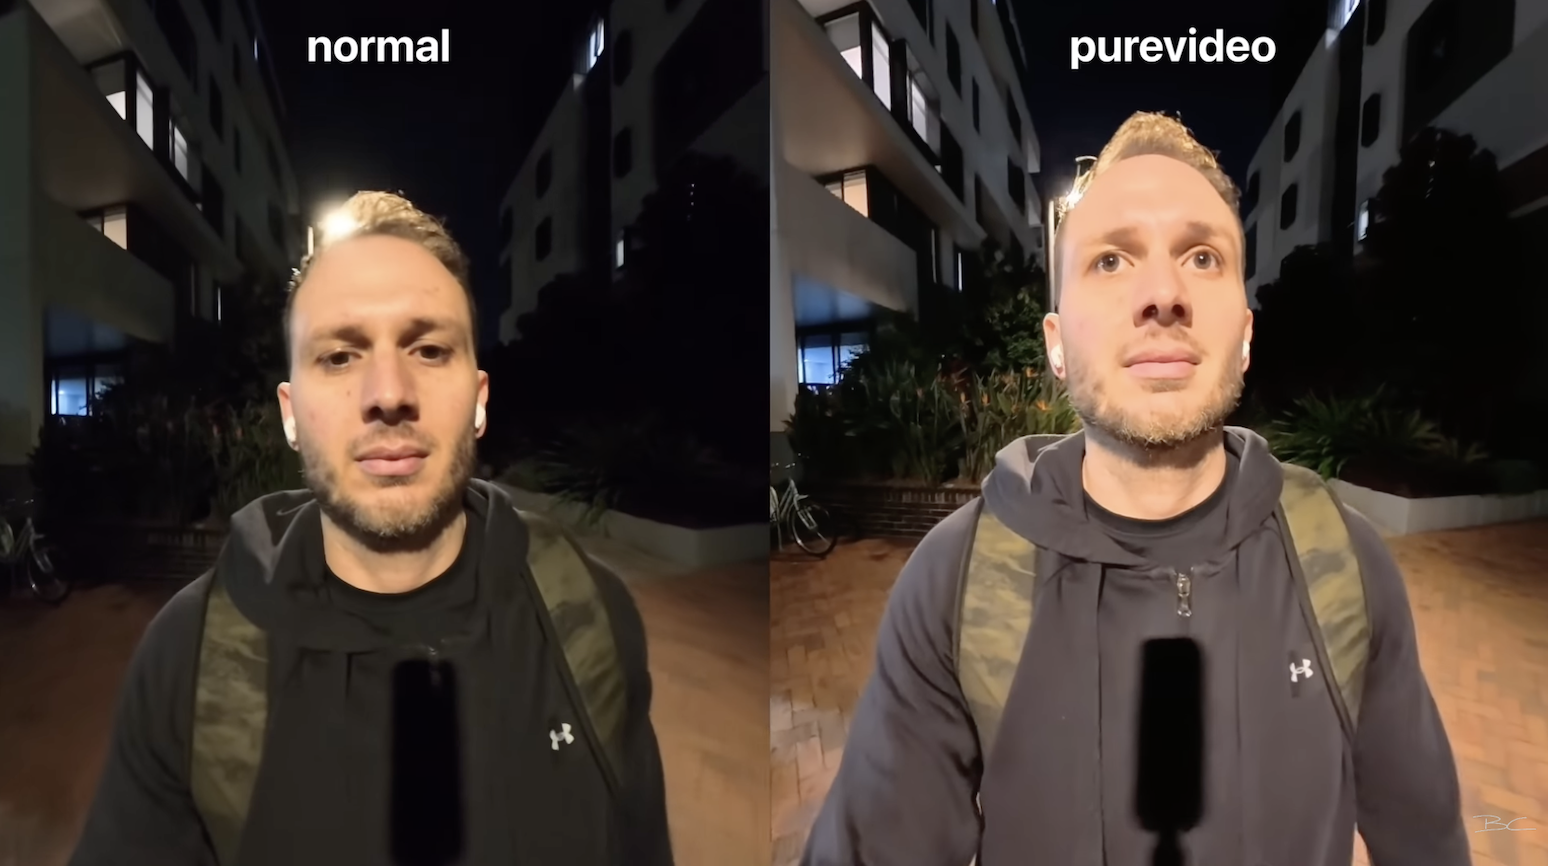 If you're shooting late afternoon or indoors in regular video mode, the X5 may prompt you to switch to PureVideo automatically (a screen will pop up prompting you to switch) If it does that, it means you probably should. Always use PureVideo when lighting conditions are poor.
3. InstaFrame Mode (Auto-Reframed Clips) 🔒
Another new mode on the X5, InstaFrame shoots a fixed-frame perspective straight out of the camera, no editing required.
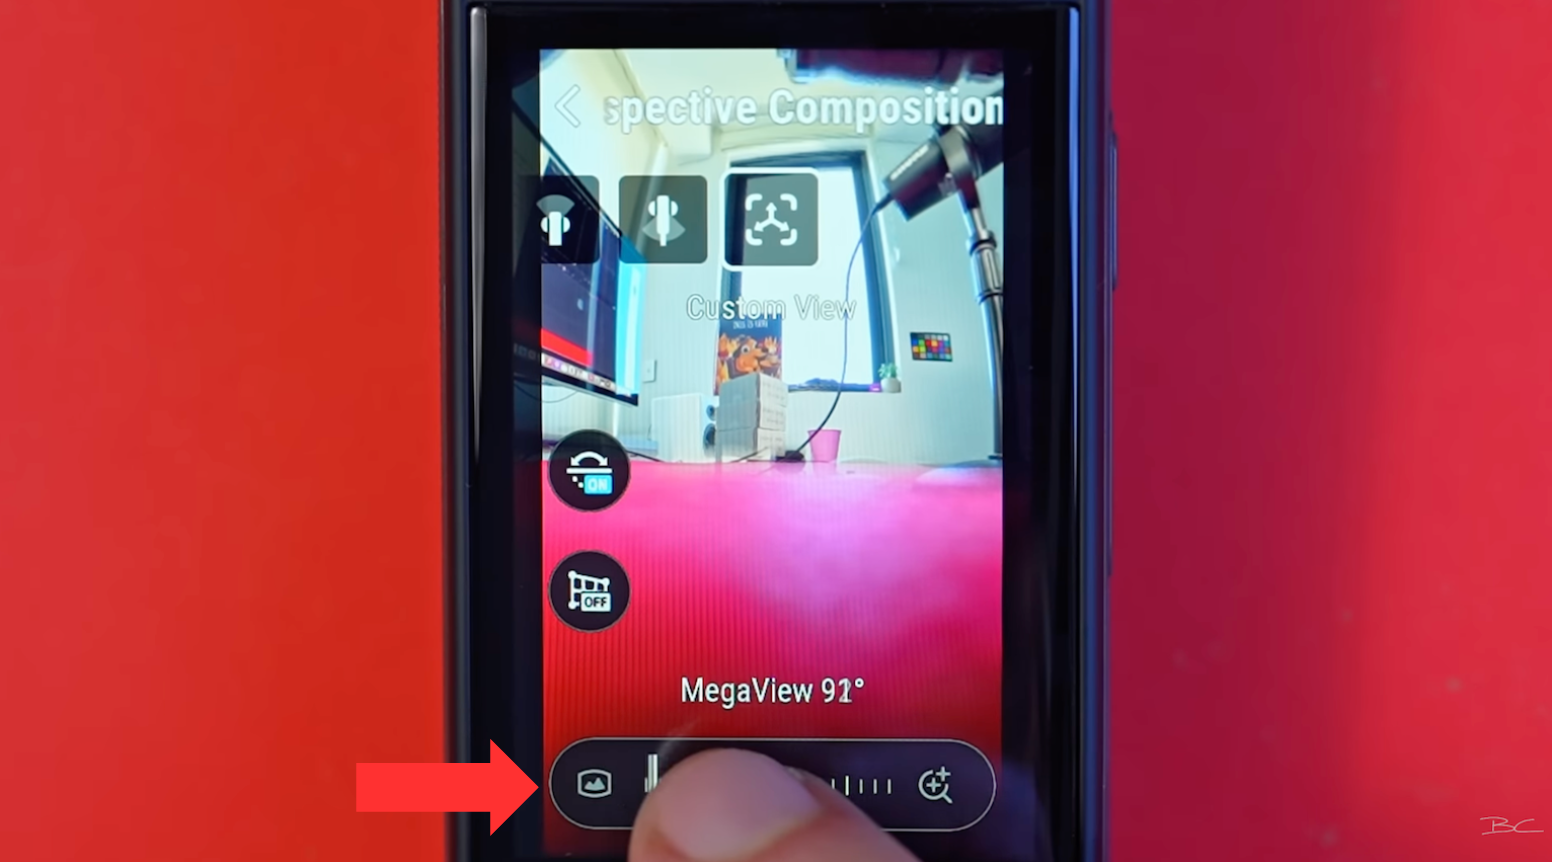
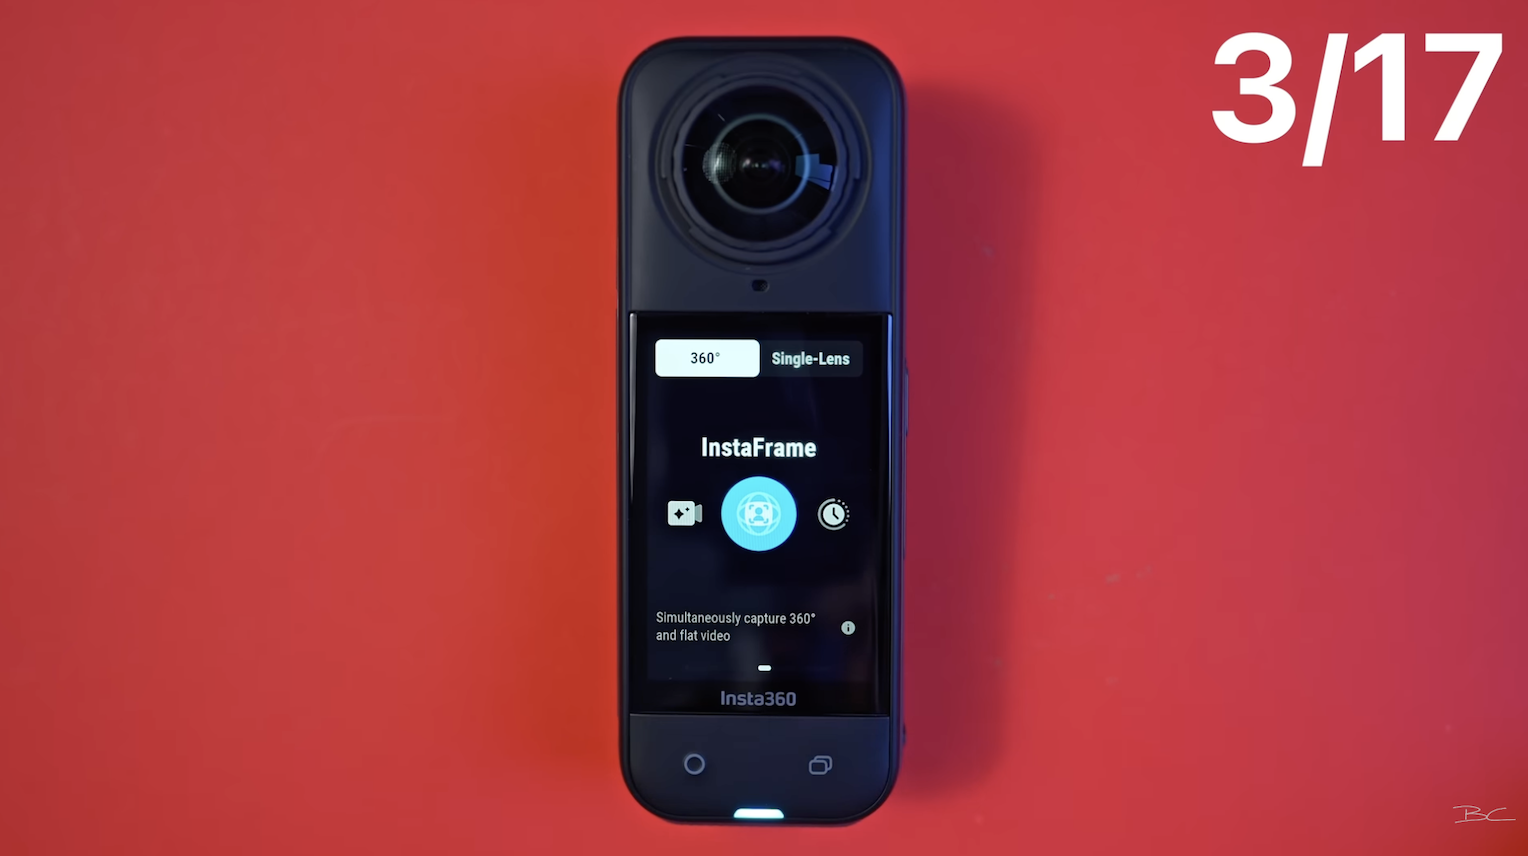 In the InstaFrame menu, you can choose the perspective that you want to shoot—whether it's rear view, front view, top view, bottom view, or a custom view of your choosing. What this will do is lock this perspective in place so you don't have to reframe it later. You can also customise it further by dragging the slider across.
There's also Selfie View which auto-tracks your face.
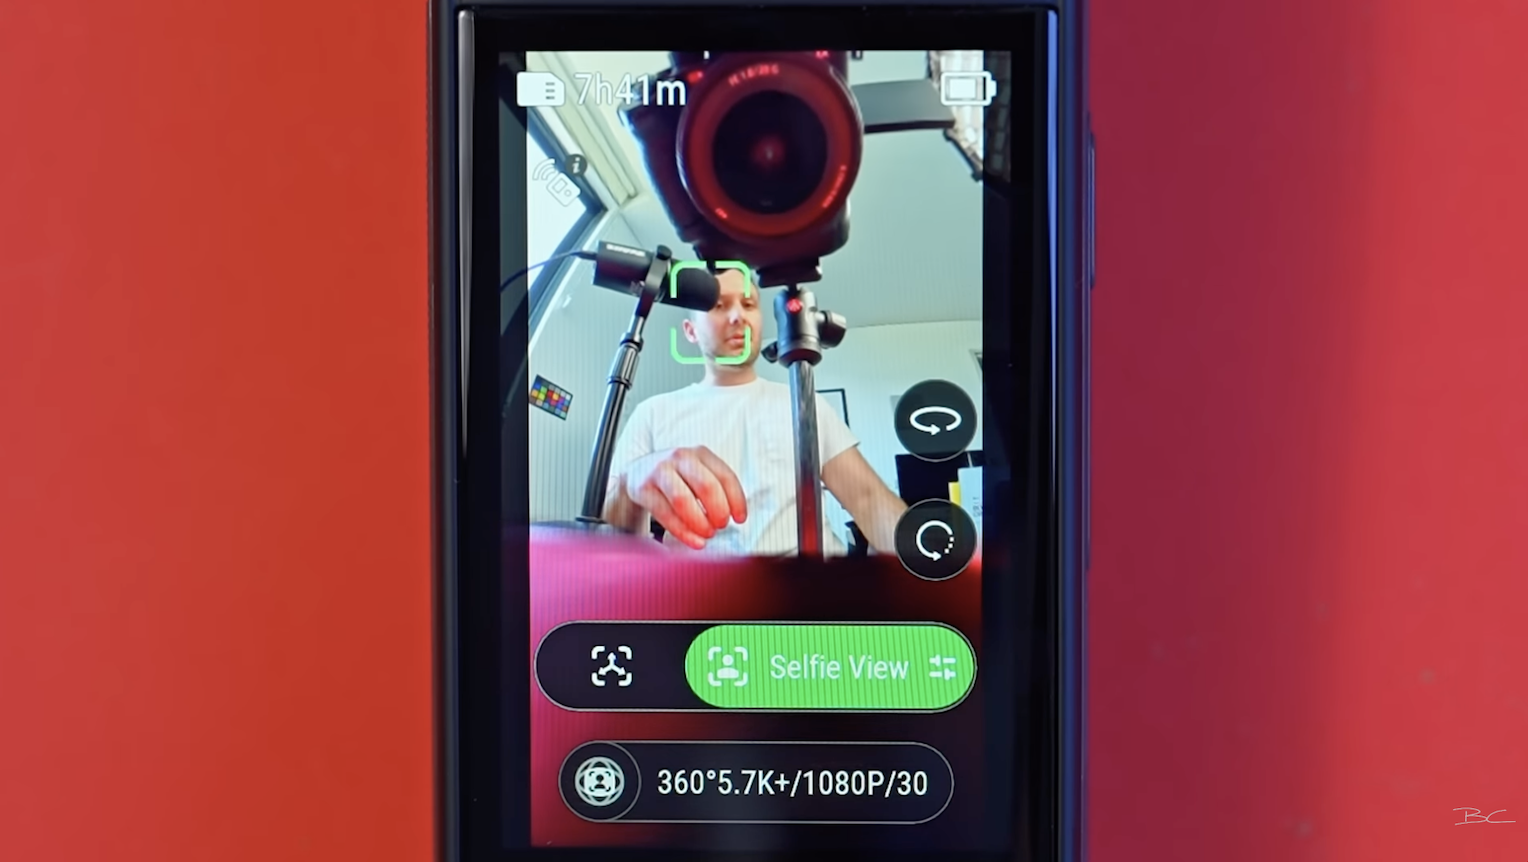
You can also set your aspect ratio: 9:16 or 16:9.

The beauty of InstaFrame is that it doesn’t just capture a fixed perspective—it also records a backup 360° video. So if the automatic reframing isn’t quite right or you’re not happy with it, you can easily go back and reframe the original footage from scratch.

Something to note: Resolution in InstaFrame mode is limited to 5.7K and 5.7K Plus, not 8K, because it's recording two videos at once. However, 5.7K Plus is still pretty sharp, so InstaFrame is a really good option if you want automatic shots straight out of the camera that don't need editing.
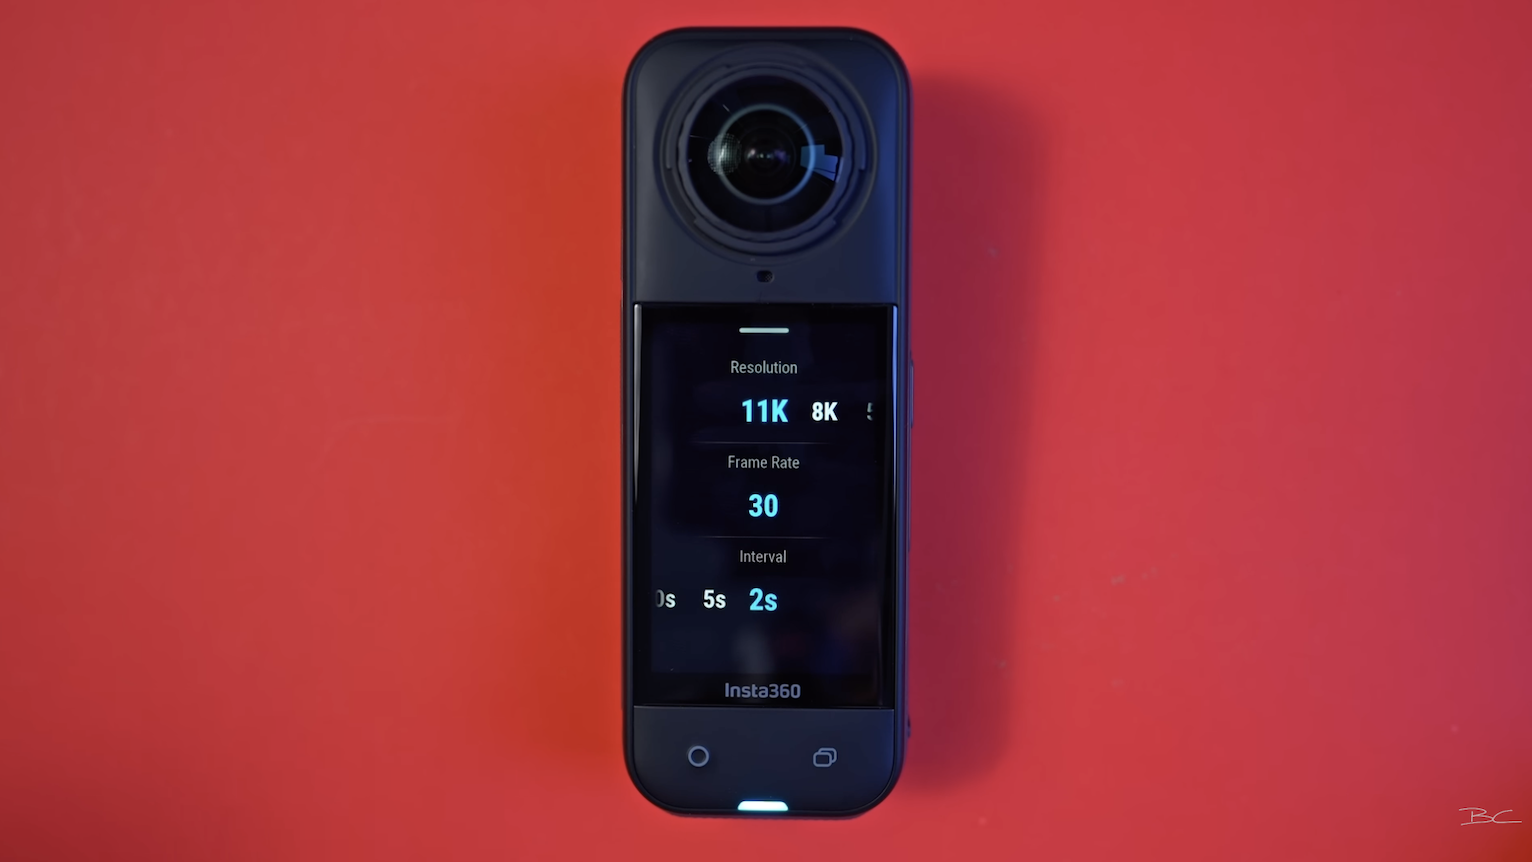
4. Time-Lapse Mode (Up to 11K!) ⏱️
Use Time-Lapse to capture landscapes or movement over a long period of time.
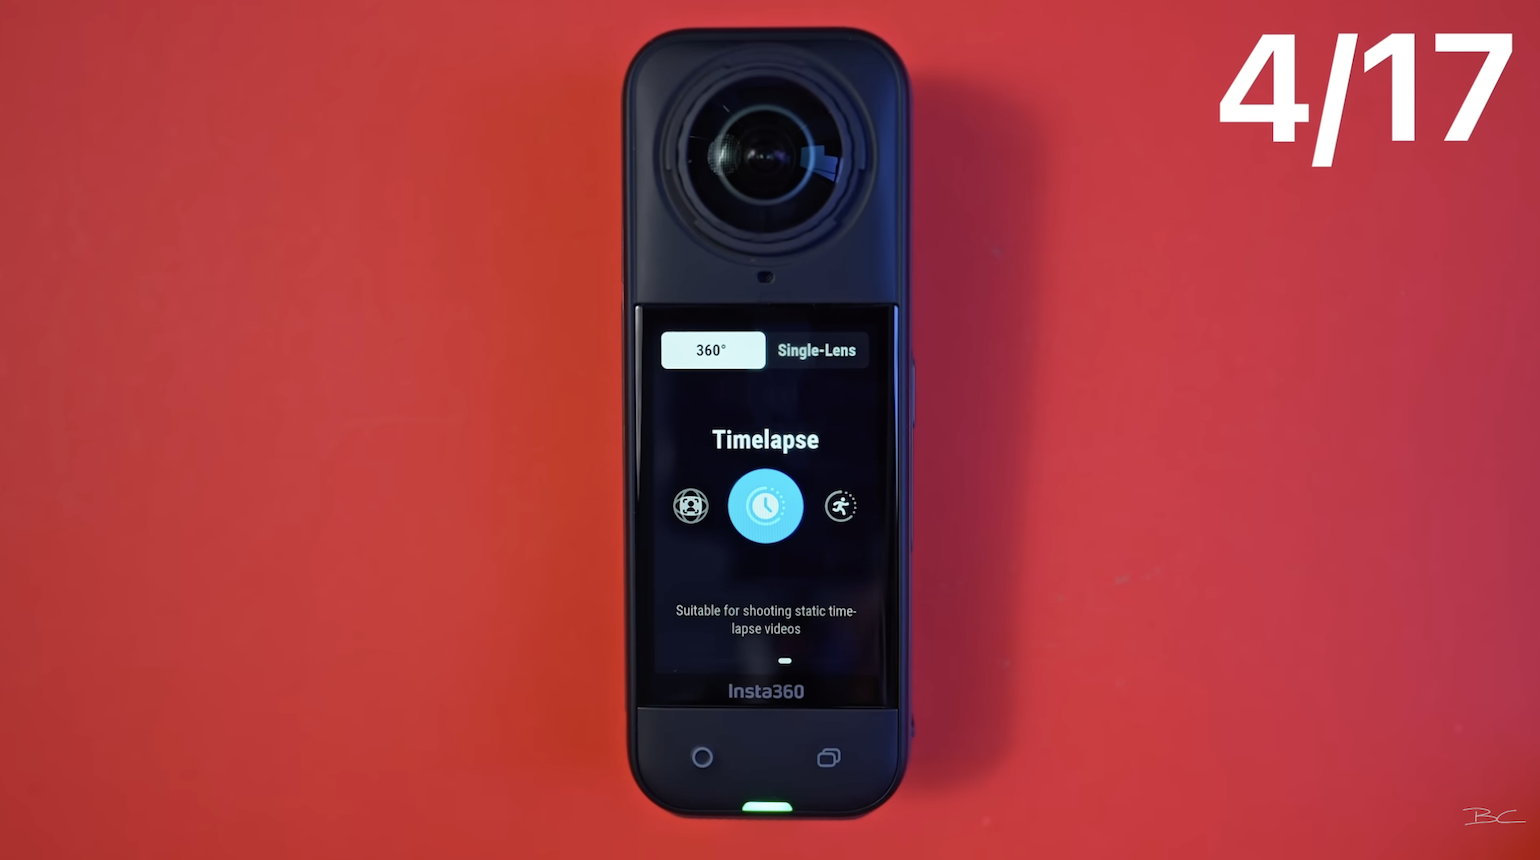
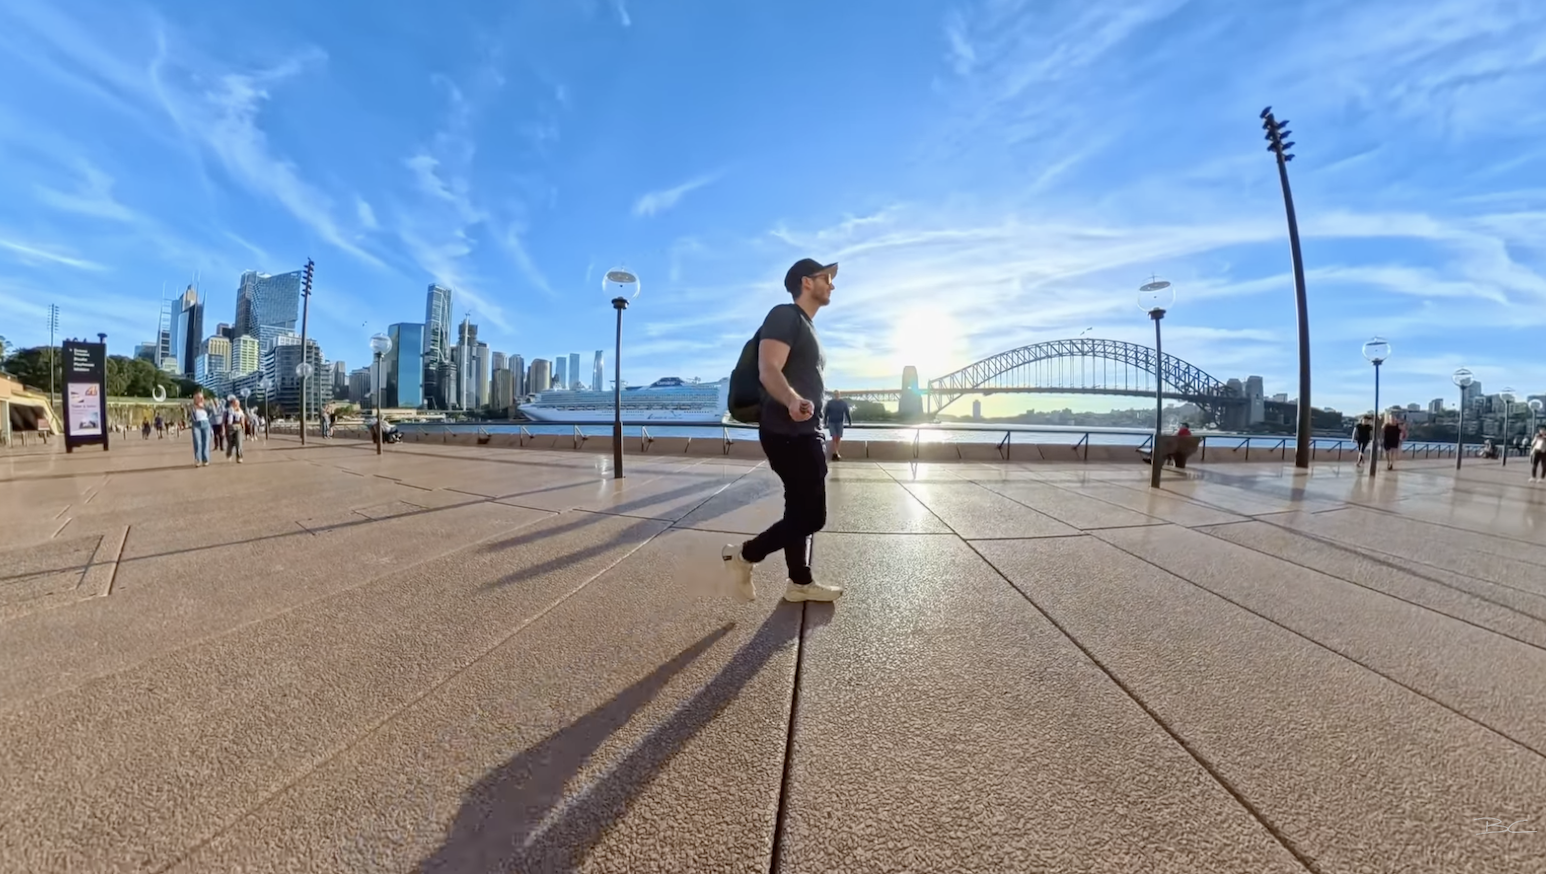
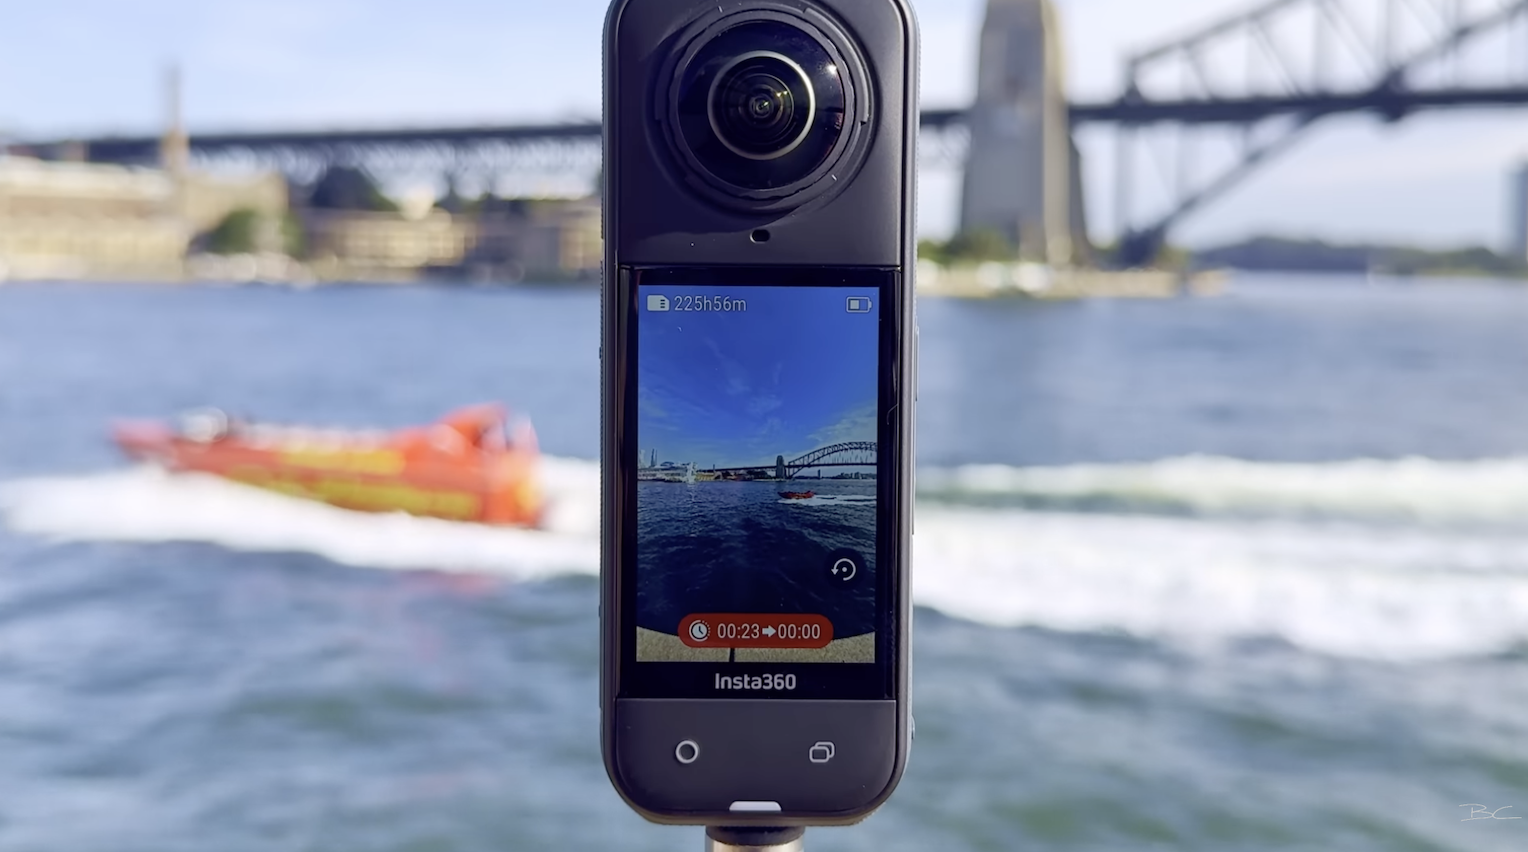
You can shoot time-lapses in resolutions from 5.7K up to 11K—the highest the X5 offers and well above the standard 8K mode. Whether it’s truly 11K is debatable, but the quality is definitely high. You can also set intervals between 2 and 120 seconds, which controls how often the camera captures each frame.
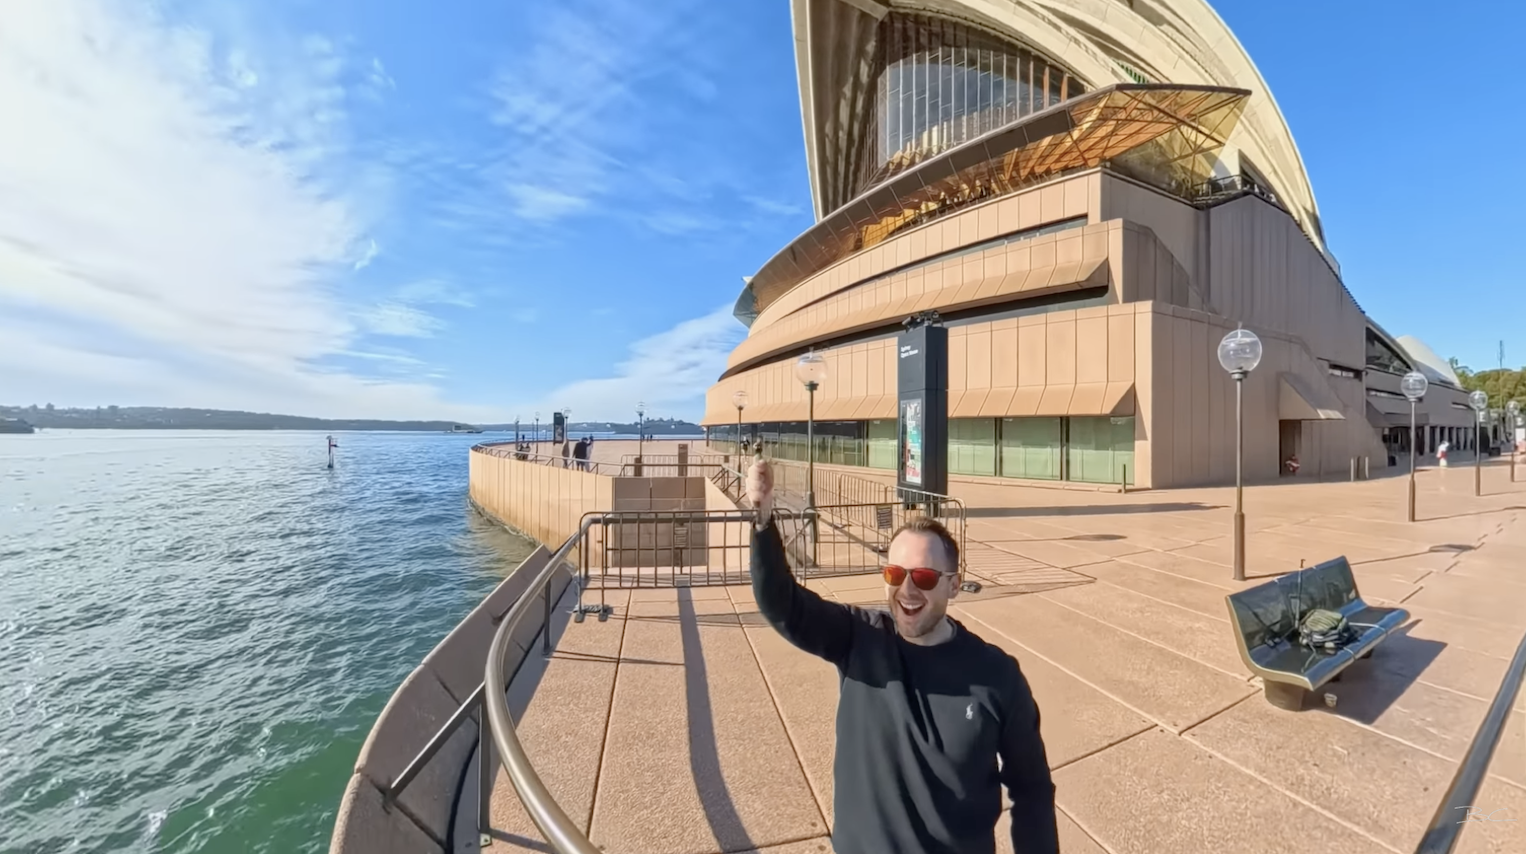
Check out my Sydney Harbour time-lapse on my channel, shot over just 10 minutes at 2-second intervals, which turned out beautifully. Time-lapses are definitely a strong creative feature of the X5.
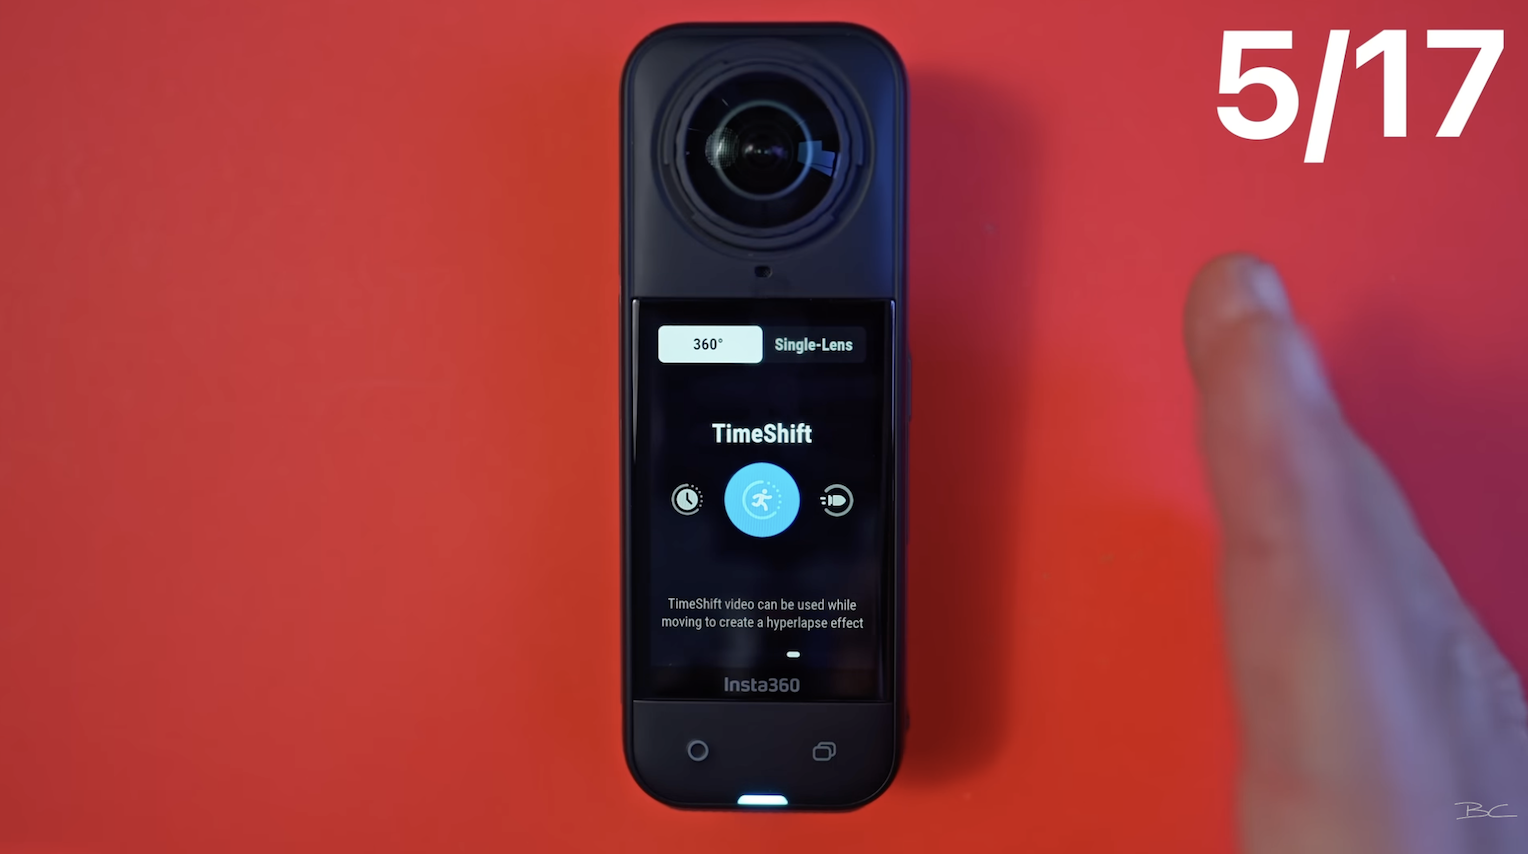
5. TimeShift Mode (Hyperlapse Effect) 🚀
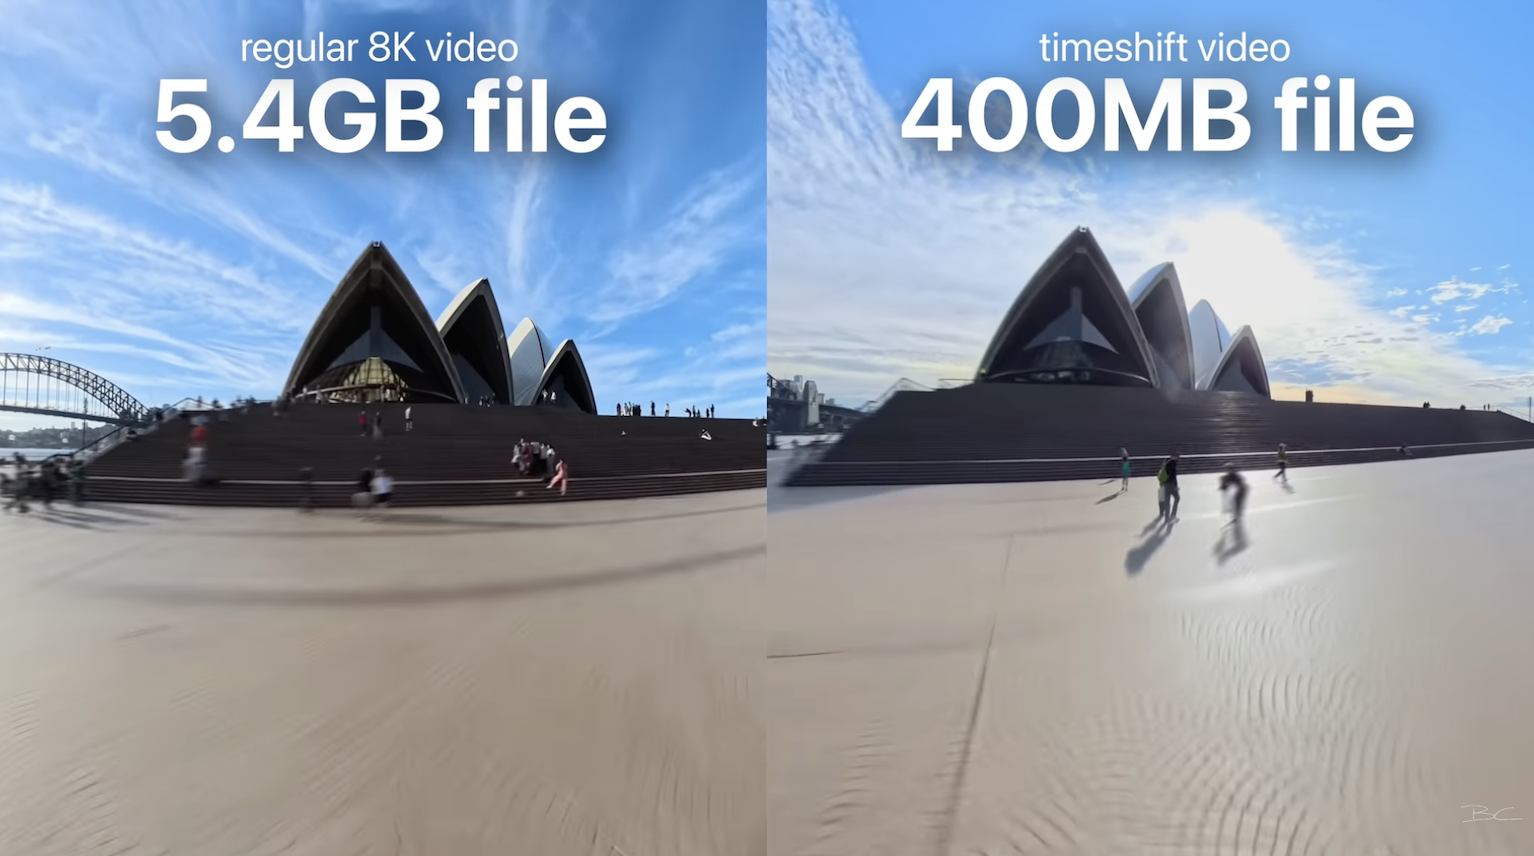
TimeShift is a mode designed specifically for hyperlapse shots—the fast-moving, motion-blur effect that looks like you're flying through a scene. It helps save space by speeding up the footage in-camera, resulting in a file that's about a tenth the size of a standard 8K video.
 It helps save space by speeding up the footage in-camera, resulting in a file that's about a tenth the size of a standard 8K video.
 You can manually set the speed up to 60x, or just select 'Auto' and the camera will basically choose the best speed based on the final length of your clip so it looks good, but also doesn't take up too much space. Just keep in mind, TimeShift is best used when you're committed to that hyperlapse look, as it won’t offer the flexibility to re-edit at a normal frame rate later.
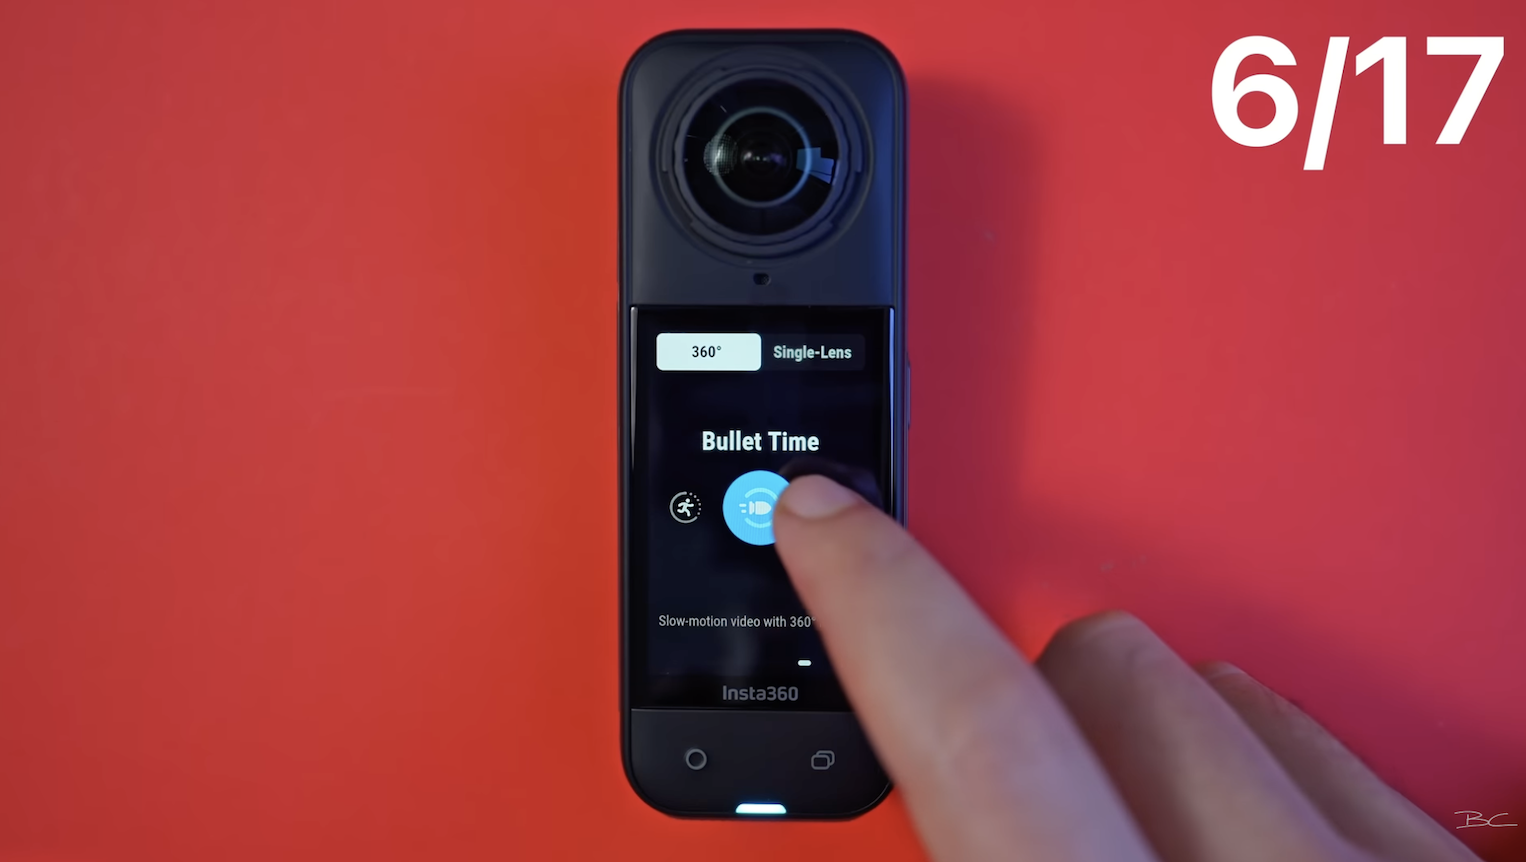
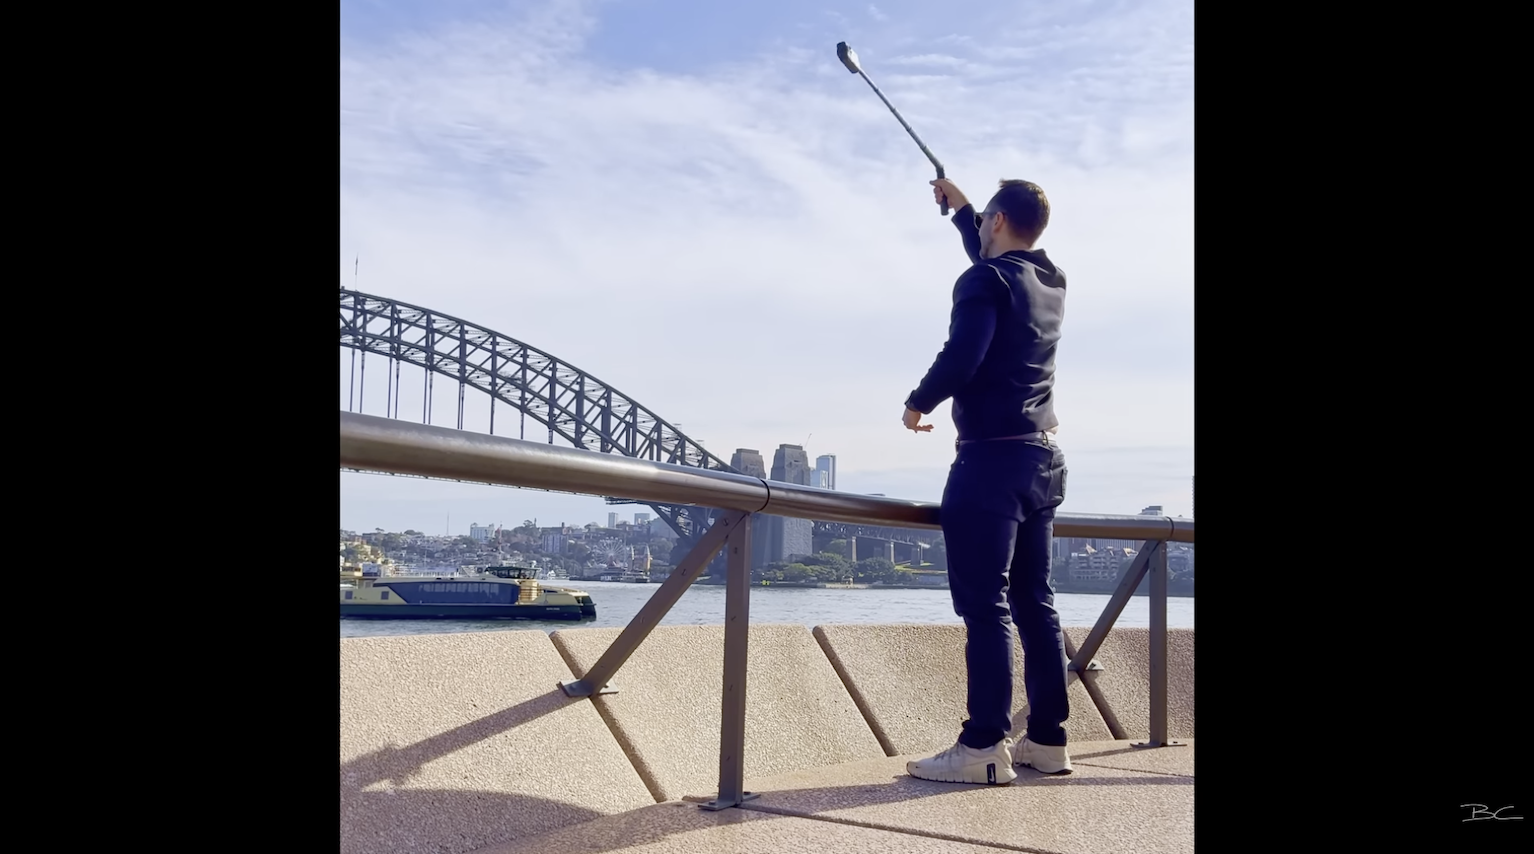
6. Bullet Time Mode (Slo-Mo Orbit Shots) 🌀
Bullet Time is where you spin the X5 around your head using the Bullet Time handle + selfie stick (and potentially embarrass yourself in public, as I clearly did below)
You may feel silly shooting it, but trust me—the results are worth it! 🤣
The reason to use the dedicated Bullet Time mode instead of regular 4K 120 video is that it shoots up to 5.7K120, auto-reframes to keep you centered, and slows it down for a ready-to-share clip, no editing needed.
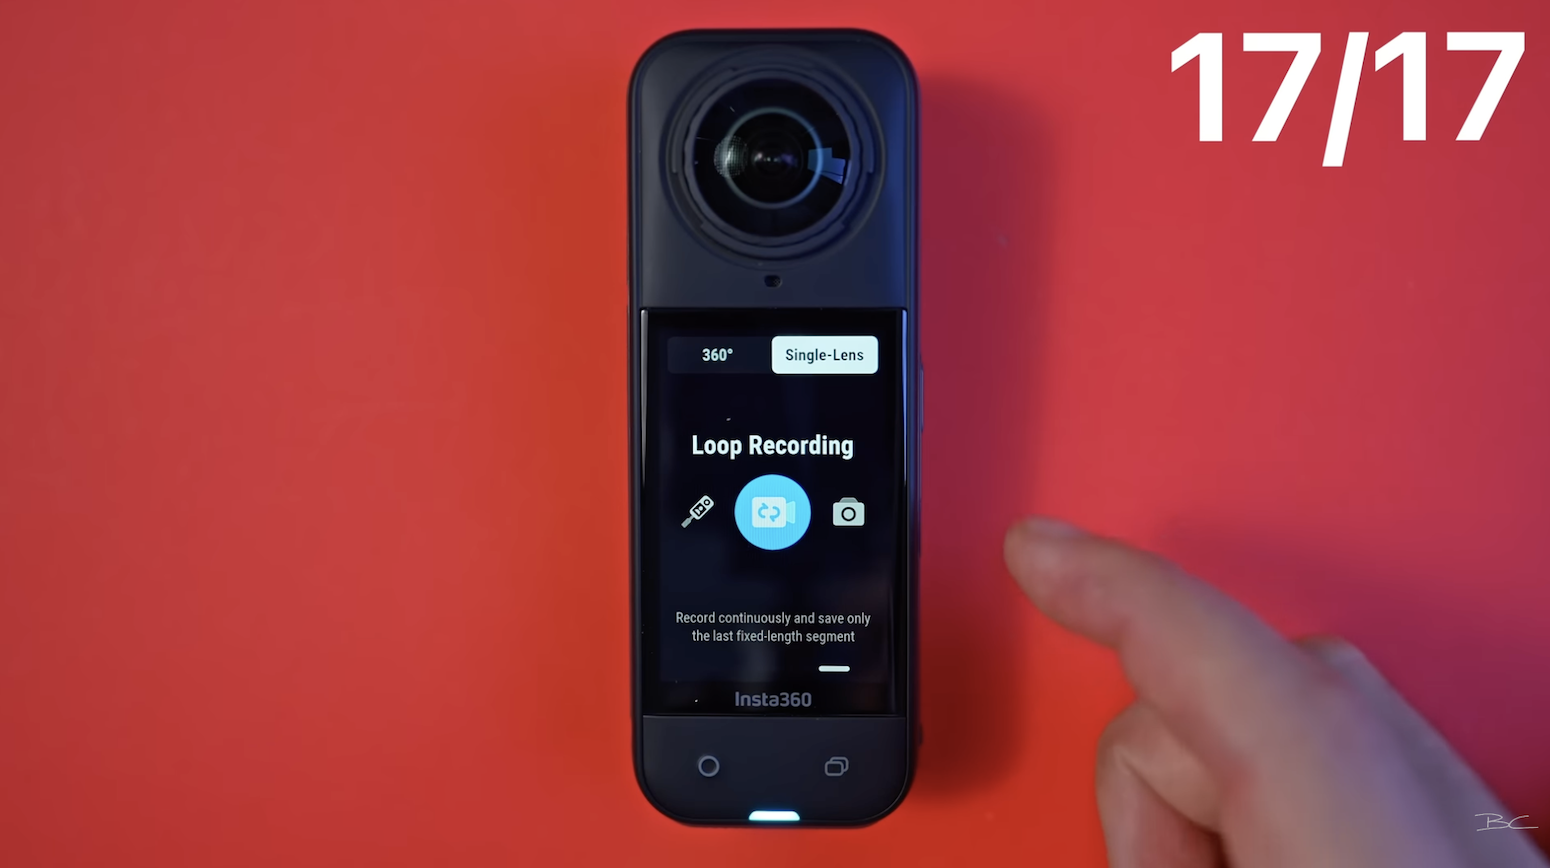
7. Loop Recording Mode 🔁
This is ideal when you're filming something unpredictable and don't know exactly when the action will happen. You can choose a loop length—from 1 to 30 minutes—and the camera will continuously record, overwriting the oldest footage once it reaches the time limit. So you'll only keep the most recent 30, 25, 20 minutes, and so on.
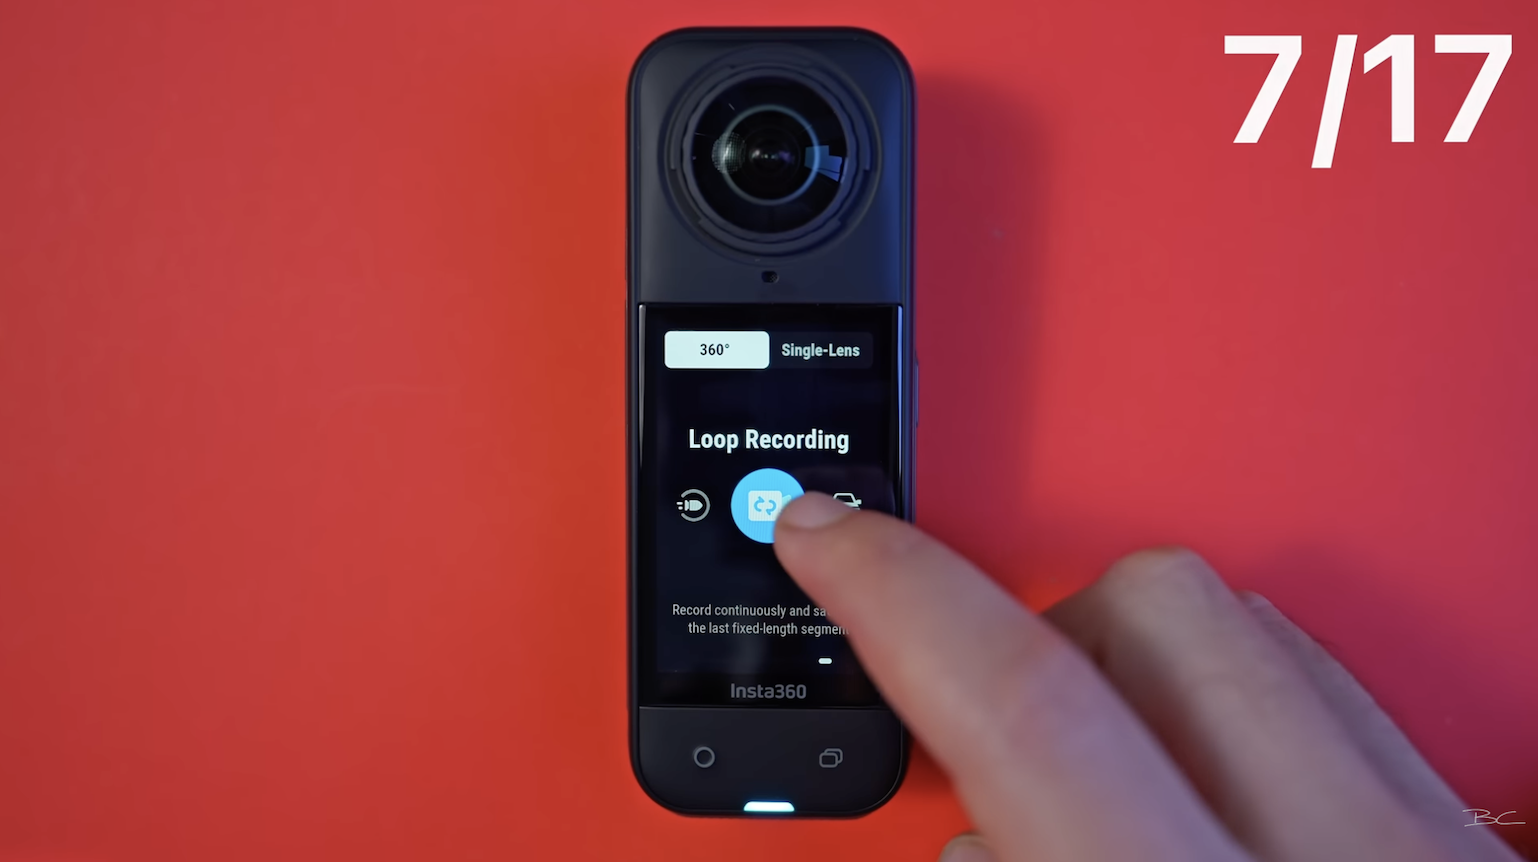
It's perfect for dashcam-style setups, allowing you to record continuously without filling up your SD card every time.
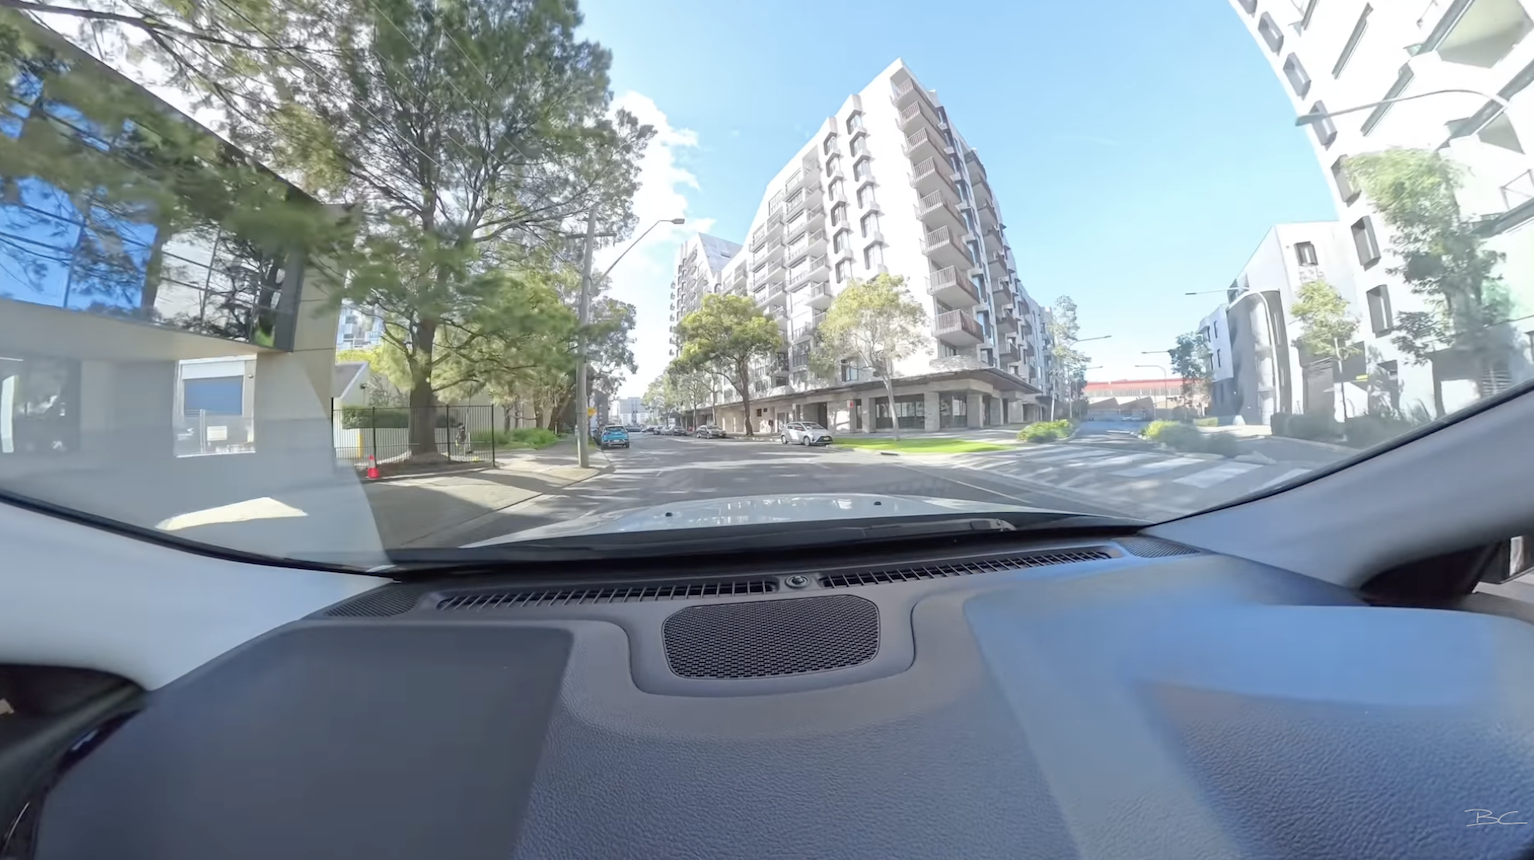
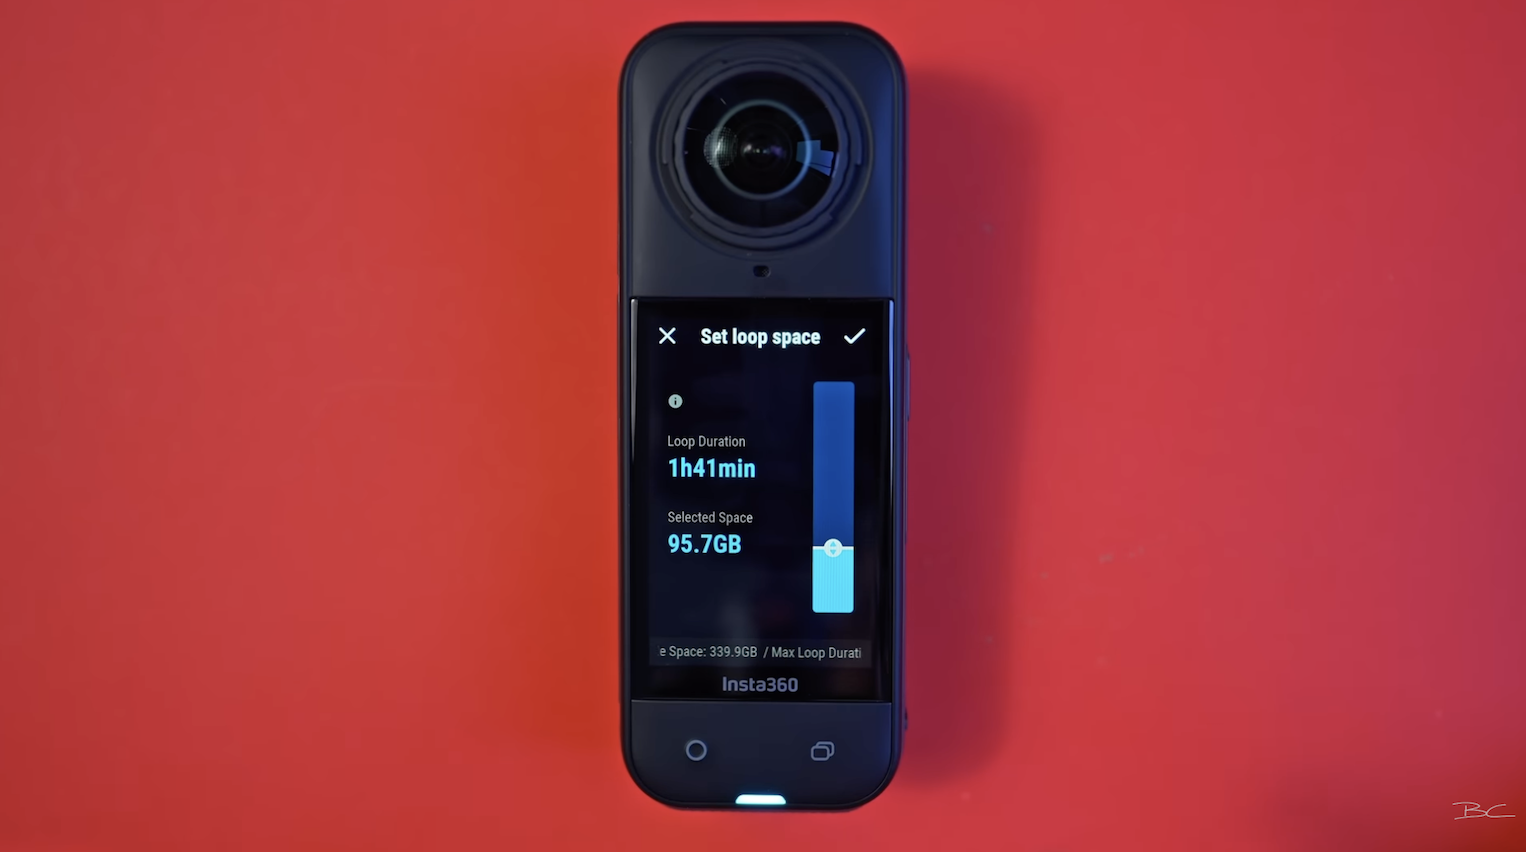
8. Road Mode (Long Loop Recording) 🛣️
This new mode is similar to Loop Recording but designed for much longer clips. It’s perfect for long drives or motorcycle trips, letting you set the recording duration to several hours or limit it based on how much of your SD card you want to use.
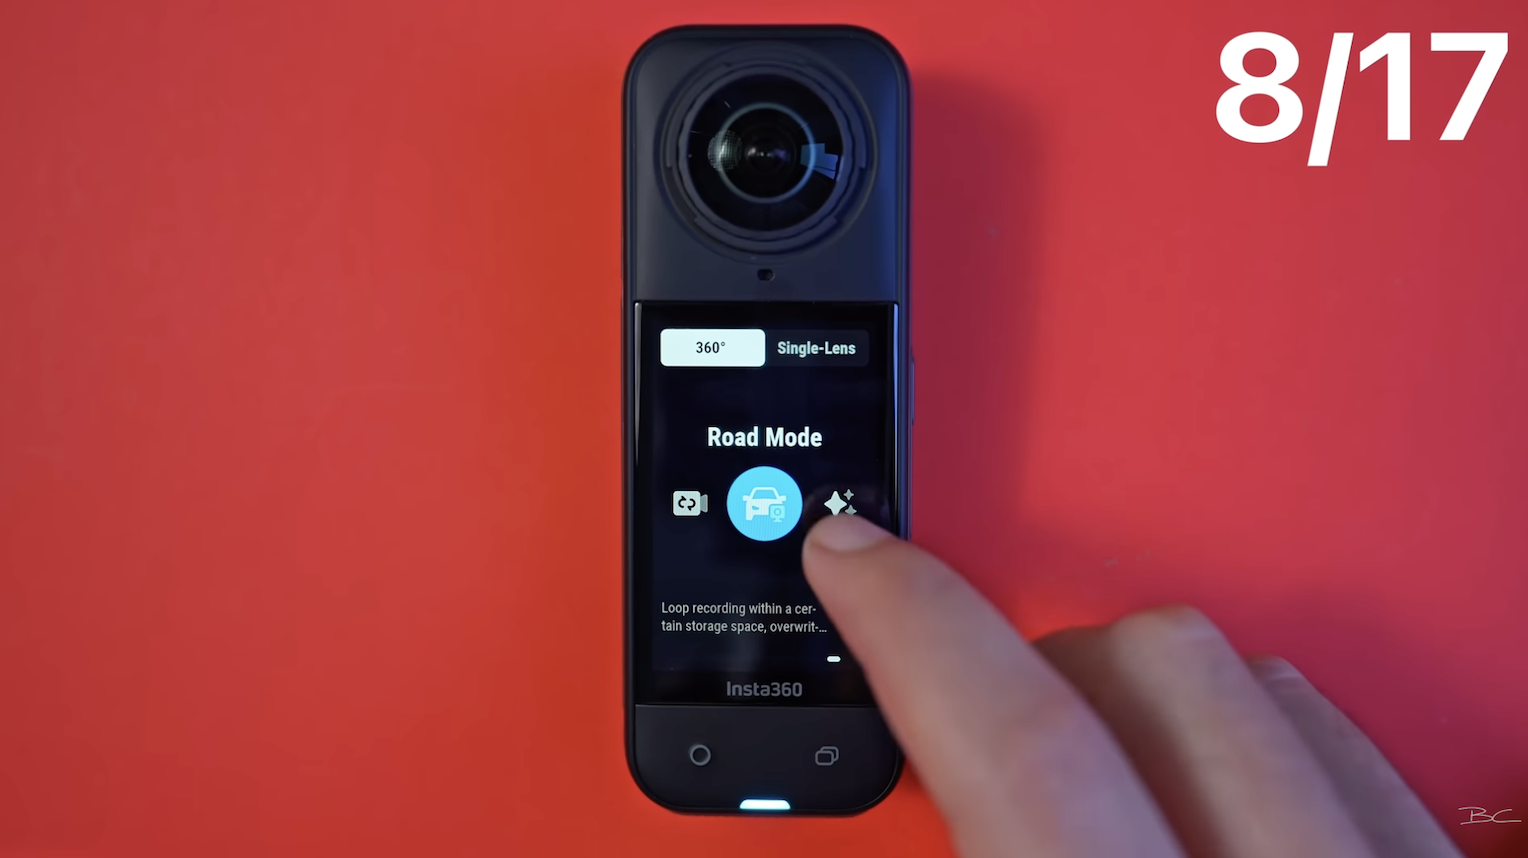
For example, if you only want to use a quarter of your SD card on the drive, you can set that as your space limit. The camera will then loop within that space—say, around an hour and 41 minutes—without exceeding it.
 It’s a pretty niche use case, though, and honestly, I’d just recommend picking up another SD card if you're planning to shoot a lot. Follow my link to grab the one I recommend for using with the X5.
Let's move on to photo modes...
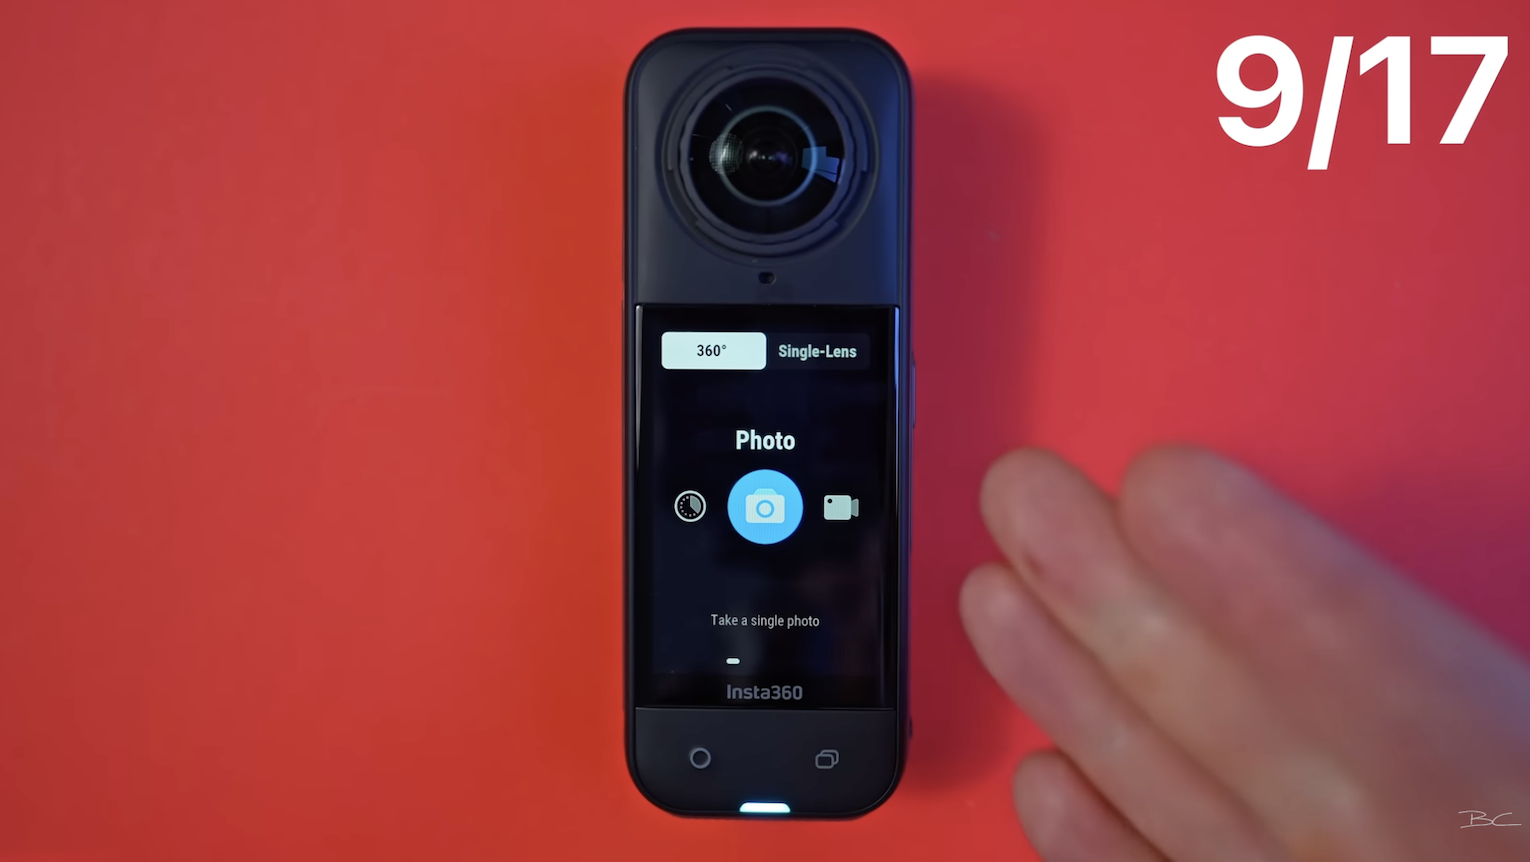
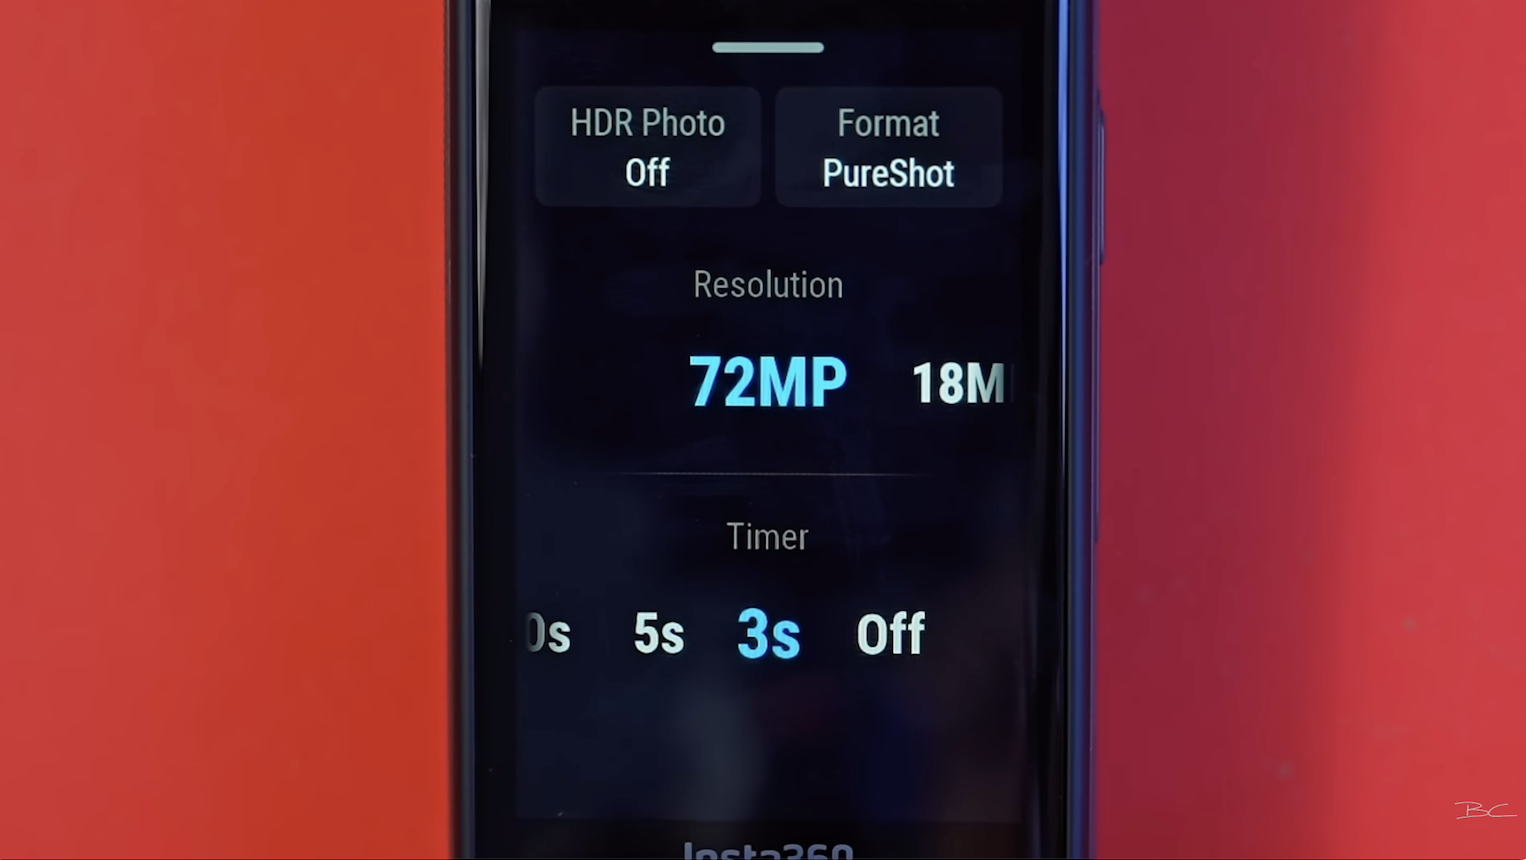
9. Standard 360 Photo Mode 🖼️
This is the one you’ll use in the vast majority of situations. You can shoot at either 18 or 72 megapixels—obviously, you want to go with 72. You can turn on HDR, which I recommend, especially for virtual tours. There’s also an auto-exposure bracketing option if you’re a bit more advanced and plan on editing your shots.
You can also shoot in just PureShot, Insta360’s automatic mode that handles things like noise reduction, or in PureShot Plus RAW, which also creates a RAW file for more flexibility in editing.
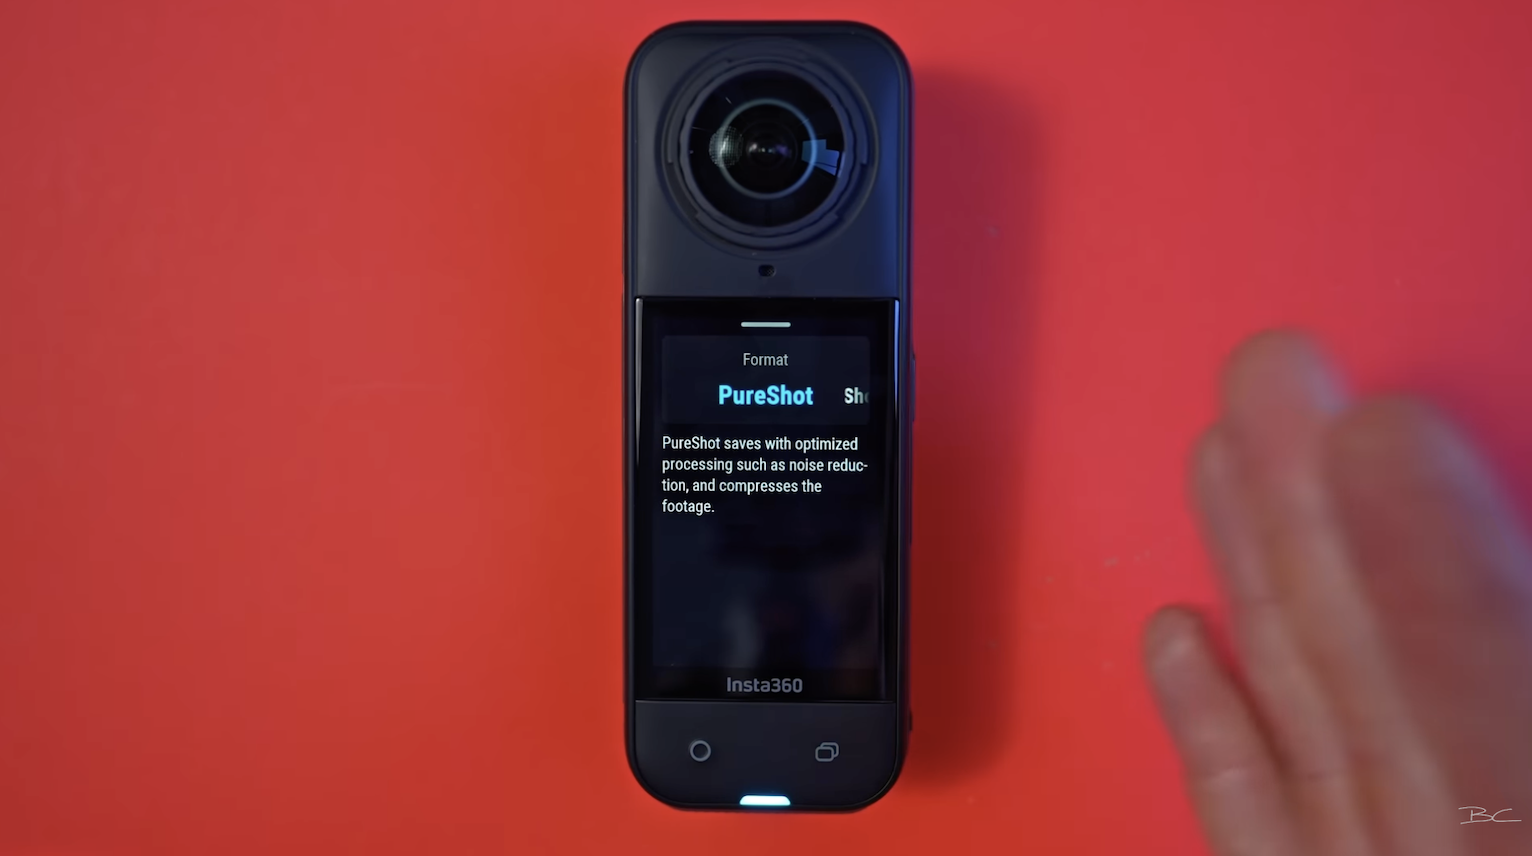
You can add a timer too which is great for setting up your camera or giving yourself time to hide if you're shooting a virtual tour. If you're just shooting casual 360 photos for social media and want to reframe them into cool perspectives, I recommend HDR off, PureShot mode, 72MP resolution, and a 3-second timer.
10. Interval Photo Mode (Photo Time-Lapses) 📷
This is similar to time-lapse mode in the video settings, but instead of creating a video, it takes individual photos.
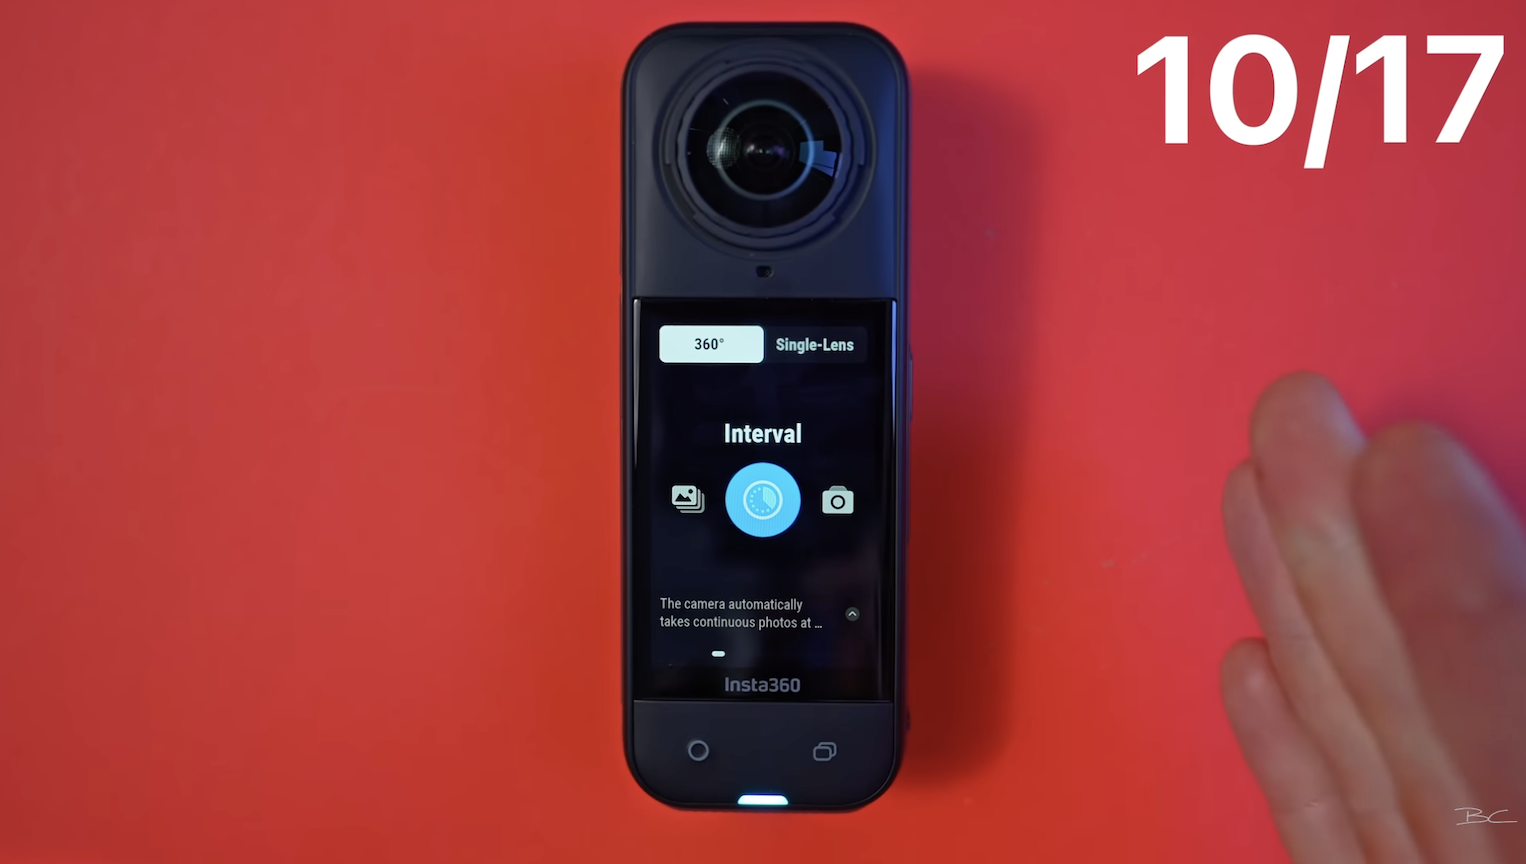
It’s a good choice if you want editing flexibility—say, for colour correction or capturing RAW shots. You might use this at an event to snap a 360 photo every 10 seconds for an hour. It's niche, but gives you more control than regular time-lapse.
11. Burst Mode 📸
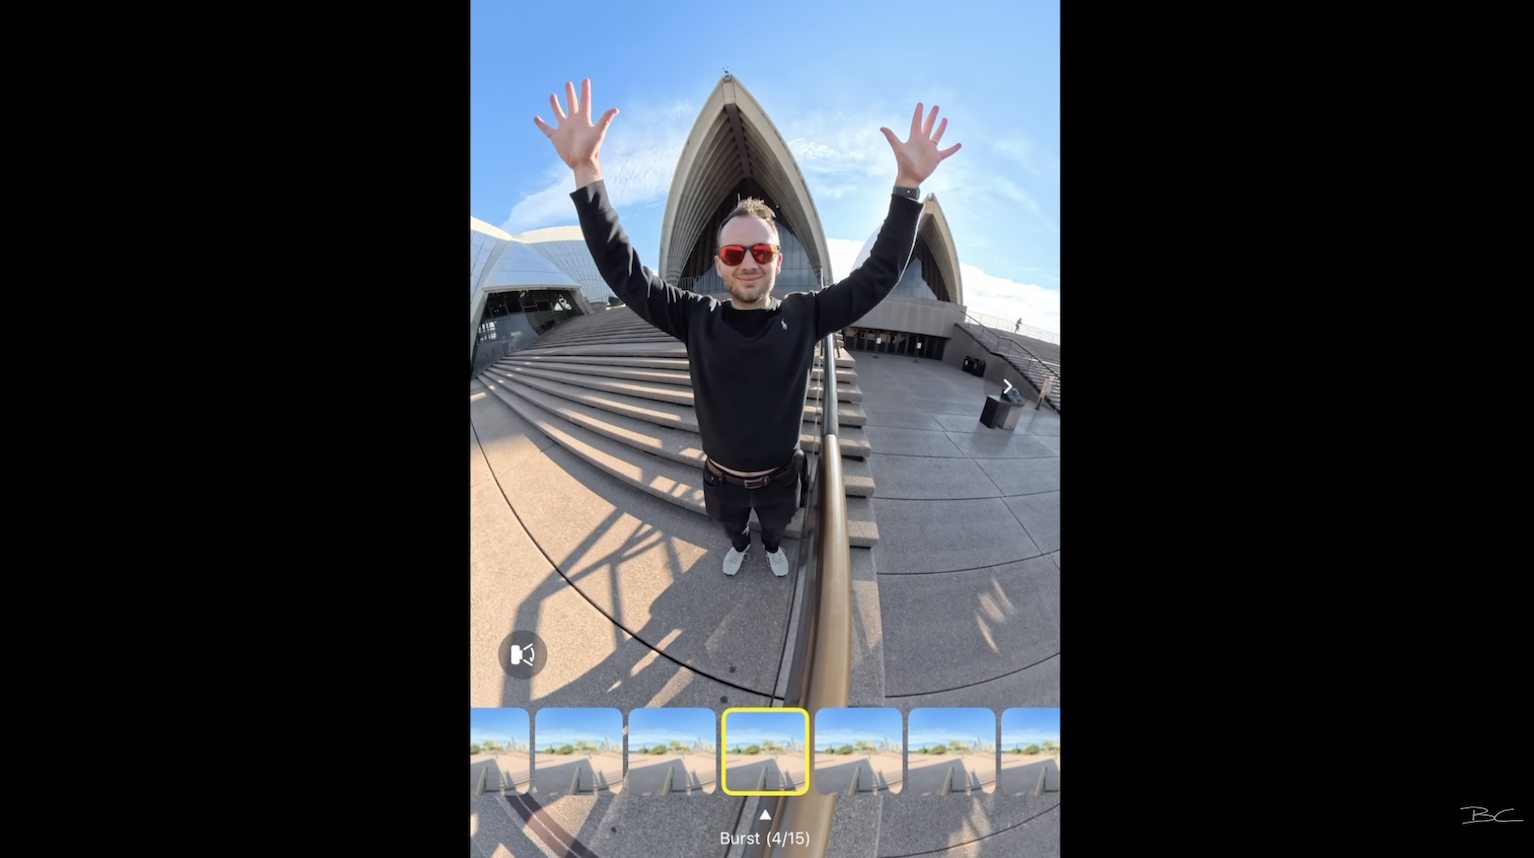
Burst takes a bunch of 360 photos really quickly, which is great if you're OCD like me and want to capture a very specific composition. Burst mode will take 15 photos at once and allow you to choose the very best framing—like this shot below.
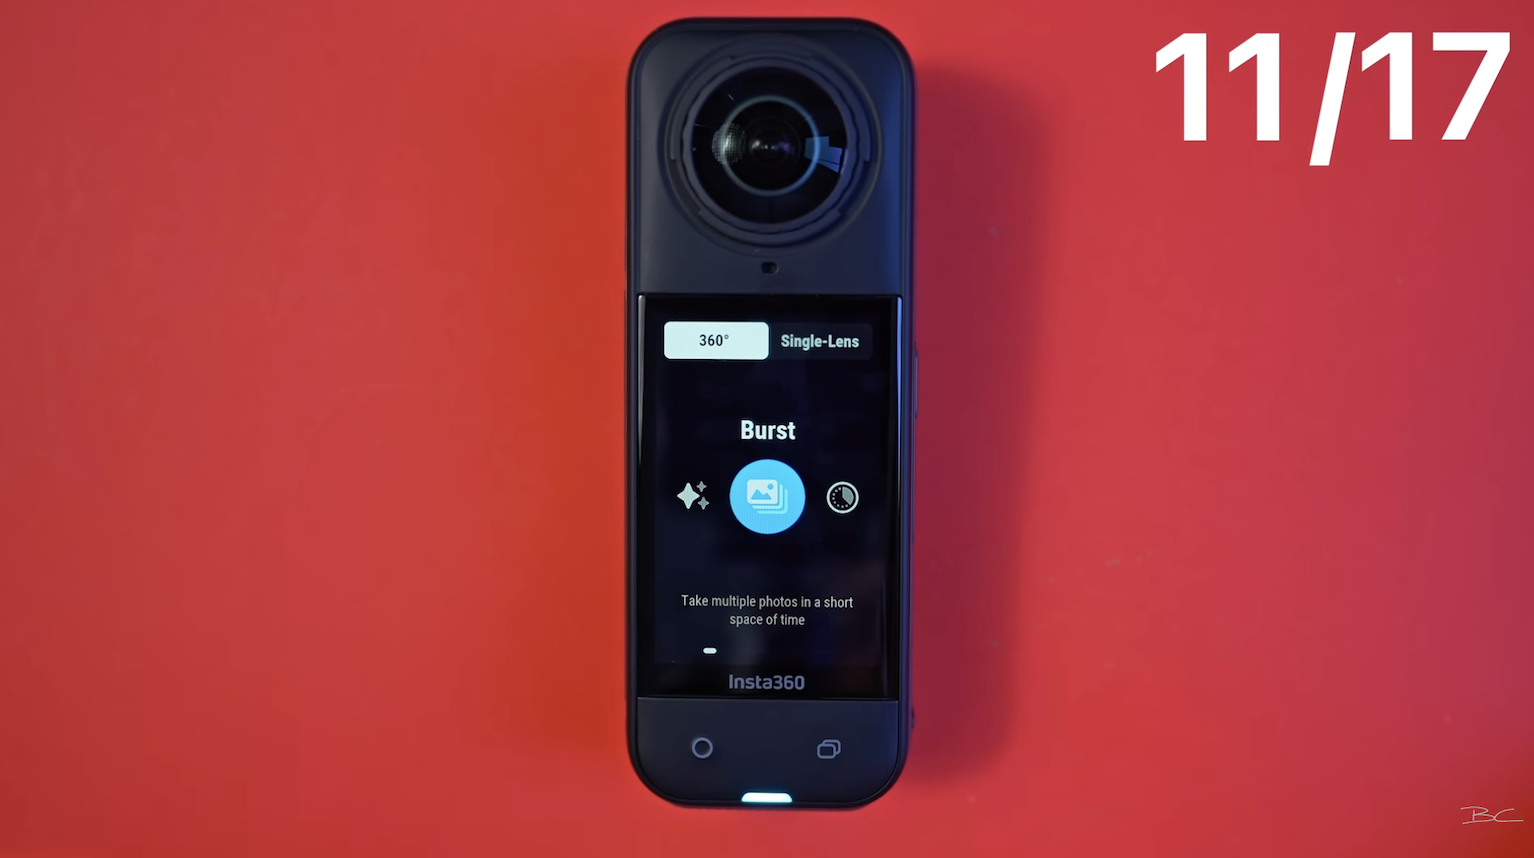
 It starts at three photos per second and goes up to 15 photos over 10 seconds. If something is happening quickly and you want to capture lots of photos, you can choose the option that works best for you.
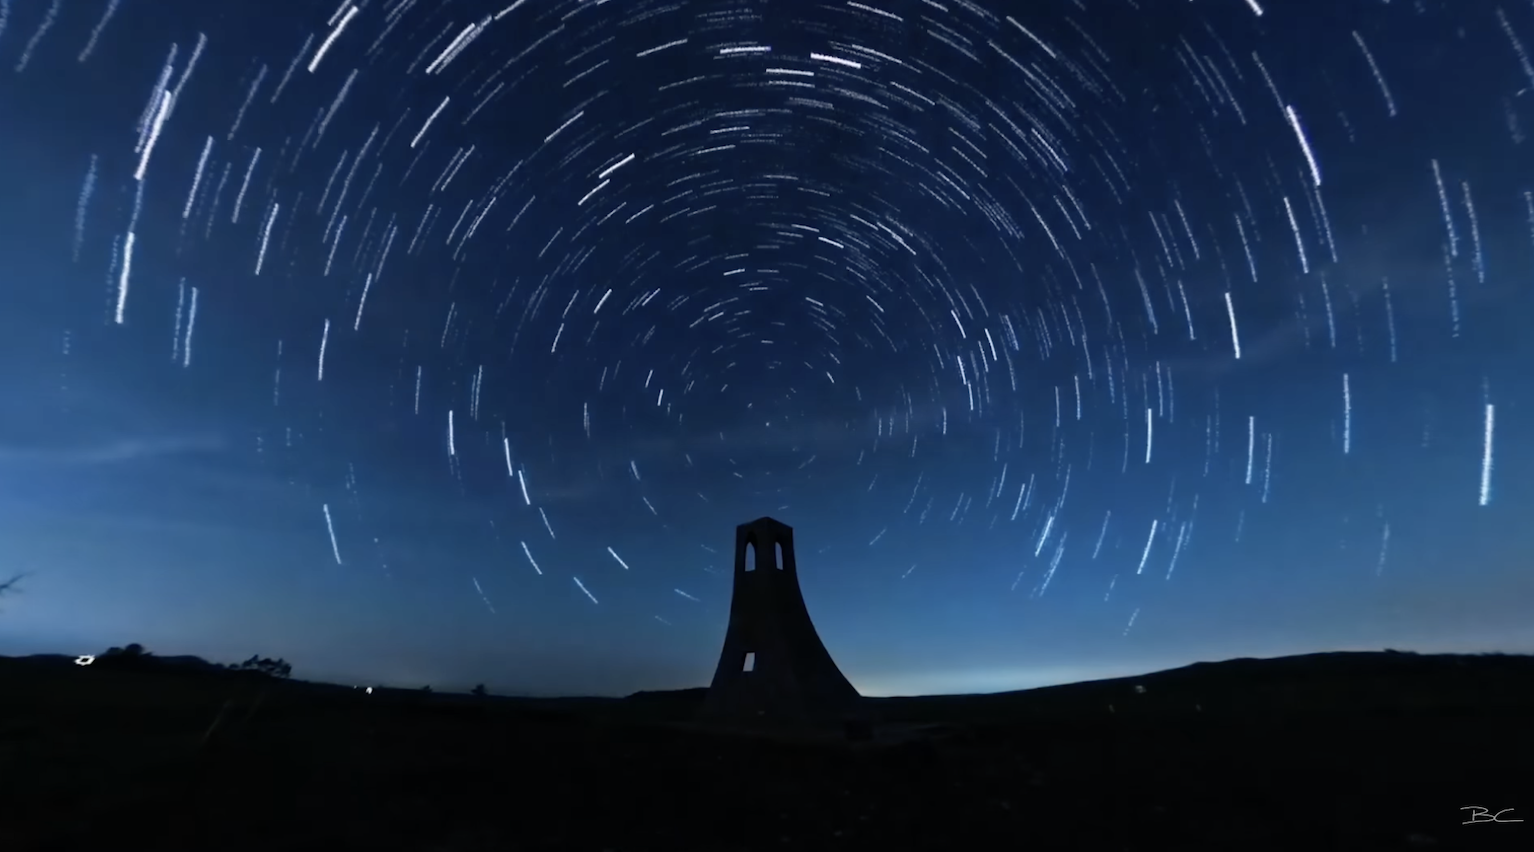
12. Star-lapse 🌌
Designed specifically for capturing star trails and light movement across the night sky.
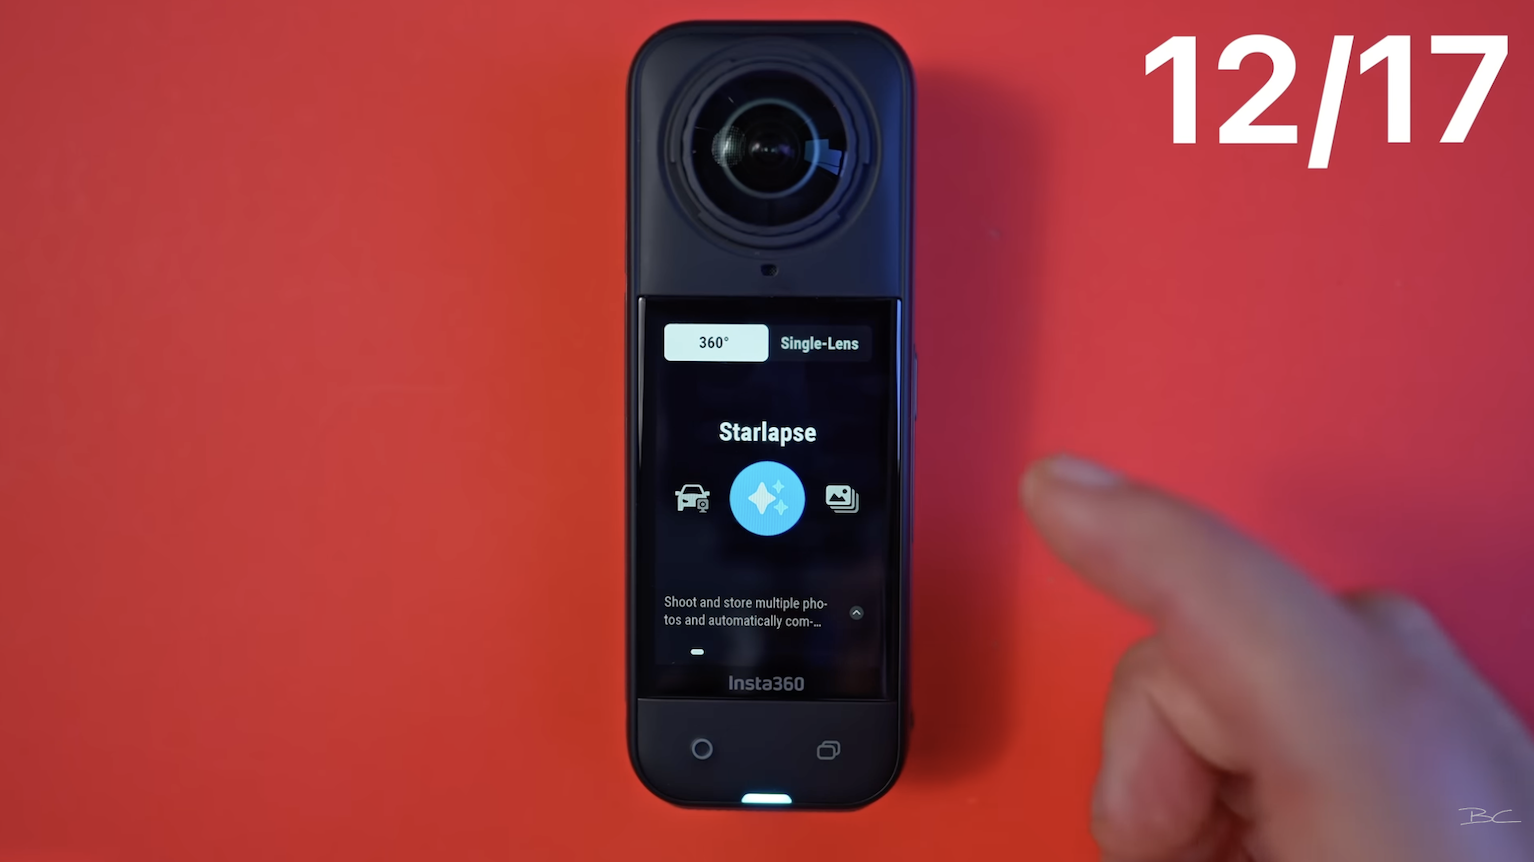
It's a niche use case, but the results are super cool. You can shoot both star-lapse photos and videos here.
Single-Lens Modes
Next to “360” at the top, you’ll see Single Lens, which contains all the modes using only one lens.
13. Standard Video Mode 🎥
Here, you can shoot up to 4K 60fps and adjust your field of view, affecting the fisheye look and zoom level. You can switch lenses by tapping the circle icon.
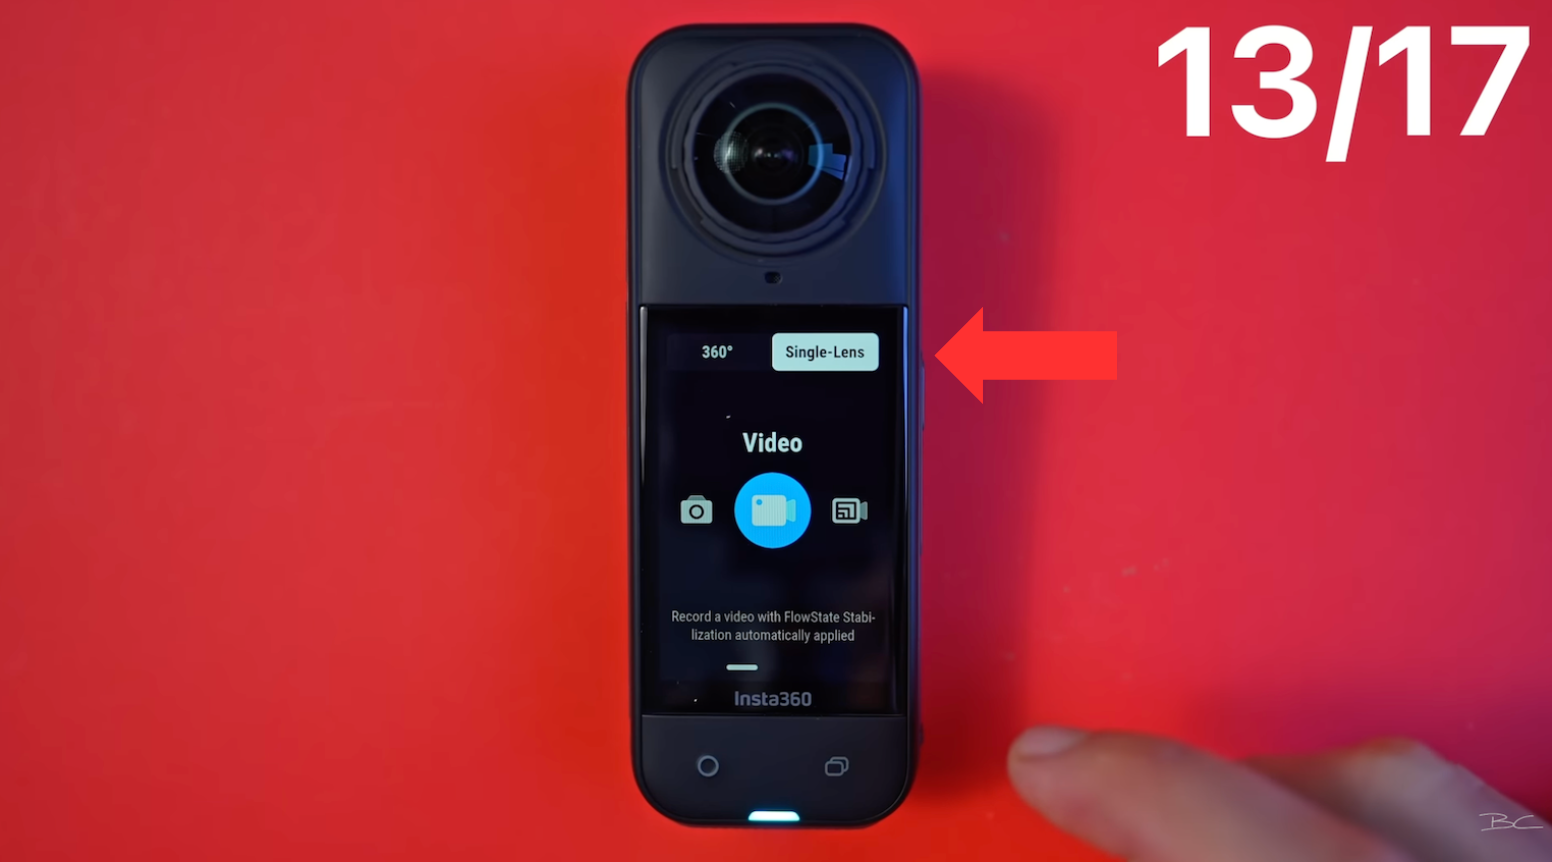
You can switch lenses to the front lens by tapping the circle icon.

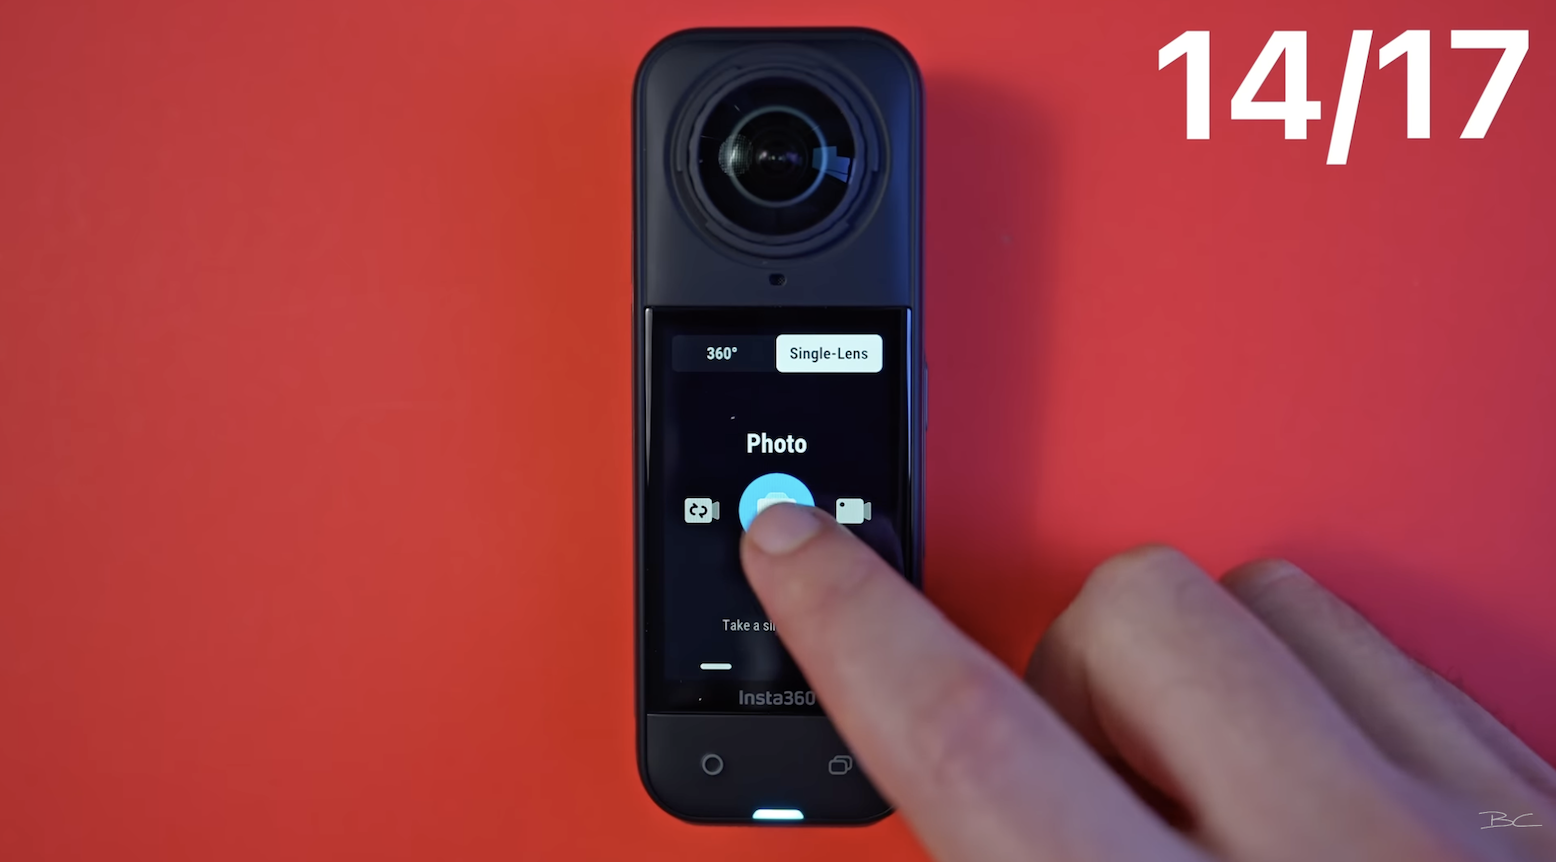
14. Standard Photo Mode 📷
Same concept—just single-lens photo capture up to 36 megapixels.
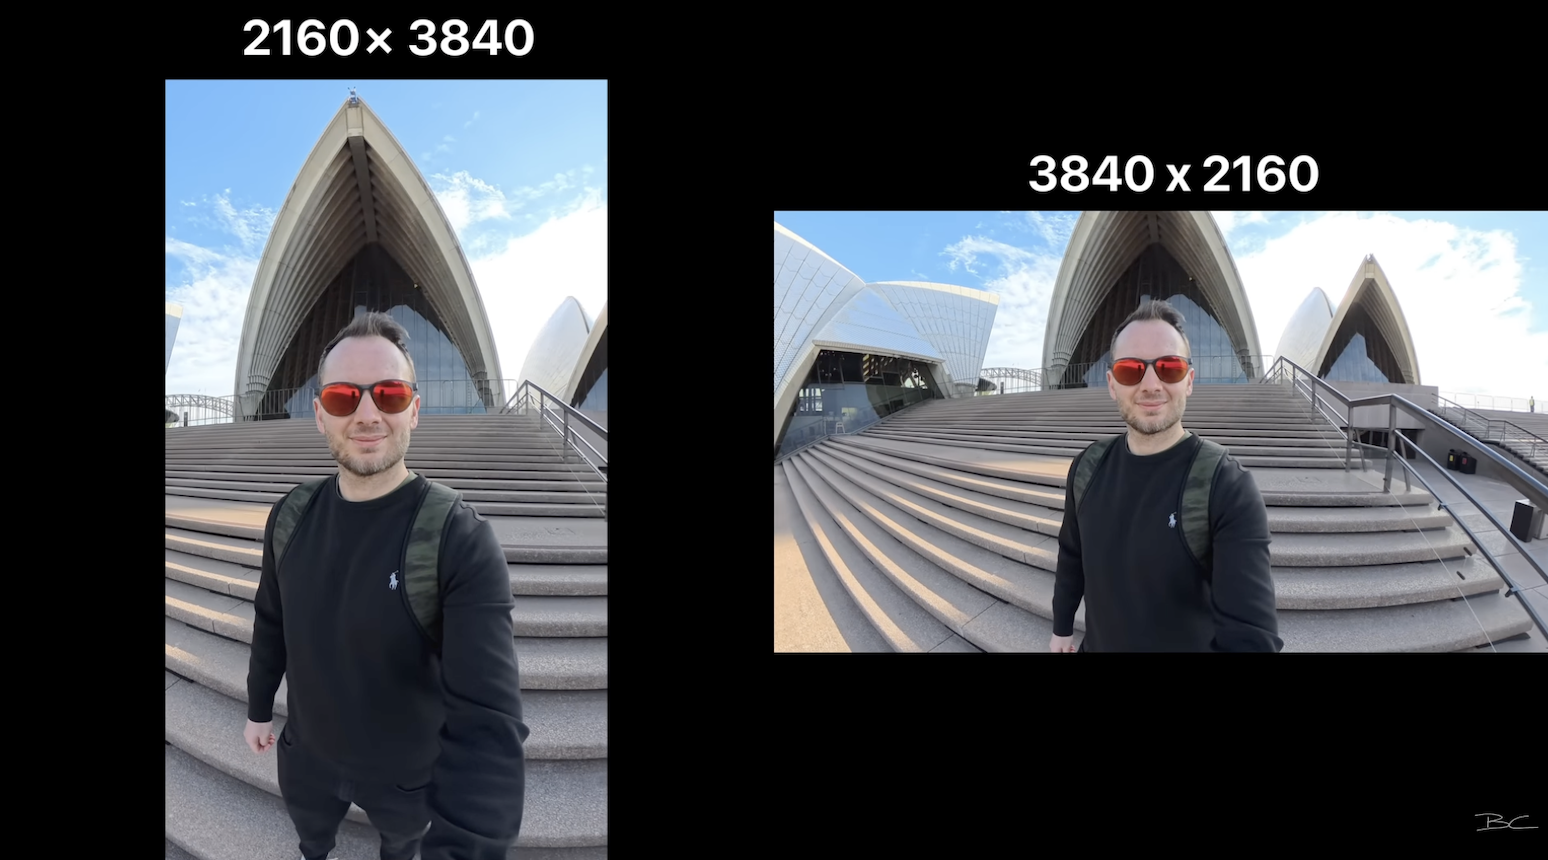
15. FreeFrame Video 🖼️
This lets you lock a fixed perspective without needing to reframe later. It captures both 9:16 and 16:9 frames simultaneously. You can adjust the field of view and change aspect ratios after shooting.
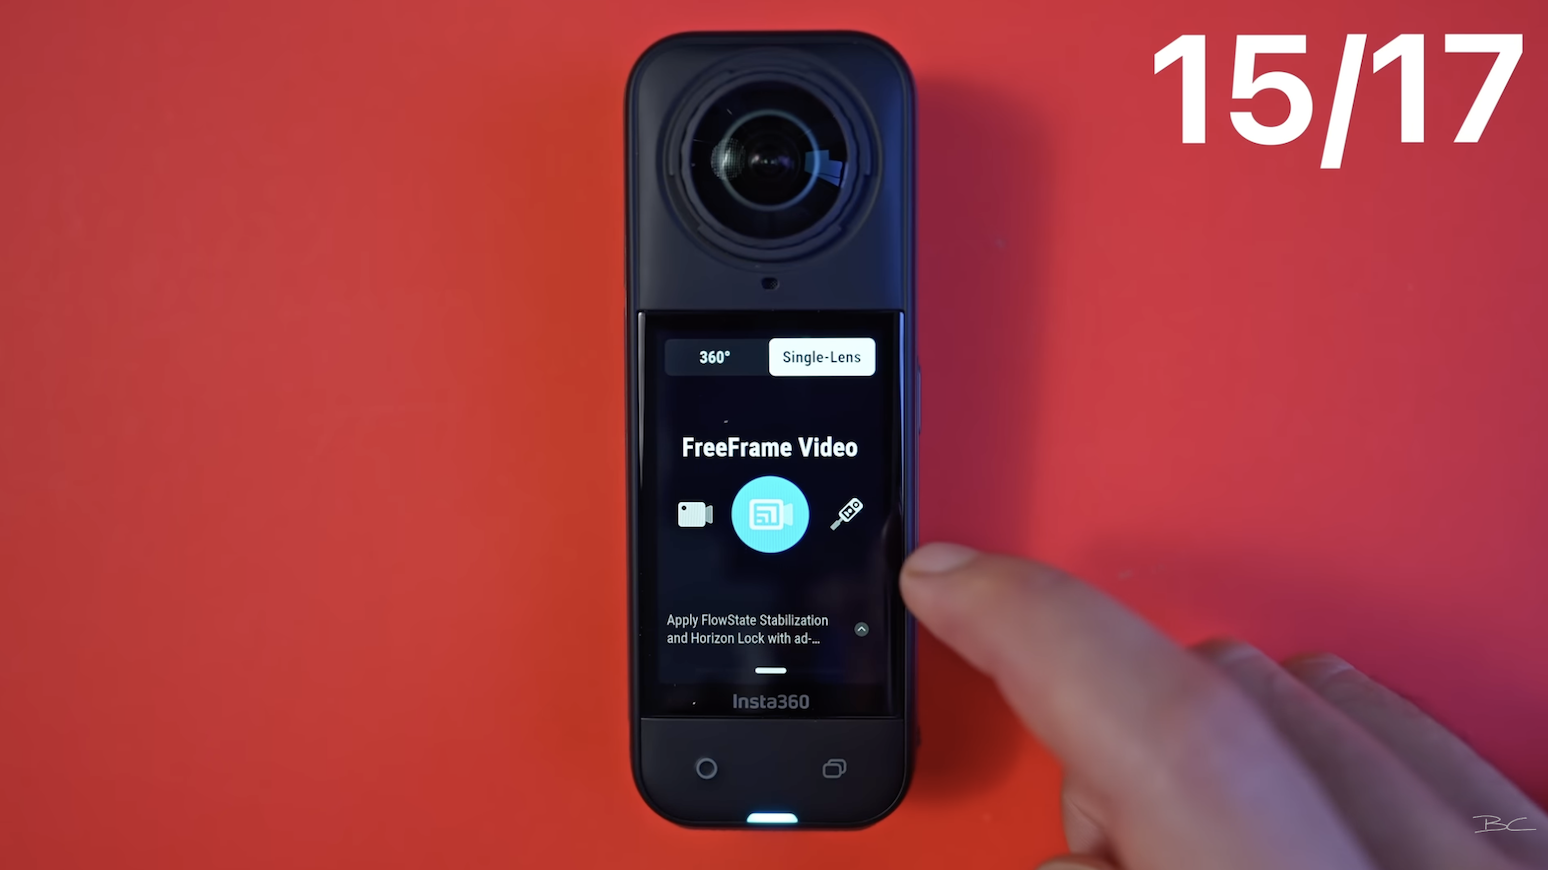
The benefit? You get both vertical and horizontal 4K videos, and you don’t have to decide on orientation while shooting.
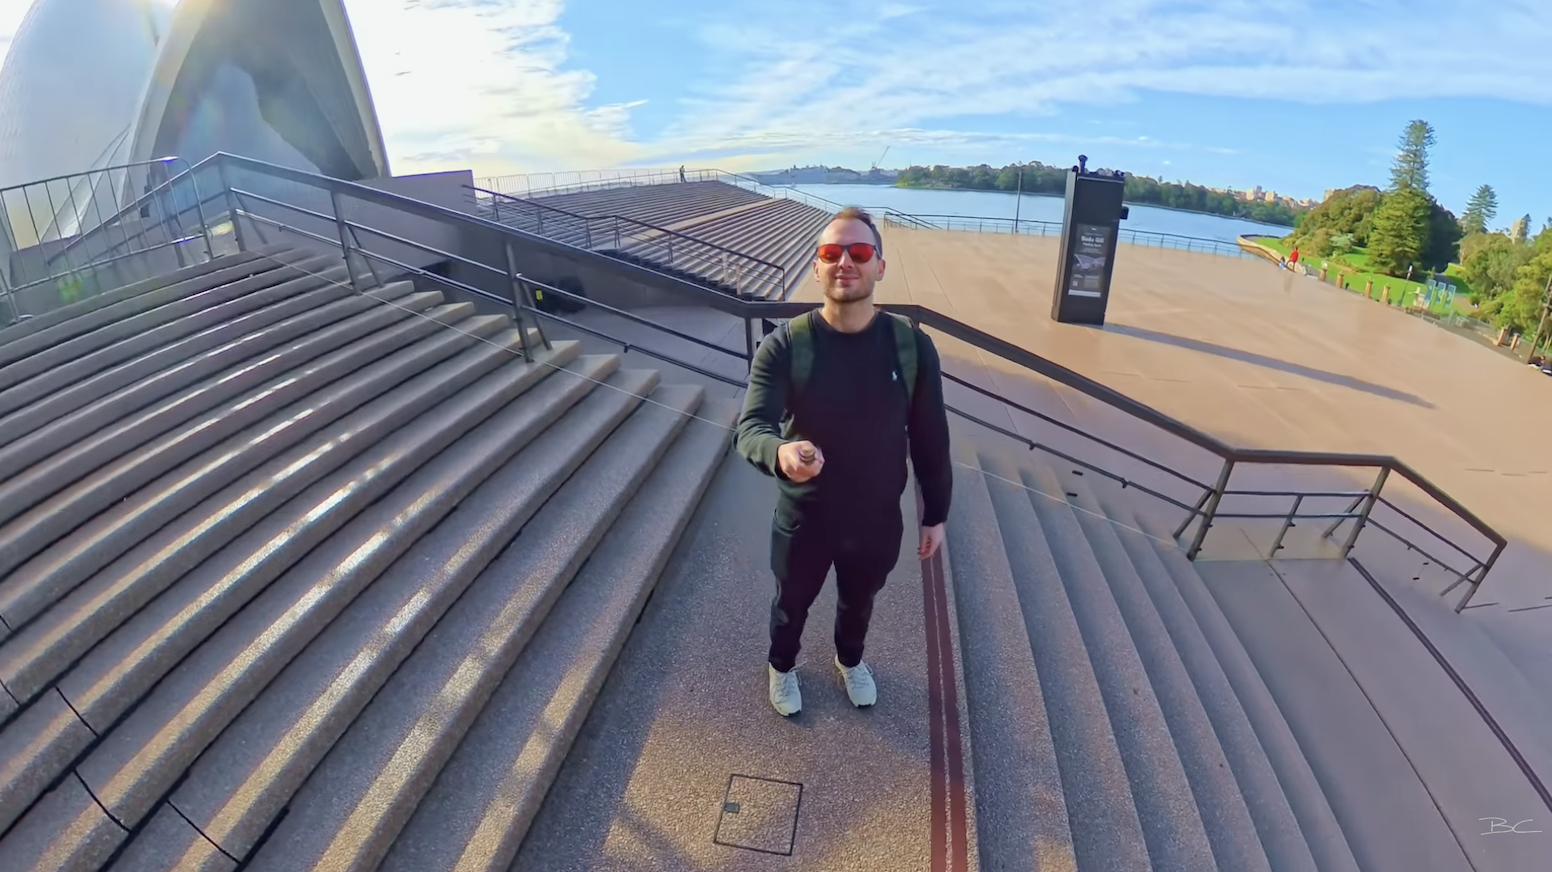
16. Me Mode 🙋♂️
Me Mode automatically points the camera back toward the selfie stick.
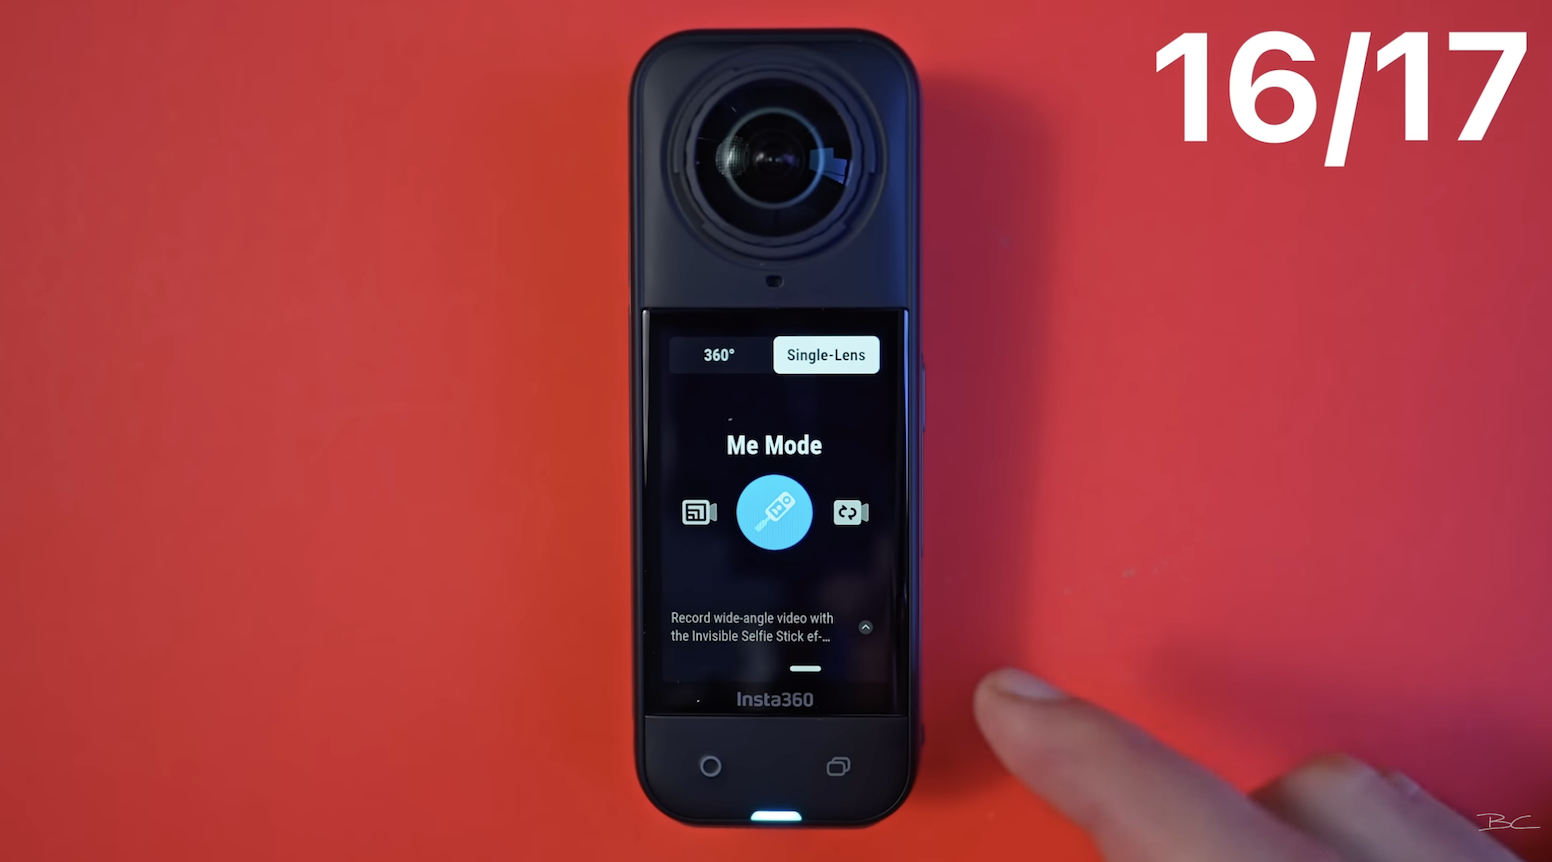
If you're holding it in front of you, the view will angle back toward you—making it an easy way to film yourself with minimal editing.
17. Loop Recording 🔁
Same as in the 360 menu—you choose a set duration, and the video loops over itself continuously.
My Recommendations 📸
So that’s it for the 17 different shooting modes of the X5. Each one definitely has its time and place. However, there are two modes in particular that I think you’ll find yourself using most often, and that I’d recommend starting with.
The first is the regular 360 Video mode, which offers the most flexibility. Especially when shooting in 8K, you’re practically guaranteed to get a smooth, stabilized shot no matter how you choose to reframe it later. And if you’re shooting at night, Pure Video is a must-have.
The second mode I recommend is InstaFrame. If you're someone who doesn't want to spend a lot of time editing, and just wants a great-looking shot straight out of the camera, this mode is perfect. It captures both 360 and flat video simultaneously, so you have the option to reframe later if needed—but you don’t have to. The whole point of InstaFrame is to give you a stylish result right away, with no extra work.
Personally, I like having that backup. If something goes wrong with the original framing, I like knowing I can still reframe and salvage the shot—especially if the automatic editing didn’t quite work out.

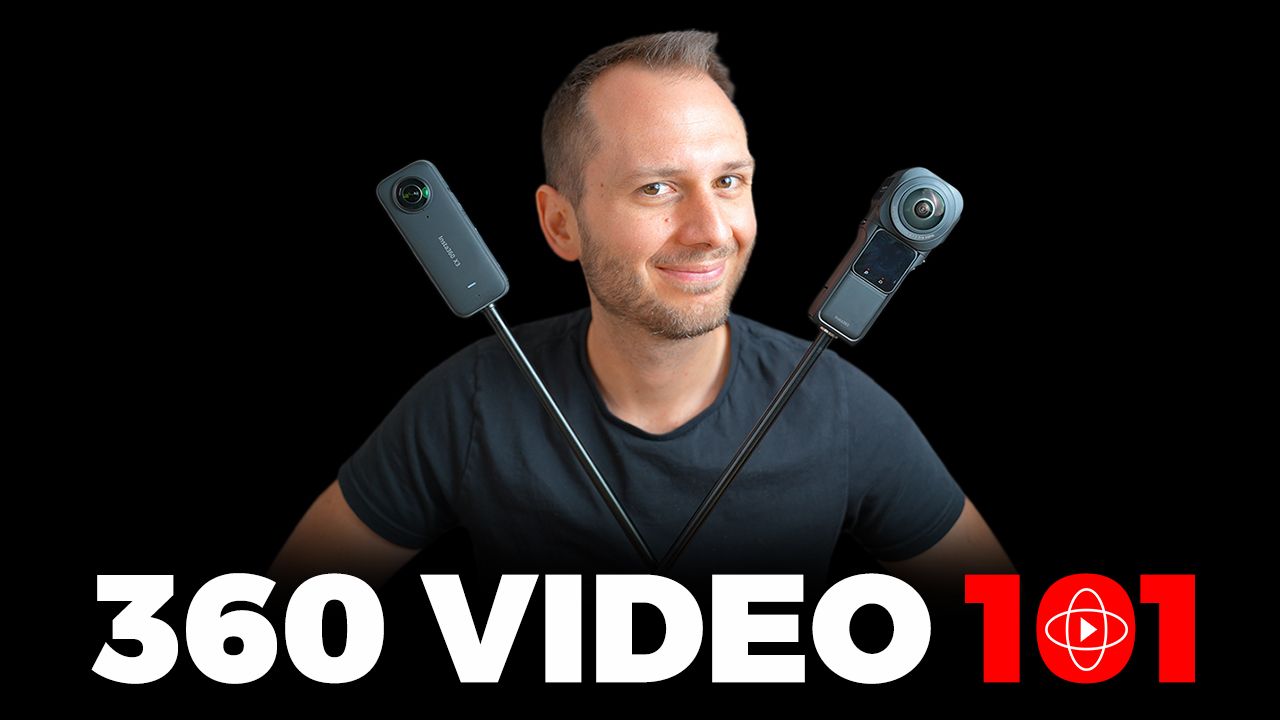
However, knowing what each one of these modes does is only half the battle. If you want to use modes like TimeShift, Time-Lapse, PureVideo, or Bullet Time to get amazing results and not just test footage, that's exactly what I walk you through inside my 360 Video 101 course. Inside the course, I'll show you how to get clean, sharp shots in any shooting situation—including shooting smooth hyperlapses, time-lapses, and a bunch of other great shots you can get with the X5. So, if you do own an X5, this course is for you.
And if you don't own the X5 yet but are thinking about it, be sure to use my affiliate link and you'll also receive a free lens replacement kit.
Blog Author