How to Colour Correct Your Footage in DaVinci Resolve for Beginners: A Simple Step-by-Step Guide
Mar 28, 2025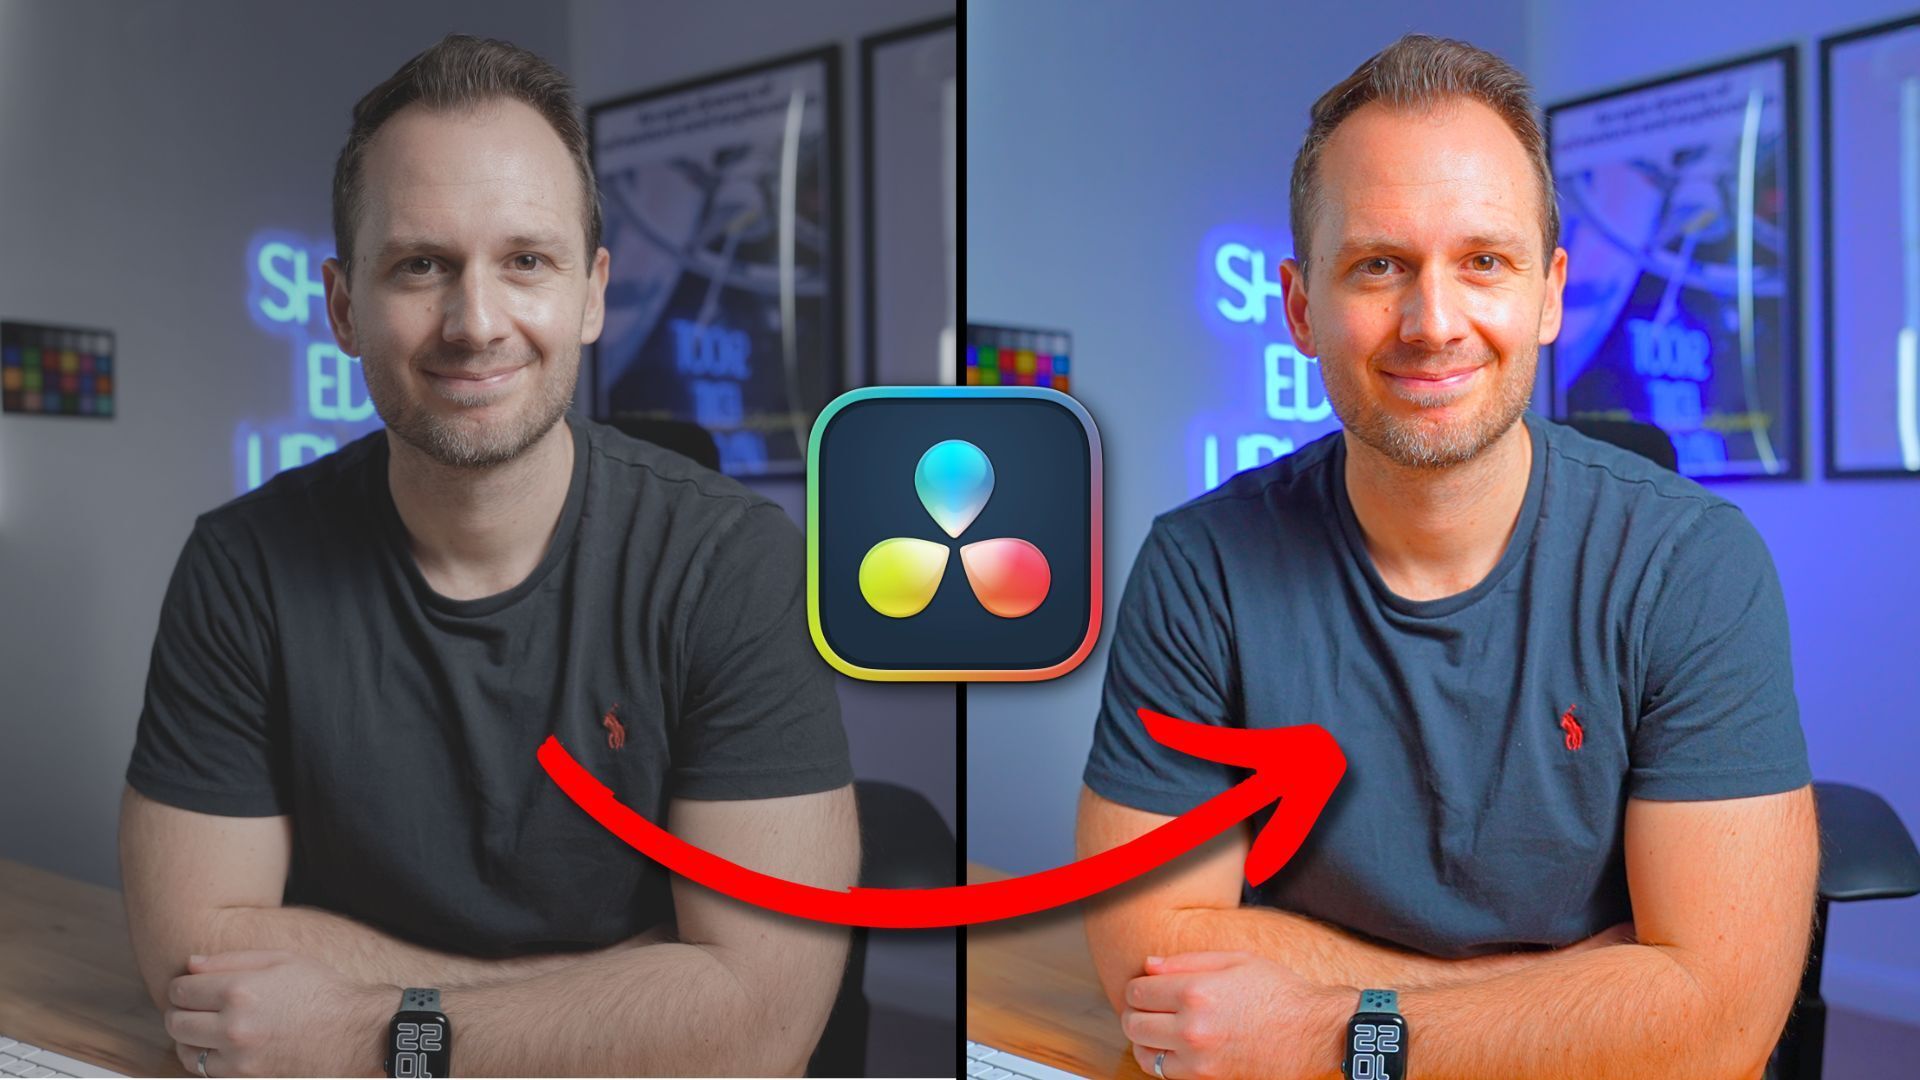
If you’re new to colour correction in DaVinci Resolve, the colour wheels and endless menus might seem overwhelming. But don’t worry, as a beginner, you don’t need all those advanced tools to make your footage look great.
In this guide, I'll show you how to use the essential colour correction sliders to enhance your footage without the need for complicated settings.
Step 1: Simplifying the DaVinci Resolve Colour Page
Once you’re in DaVinci Resolve and have your clips ready on the timeline, head over to the Colour tab. This is where all the colour magic happens.
As a beginner, you may have been intimidated by the nodes, colour wheels, and other advanced options. But here's the good news: you don't need to touch most of those.
For this guide, we’ll focus on the most basic tools that will help you create a natural-looking colour grade for your videos. Let’s dive in!
Step 2: Link Your Clips with Remote Grades
Before diving into colour correction, it’s important to decide if you want to colour grade your clips individually or collectively. If you have multiple cuts from the same source clip, like a talking head video, I recommend linking them together using remote grades.
- Right-click the thumbnail of one clip.
- Select Use Remote Grades.
This will ensure that any adjustments you make to one clip are automatically applied to all other clips that were cut from the same source. It’s a time-saving method that ensures consistency across your video.
Step 3: Basic Exposure Adjustments
Now, let’s start with the first step of colour correction: adjusting exposure. This is the process of tweaking the brightness, contrast, shadows, and highlights in your shot to create a more natural look.
Contrast
Start by adjusting the Contrast slider. Sometimes clips come out too contrasty, and other times they lack contrast altogether. Slide it left and right until you find the perfect balance that looks natural and realistic for your scene.
Pivot
The Pivot slider controls how the contrast adjustments affect the highlights and shadows. Play around with this setting to fine-tune your contrast until it feels right.
Shadows and Highlights
Next, adjust the Shadows and Highlights. Shadows help you recover detail in the darker parts of the image, while adjusting highlights prevents overexposure in the bright areas. Move these sliders until your image looks balanced, with detail preserved in both the shadows and highlights.
Step 4: Colour Correction - Colour Boost and Temperature
Once your exposure is dialled in, it's time to move on to colour adjustments.
Colour Boost (Vibrance)
The Colour Boost slider in DaVinci Resolve is similar to the Vibrance setting in other software. This slider increases the saturation of less saturated colours while leaving already vibrant areas untouched. This way, you can add more colour to your footage without going overboard.
Temperature
Skin tones typically look better with a slightly warm (yellow) tint. Use the Temperature slider to adjust the warmth of your footage. Sliding it left will cool the image down, while moving it right will warm it up. Make sure your skin tones look natural and balanced while preserving the vibrancy of the background.

Step 5: Fine-Tuning Your Look
After adjusting exposure and colour, there are a few final tweaks you can make.
Tint
If you notice any colour shifts (like a green or magenta hue), you can use the Tint slider to fine-tune the overall colour balance. However, you don’t need to use this unless you notice a colour cast in your footage.
Hue
The Hue slider can drastically change the overall colour of your footage, but it's usually best to leave this one alone unless you want to create a specific look (e.g., a Martian-like effect).
Mids and Detail (Sharpening)
The final adjustment is sharpening. By adjusting the Mids and Detail slider, you can enhance the sharpness of your image, especially around the eyes and other details in talking-head videos. Be cautious with this setting; a slight increase (between 10-20) can help without overdoing it.
Step 6: Before and After Comparison
After making your adjustments, it’s time to see the difference. DaVinci Resolve allows you to toggle between the before and after by clicking the red circle at the top. This will help you see how your colour correction has transformed the footage and guide you in making any final tweaks.
Step 7: Save Time with LUTs
If you often shoot similar types of footage (like YouTube videos with the same lighting setup), you can save time by creating a LUT (Look-Up Table). This allows you to apply the same colour grade to future videos with just one click.
- Right-click the thumbnail of your graded clip.
- Select Generate LUT and save the file to an accessible location.
- In the LUT section of DaVinci Resolve, click Reveal in Finder and drag the LUT file into the LUT folder.
Now, when you shoot a new video, simply drag and drop the LUT onto your clip, and your colour grade will be applied instantly!
Step 8: Colour Grading Action Shots
Wondering if this approach works for fast-paced action footage? Absolutely! Whether you’re shooting talking-head videos or action scenes, the same principles apply. Start with exposure adjustments, then move to colour correction. Your footage will pop, and your viewers will appreciate the polished, professional look.
Conclusion: Keep It Simple and Save Time
Colour correction doesn’t need to be a complicated process. As a beginner, focusing on basic exposure and colour adjustments will help you get professional-looking results without needing to dive into the more advanced tools in DaVinci Resolve. Keep it simple, and you’ll speed up your workflow and create better content in less time.
Bonus Tip: If you want to learn more about speeding up your editing workflow in DaVinci Resolve, download my free DaVinci Resolve Editing Shortcuts to save even more time!
Blog Author